In Australia, February is the hottest month of the year. Obviously, I’m inclined to keep the oven off as much as I can. Enter superb panna cotta recipes. What is a panna cotta? This cream based Italian dessert seems simple to make, the basic recipe includes cream, sugar, vanilla and gelatin. Seems easy enough, right? Well, sort of… A perfect panna cotta jiggles on the plate and melts in your mouth. So you need the perfect ratio. That’s what I’m here for today.
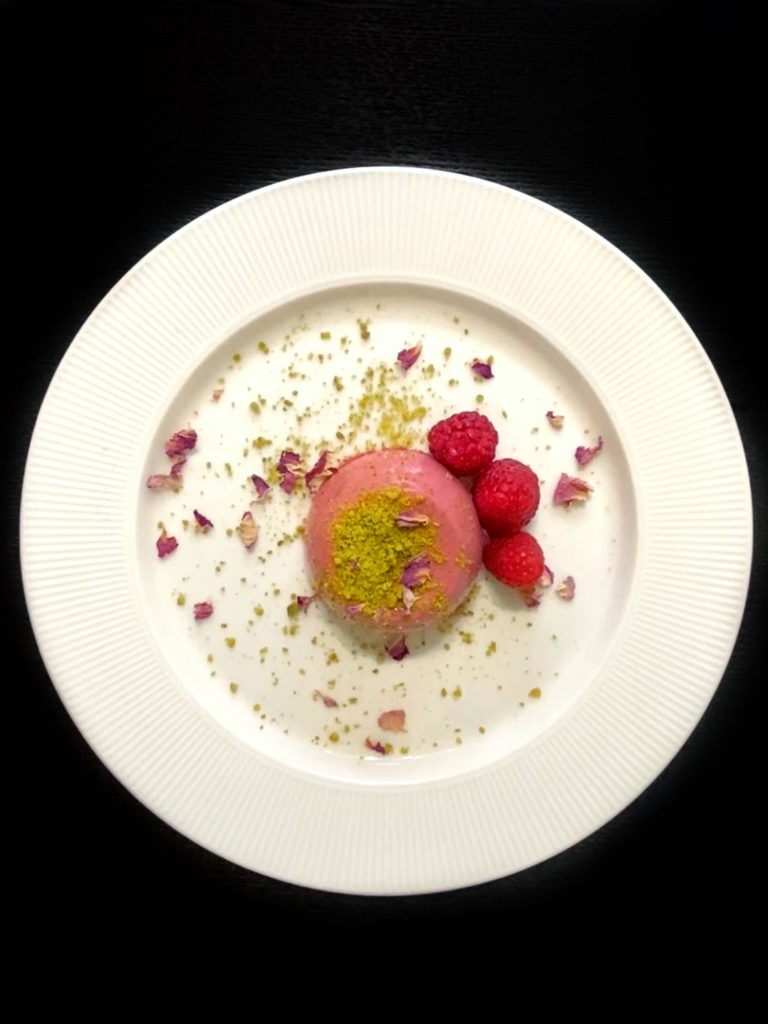
I will share with you my recipe for raspberry panna cotta today. I use raspberry puree and I add a touch of vanilla to the mix too. You can serve this in a lovely dessert glass or you can use dariole moulds to set them and turn them out. I like mine simple with a little sprinkling of pistachios, a couple of fresh raspberries and some dried rose petals give it a hint of another flavour. It’s light and enjoyable and won’t leave you feeling guilty for having dessert.
This is also a perfect dessert to serve on a Valentine’s Day dinner or any romantic dinner, really. You can make it the day before and just focus on flowers and the rest of dinner on the day. Add a chocolate heart to make it extra romantic!
Lightly oil, 4 200mL panna cotta moulds or 4 nice dessert cups.
Blend the raspberries and water until super smooth then push through a fine sieve. You should yield 150mL. Set aside.
Bloom gelatin in cold water. In a saucepan, bring cream, vanilla and sugar to the boil. Turn off the heat and add 150mL of raspberry puree. Stir until incorporated.
Squeeze off excess water from gelatin and add to cream mix. Stir until gelatin is dissolved. If you want to make the panna cotta more pink, add a drop of red food gel and stir until it blends together.
Strain panna cotta using a fine sieve and divide between 4 moulds. Set in the fridge for at least 4 hours or longer if turning out.
To serve: you can turn out the panna cotta onto a plate by breaking the seal between the panna cotta and the mould by pressing the panna cotta edge lightly with your finger until you create an air pocket. Then turn it over onto a plate. Otherwise, you can serve them in the cups you have set them in.
Decorate with crushed pistachios and fresh raspberries.
Risotto is a dish that people try to avoid when having guests over. Why? Because as the host, you also want to spend time with your friends and risotto has a reputation for being time and attention consuming to cook. Who wants to be in the kitchen most of the night when they can hear laughter coming from the other room? I’m guessing not you.
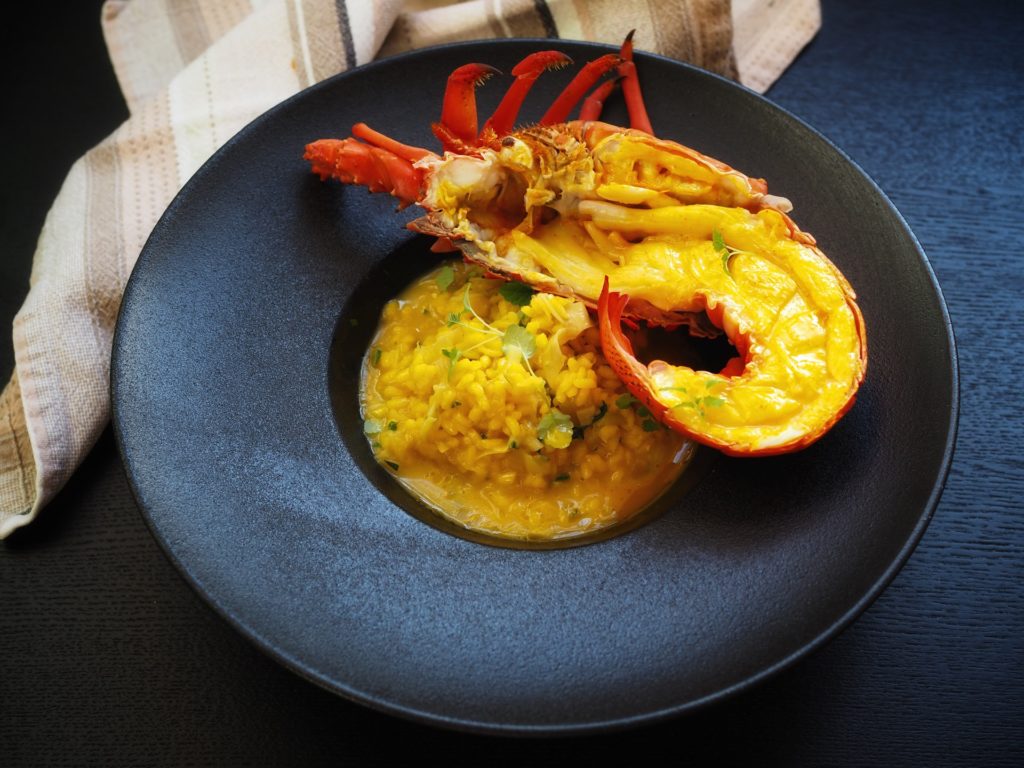
But wouldn’t you want to impress your friends when you bring out plates of creamy, steaming hot, delicious smelling risotto for their main? I know I would, and believe me, they are always impressed.
So here are my solid tips on serving risotto at your next dinner party:
Choose an easy to follow and tested recipe. This is always important. Never–and I mean NEVER–make a dish for the first time on the day you are having a dinner party. This is simply a recipe for disaster. So choose a recipe way beforehand and test it out, because then you can adjust it to your liking, or find a better recipe if it doesn’t work for you.
Now that you have a recipe, make sure you prepare all the ingredients. Measure your rice, wine and stock, chop your vegetables and protein, and bring your stock to the boil. Most importantly, prepare a wide, shallow dish or tray that will fit the risotto in a thin layer and will also fit in your fridge.
Start making the risotto. Most risotto recipes start with sautéing eschallots and garlic in oil. Do not burn, sweat them until soft without color, otherwise you’ll either get a burnt or raw after taste in your risotto.
Follow the rest of the recipe only until your rice is al dente. Meaning, do not finish cooking, but cook it until it almost ready. Now you have to be quick.
Transfer the risotto in the tray that you prepared earlier. Spread it out until you only have a thin layer. Then trace crisscross lines along the risotto with the wooden spoon and place it in the fridge to cool down completely.
When you’re ready to serve. When you’re ready to serve, bring your leftover stock to the boil. In a wide pan place 1/4 cup of hot stock for every 1 cup of risotto, then add the cold risotto. Stir to loosen it up and finish it according to the recipe you’re following.
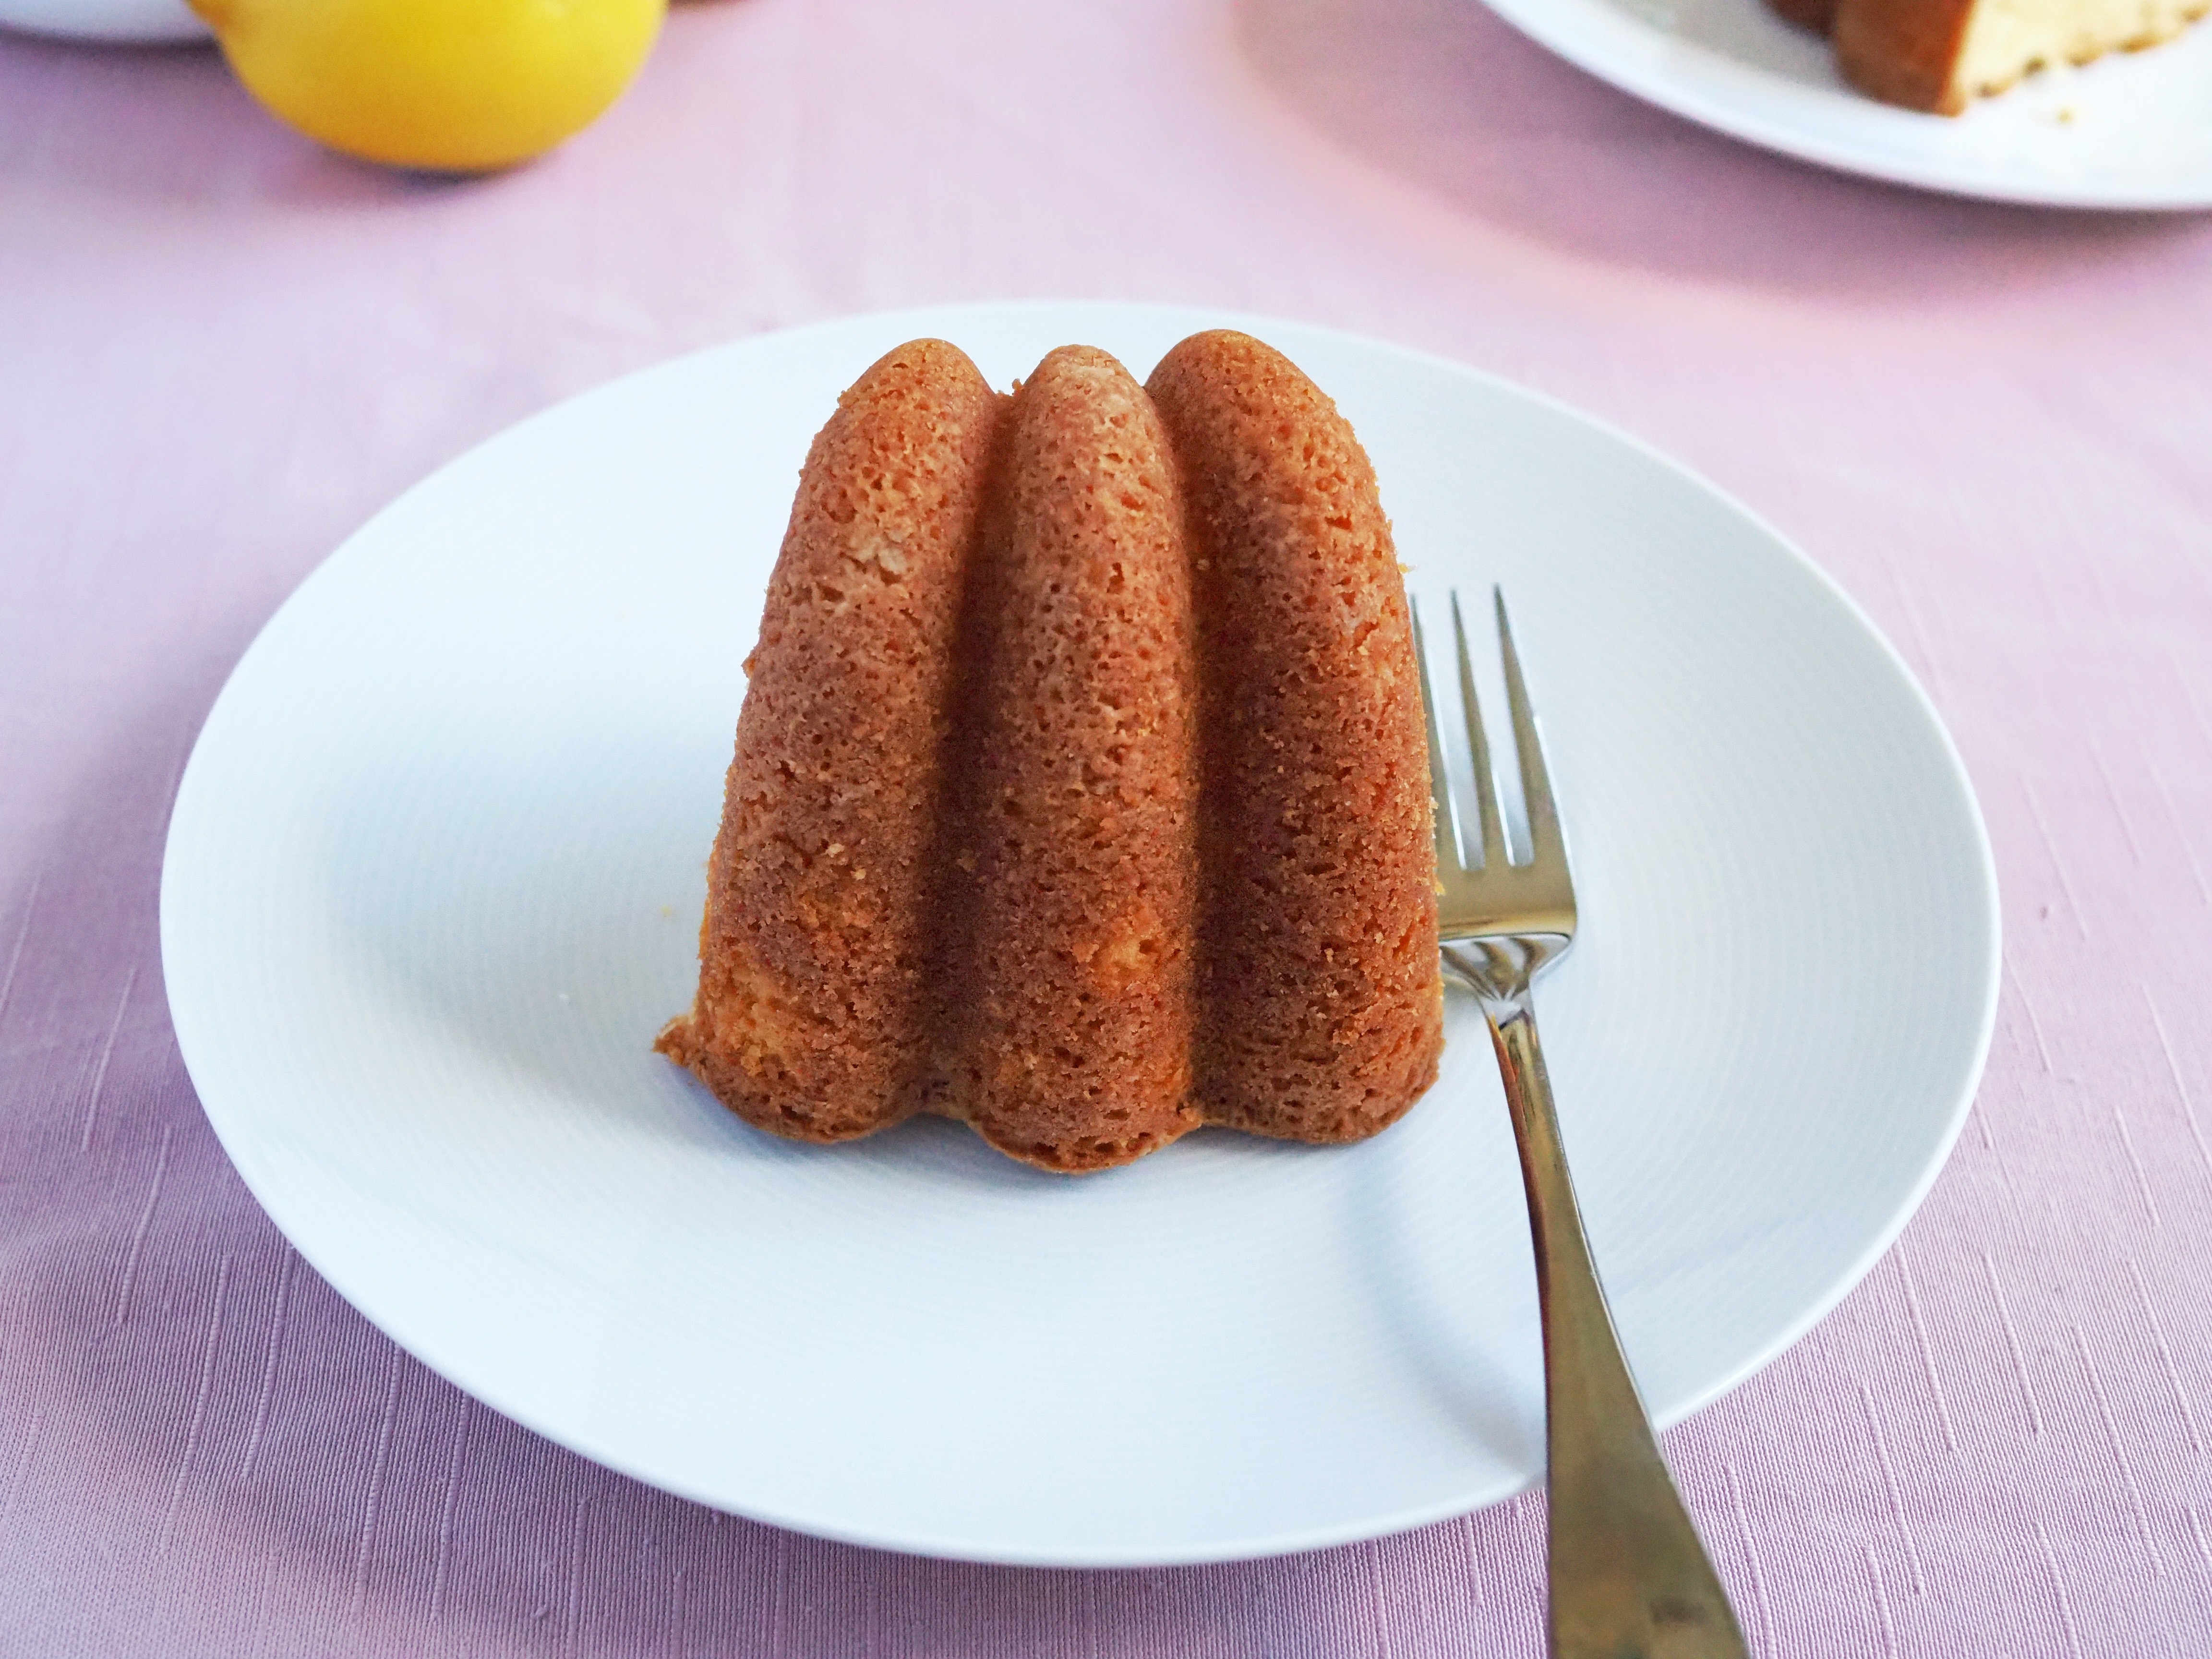
Let’s be honest, intricate bundt cakes look so amazing. But there’s always that risk that because the design is so intricate your cake will get stuck. If you are a bundt cake pro, please keep doing what you’re doing, because why fix what’s not broken? Now if you’ve had bundt cake stuck in the pan several times and you’re ready to give up, please give this recipe a try before totally throwing your beautiful pan out.
Here are a few key things to remember:
Softened butter is my preference when it comes to greasing bundt pans. Softened means you can make a dent in the butter even with just a slight pressure. Use a small pastry brush and get the butter into each nook and cranny. Take your time.
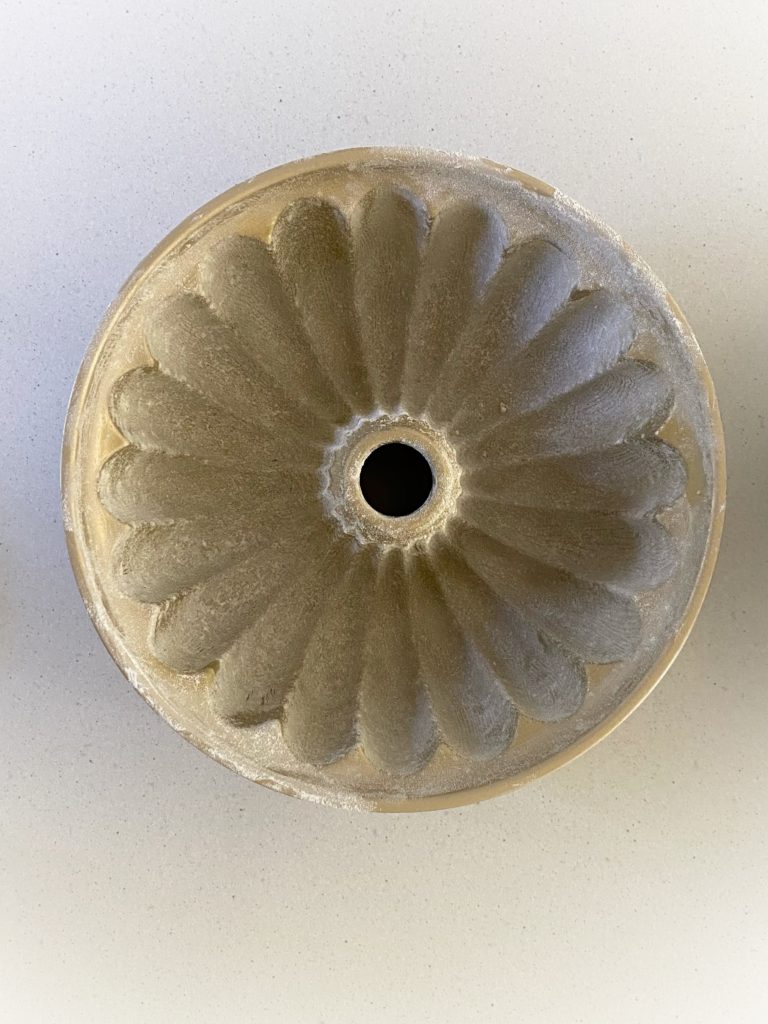
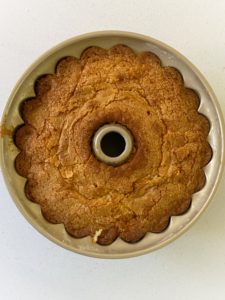
When you’re satisfied that every millimetre is buttered up, sprinkle flour on top of the butter and lightly tap to distribute the flour. Cover all of the buttered surface then turn your pan over and tap lightly to remove the excess flour. Your pan should look like the one below:
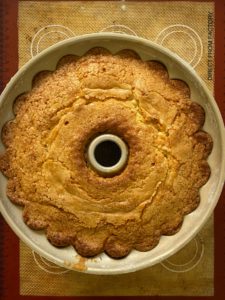
3. Now like any cake, you know the cake will come out if the cake is pulling away from the pan.
Note the photos below:
Slightly pulling away
This looks stuck
Now here’s the golden ticket! This tip is a bundt cake game-changer! Once you remove the pan from the oven, cover the pan with a bigger plate and let sit for 10 minutes. After 10 minutes, invert the pan and your cake should slide right out.
If you don’t have a bundt pan, this recipe works in a large loaf pan too! Some key notes if you’re using a loaf pan:
It’s the same baking time and temperature.
You don’t have to use butter and flour to grease the pan, I simply use spray oil and line the tin with baking paper.
You don’t need to cover the pan with a plate after removing from the oven, just cool it down completely in the pan.
Finally, I adapted this recipe from Spruce Eats’ Sour Cream Lemon Cake. What does “adapt” mean? I added some of my own touches like:
I use metric measurements when baking because I weigh everything, but I’ve tested the US measurements in this recipe too.
I prefer using creme fraiche instead of sour cream (and yogurt) because after testing all three, I found the cake using creme fraiche had the nicest crumb, flavour and moisture even without the syrup and glaze.
I added another lemon for zesting to amp up the flavour in the cake itself
I added a lemon-vanilla syrup mostly to use up the other lemon and in case you overbaked your cake, this will save it.
Lastly, I used the juice from the other lemon in the glaze.
Surprisingly, the lemon flavour in the cake is not overwhelming, it’s just absolutely delicious and fresh. Now you know everything there is to know about this lemon drizzle cake. Time to take your whisks out and preheat your ovens and try this recipe! Please comment below if ou have any questions, and tag @mrs.fancypants.recipes on your Social Media posts. Happy baking!
Measure all your ingredients then preheat oven to 175C. If using softened butter, grease your bundt pan now. Do this by brushing the bundt pan with the softened butter using a small pastry brush, being careful to get the butter into each nook and cranny. Sprinkle flour over the butter and tap around lightly to distribute. Turn pan over and tap lightly to remove excess flour. If you're using melted butter, DO NOT GREASE YOUR PAN YET.
Sift flour, salt and baking powder together. Set aside.
In the bowl of your stand mixer with the paddle attachment on medium-high, cream sugar and butter until light and fluffy.
Add eggs one at a time, incorporating well after each addition.
Turn mixer down to low then add lemon zest.
Add half of the flour mixture gradually using a spoon, mix well.
Add the creme fraiche (or yogurt or sour cream) then mix until incorporated.
Fold in the rest of the flour mix. Set aside.
If you're using melted butter, make sure its not hot. Brush the bundt pan with the butter using a small pastry brush, being careful to get the butter into each nook and cranny. Sprinkle flour over the butter and tap around lightly to distribute. Turn pan over and tap lightly to remove excess flour.
Pour cake batter into the pan. Bake for 50 minutes or until the skewer comes out clean. Meanwhile make the syrup.
Combine all the ingredients for the syrup in a small pan. Bring to the boil until sugar is dissolved and you get a slightly thick consistency. Cool down.
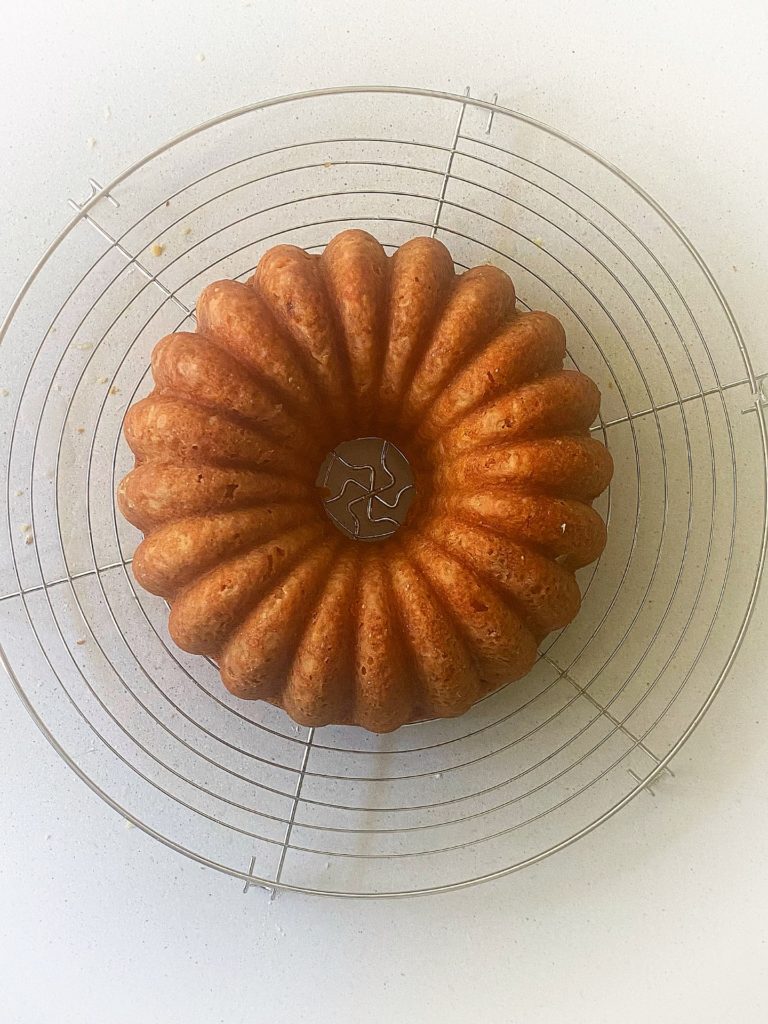
When cake is ready, remove from oven and cover with a large plate for 10 minutes. Use kitchen mitts to invert pan and remove cake. Your cake should slide out perfectly.
Make several small holes on your cake using a toothpick then brush the cake with the syrup. Leave to cool completely.
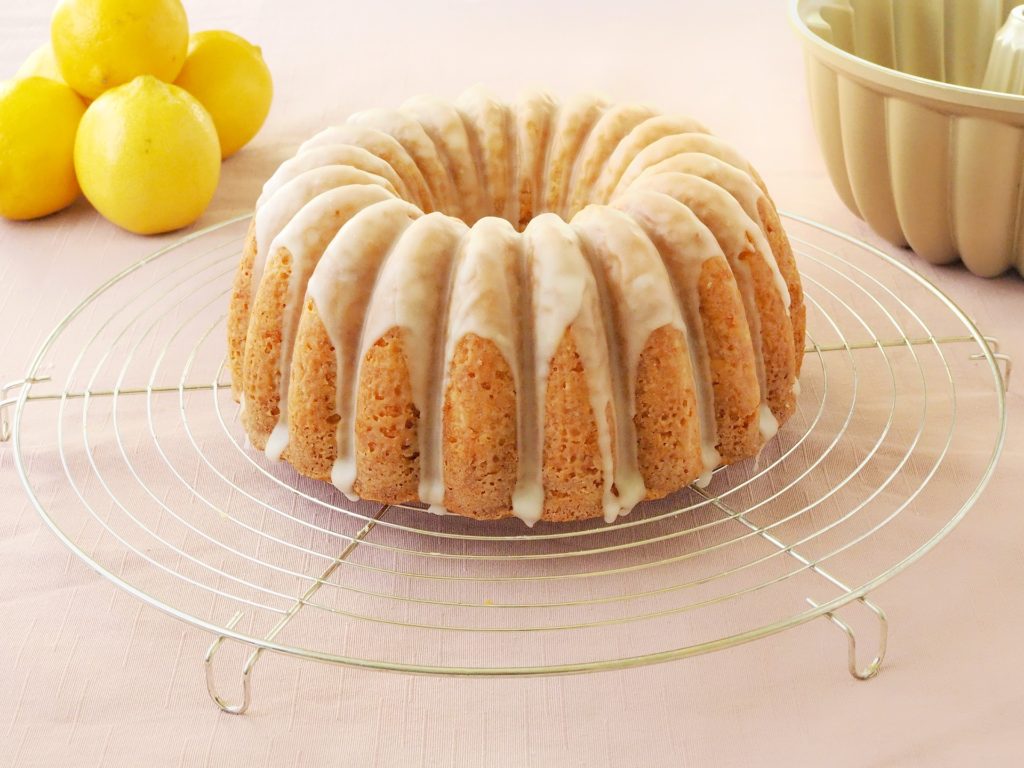
When cake is completely cool, make the glaze by placing the icing sugar in a medium bowl and whisking the lemon juice in. Start with half and keep adding until you get the consistency you want just be careful that you don't make the glaze too thin, test it by checking how quick it drips from your spoon. You want a slow drip to get that nice drizzle effect.
Leave the glaze to set for 10-15 minutes then your cake is ready to serve.
Notes
You can make this in a large loaf pan if you don't have a bundt pan. Here are some notes if you're doing this:
It's the same baking time and temperature.
You don't have to use butter and flour to grease the pan, I simply use spray oil and line the tin with baking paper.
You don't need to cover the pan with a plate after removing from the oven, just cool it down completely in the pan.
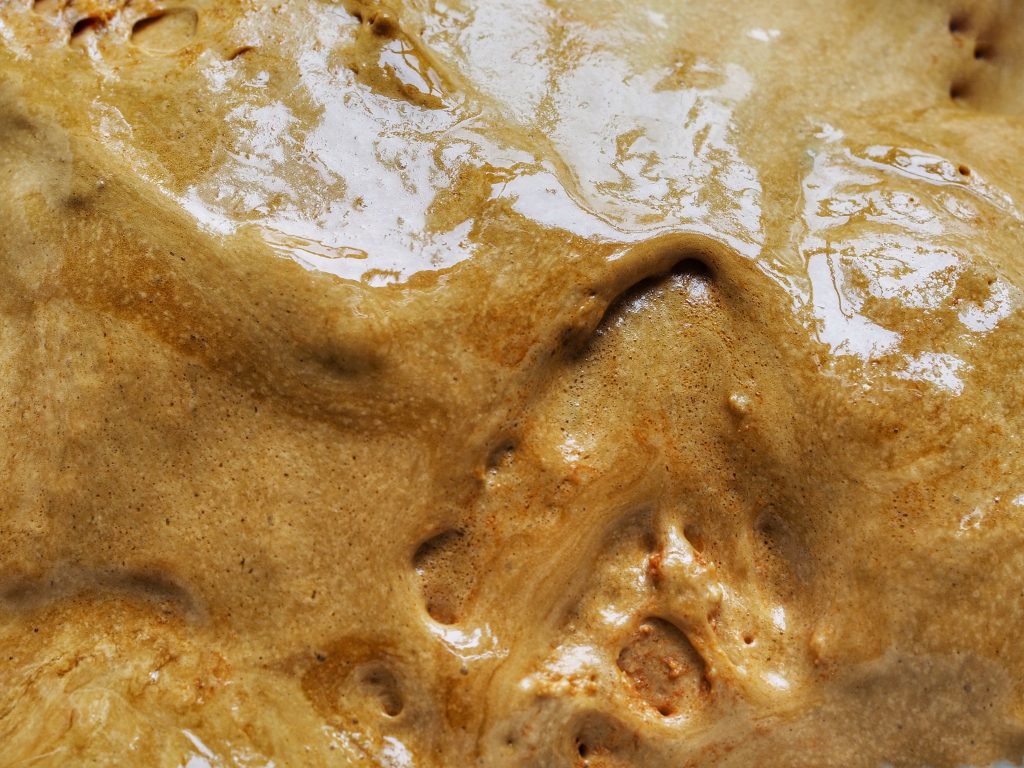
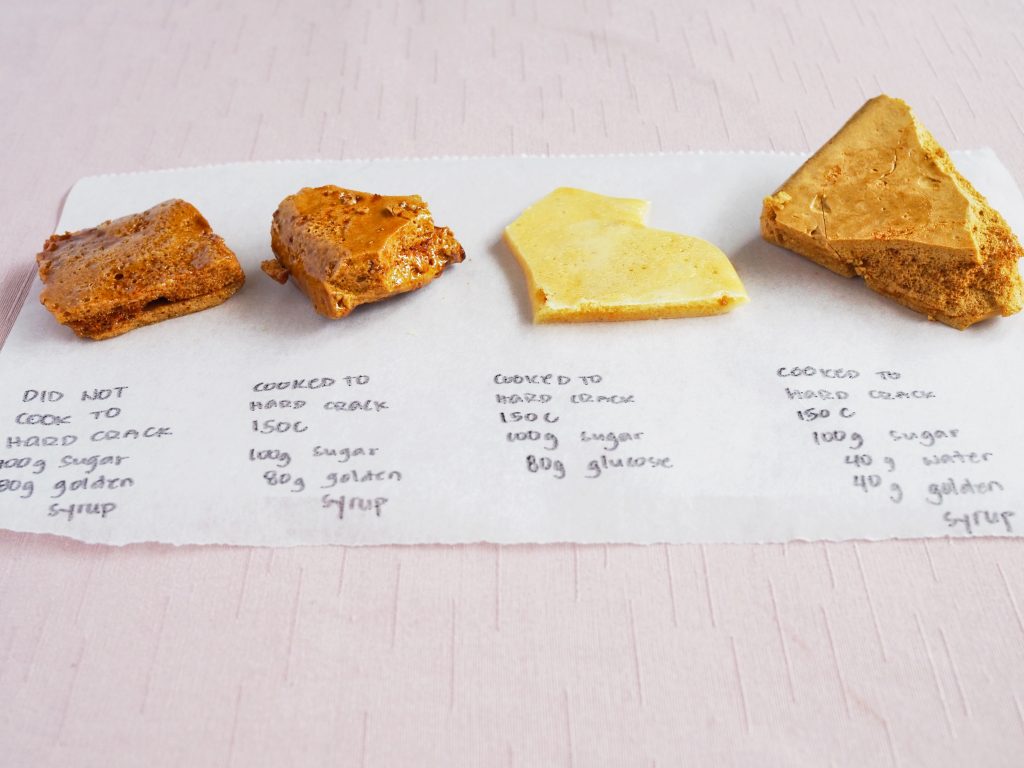
This tutorial has been a loooooong time coming. Since I published my banoffee pie recipe, I’ve had readers and friends asking me to make a honeycomb tutorial. I wasn’t ready because the honeycomb recipe I had then was from my notebook when I was an apprentice and I haven’t really experimented on how to get the best result, I just kept using this recipe and it worked for me, but I learnt it doesn’t always work for everyone, so today I made 4 batches of honeycomb and tweaked each one to see which one would give me the best result. Now I’m ready to share with you a Mrs.Fancypants approved recipe with matching photos and videos.
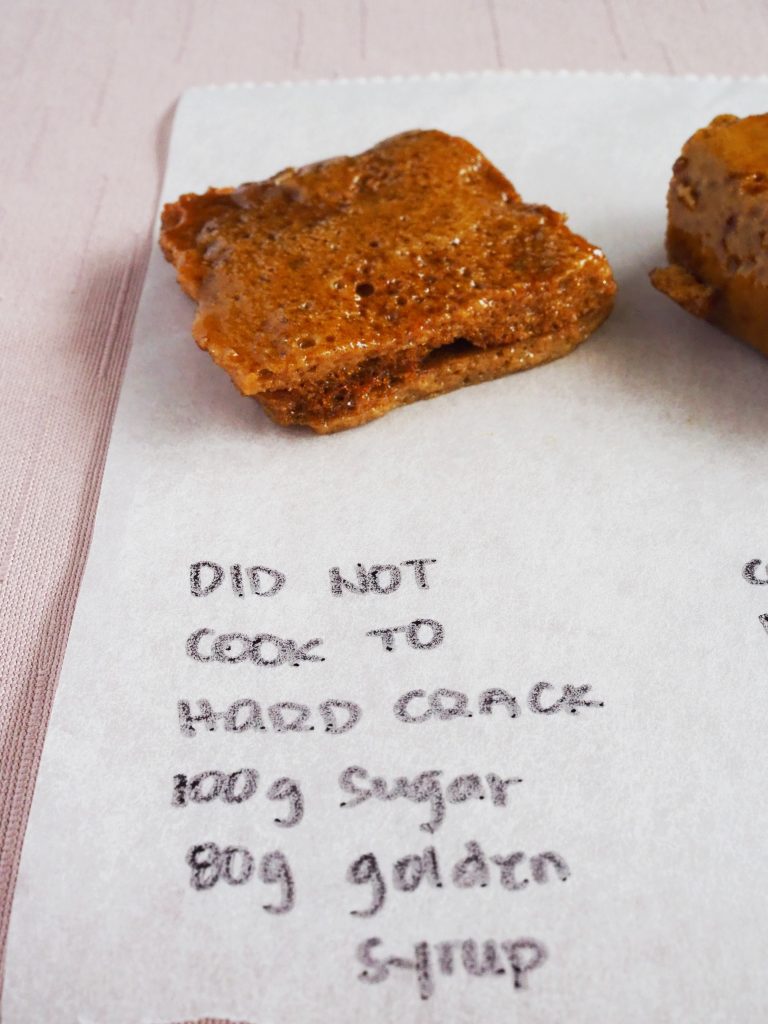
Test 1: This was my original scribbled recipe from the stone ages. LOL. I used 100g white sugar, 80g golden syrup and 8g bi-carb soda. I brought the sugar and golden syrup to the boil on medium heat and left it for 3 minutes then whisked in the bi-carb soda. I never really had a problem with this recipe, except that it was sickly sweet and has the after taste of bi-carb soda. The other thing wrong was, some readers just couldn’t get the right result and it’s frustrating for them (and me!). I knew this was because there were too many variables and there was no temperature specified for the caramel. I needed a recipe that was accurate so there’s less chance for failure.
Test 1
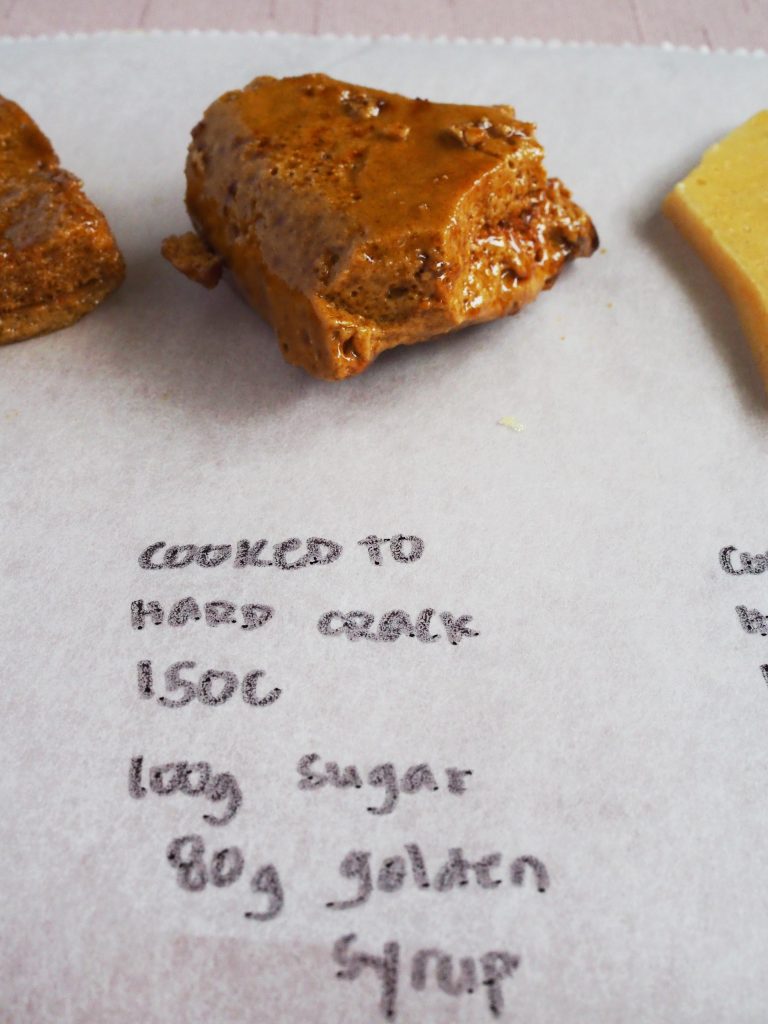
Test 2: So then came test 2. This is the same ratio as above, however, I pulled out my handy-dandy candy thermometer and heated my sugar to 150C (aka hard crack) then instead of whisking, I stirred the bi-carb soda using a wooden spoon. The sugar took 8 minutes from when I turned my stove on, to reach 150C. So in case you don’t have a thermometer, you can use a timer as a guide. This was great because it wasn’t sticky at all and it was super crunchy. However, I still found it sickly sweet. That’s where test 3 comes in.
Test 2
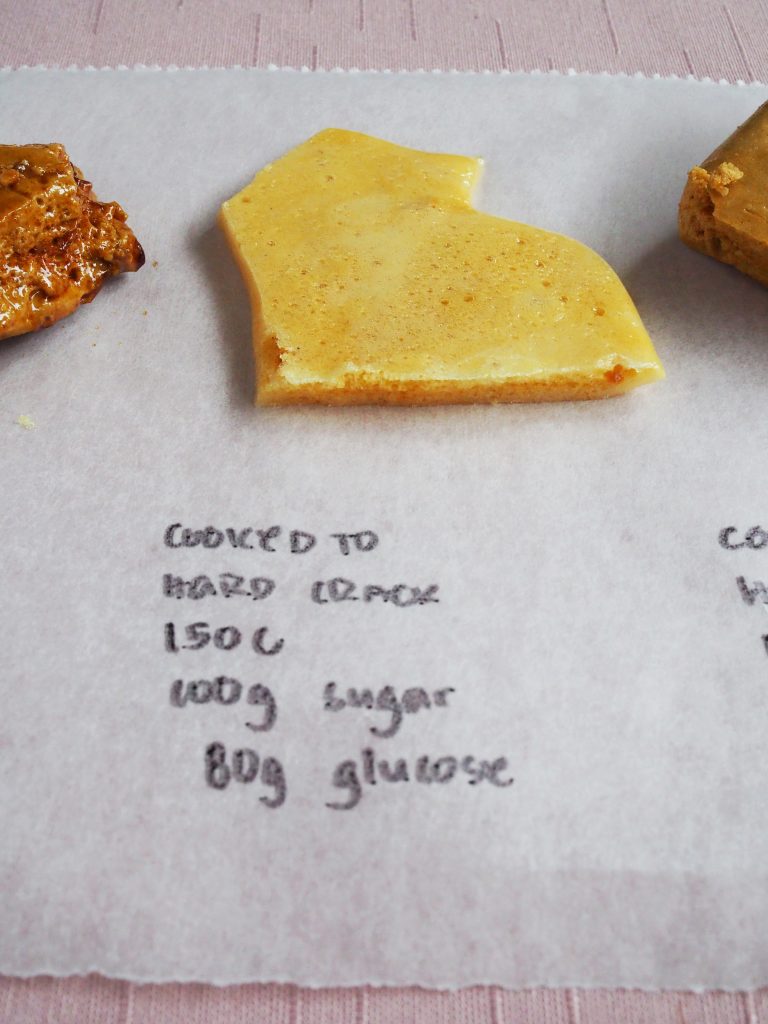
Test 3: I thought maybe use glucose instead of golden syrup. Glucose has very mild sweetness while golden syrup is 25% sweeter than sugar, I was just concerned about the colour. I was tempted to do half and half glucose and golden syrup, but I thought, if I wasn’t a chef, would I have golden syrup and glucose in my pantry at the same time, all the time? NO. So I stuck with glucose. It just didn’t turn out great, that’s all I could say. LOL. The result was pale and thin, more like a light caramel shard than honeycomb. So that’s that, back to the drawing board.
Test 3
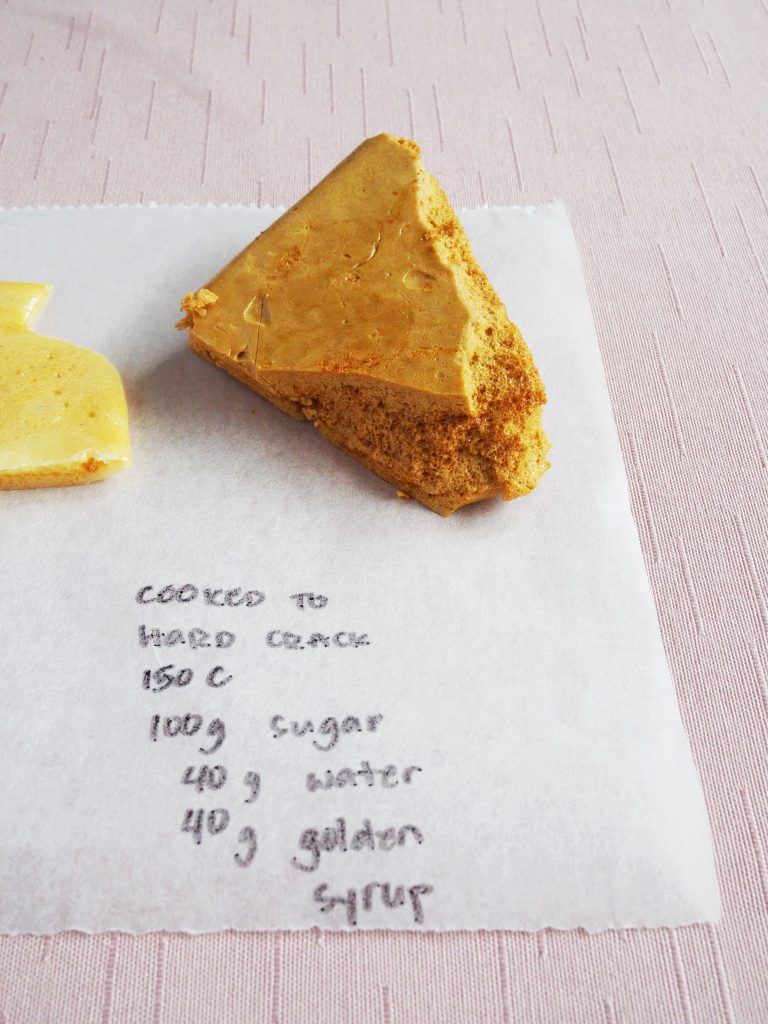
Test 4: Since I haven’t addressed the sickly sweet problem, I then thought back to golden syrup but half the amount then make up the other half with water. Same as before, on medium heat, bring the mix to 150C. This time it took 10 minutes. Again, in case you don’t have a candy thermometer, that’s your guideline, as well as the visual in the video. And if you watch and listen, you’ll see what I mean.
Test 4
After all the experimentation and multiple tooth brushing to get rid of the sugar on my teeth, I’m happy to report that both test 2 & 4 gave me good results. Both were crunchy, aerated and golden. But I have to pick a winner, and I choose test 4 because it’s less sticky on top and easier to handle plus it sorted out the sickly sweetness that I didn’t like from test 2.
I made 4 batches of honeycomb today!
A candy thermometer will help you accurately make honeycomb and other sugar recipes.
I also want to point out that both 2 & 4 didn’t have an after taste because the sugar is cooked to 150C the bi-carb soda dissolves in the mix easily, which is great. Test 1 has a bi-carb soda after taste and that used to bother me, but now with my tried and tested updated recipe, my honeycomb is exactly how I want it. I strongly recommend to get a candy thermometer, they come as cheap as $6 and totally worth skipping 2 coffees for.
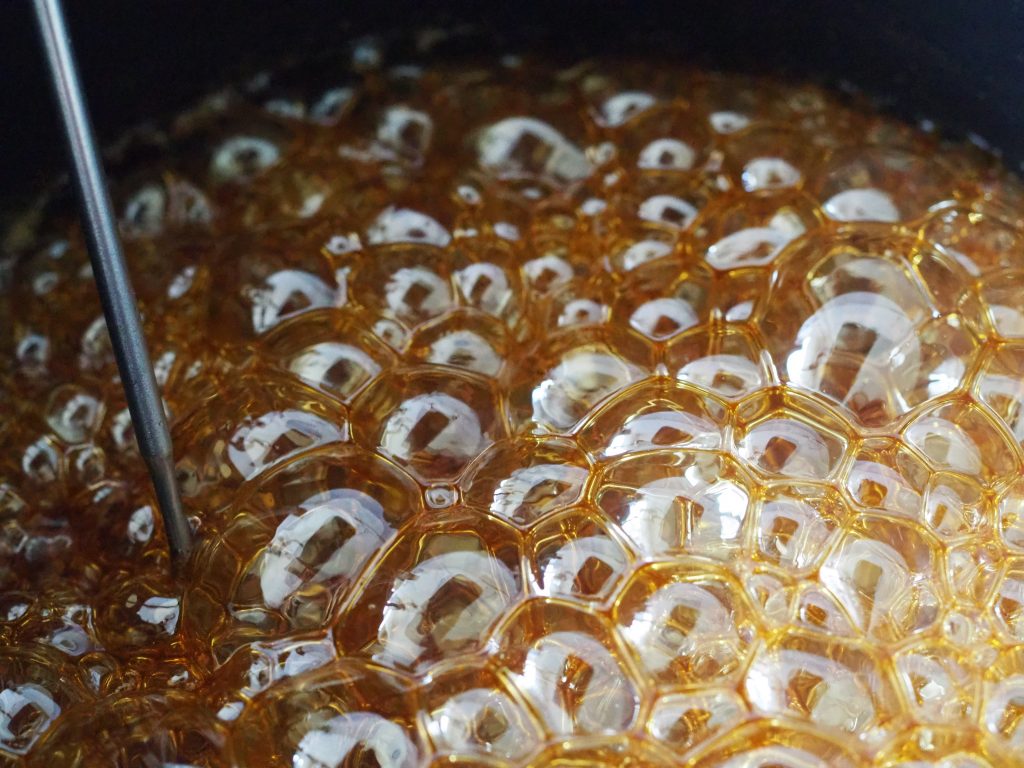
I made a video to serve as a visual guide. In baking and cooking, I like to get to know the process. I didn’t have time to do this in a commercial kitchen, because of course, I needed to be super quick, but when I can, I look for signs when I cook that when the food tells me it’s ready. Like when the bubbles slow down or they change size, small things like this. So please watch the video, you might pick up something new!
https://www.instagram.com/p/CJs0IkqB0QB/
So there you have it, now that you know how to make honeycomb, give my Banoffee Pie a go! I hope you learned something today, and please comment below for any questions and tag me on social media if you try this at home. Be careful in handling hot sugar, but more importantly have fun while cooking!
You will need a candy thermometer, a wooden spoon for mixing and a medium rectangular baking pan. Make sure everything you need is ready before starting the recipe.
Line a medium rectangular baking pan with parchment paper then grease lightly.
In a small sauce pot stir golden syrup, water and sugar together then put on a medium flame.
Leave the mixture on medium heat and bring it to the boil then clip on a candy thermometer, cook until candy thermometer registers 150C, about 10 minutes from when you put the sugar on the heat.
Turn off the heat then sprinkle bi-carb soda and use a wooden spoon incorporate the bi-carb into the mix. This will make your honeycomb bubble. Do not over mix or you will not get aeration on your honeycomb.
Turn over onto your prepared baking pan and let set for a few hours then you can snap or cut it into small pieces.
Growing up, my mom loved watching The Food Network and there was an episode about making scones. After watching the episode, she was obsessed with them. She then went on repeating one of the baker’s lines, “scones are eaten with hot tea!” for the whole weekend. Until now when we have tea with scones, we would still all say “scones are eaten with hot tea!” Anyway, I was again missing my family and had numerous morning tea box orders to finish when I realised that a lot of my friends have been saying how much they love a good scone but can’t find a recipe that doesn’t produce rocks! So here it is my friends, complete with tips for a fluffy and tall result, my recipe for traditional English scones.
A few tips for fluffy and tall scones:
Do not overwork your dough. I like to bring my dough together in the bowl then just knead it until it comes together. It doesn’t have to be as smooth as a baby’s bottom.
Cut with the sharper edge of the cutter. This may seem obvious but a cookie cutter normally has a rolled and a sharp edge, use the sharp edge to get a sharp cut for a good rise.
Rest before baking. Just like tart shells, you need to rest the scones before you put them in the oven to let the proteins relax, otherwise they will not rise as much.
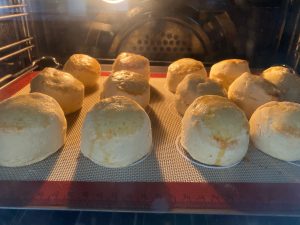
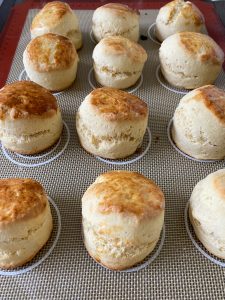
Be patient with baking. I get it, you want the scones right here, right now, but pulling them out too early can lead to a floury tasting scone that’s dense inside. I suggest waiting until you see the sides pulling up and breaking a bit and the colour turning nice and golden.
Needs more baking…
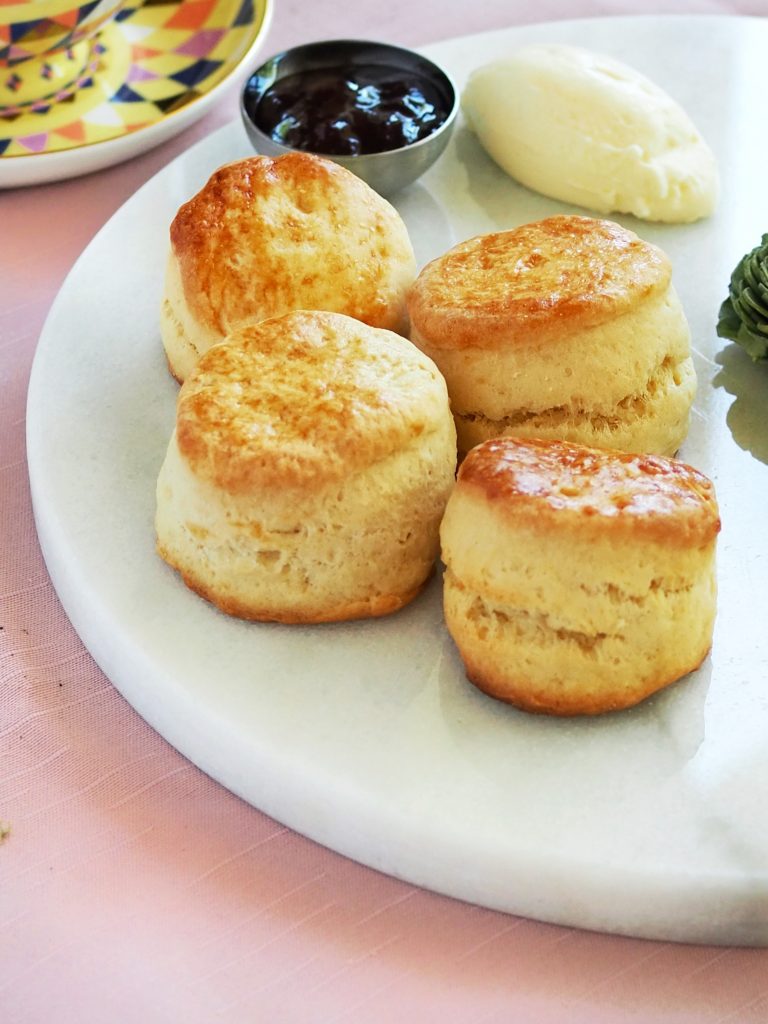
All done!
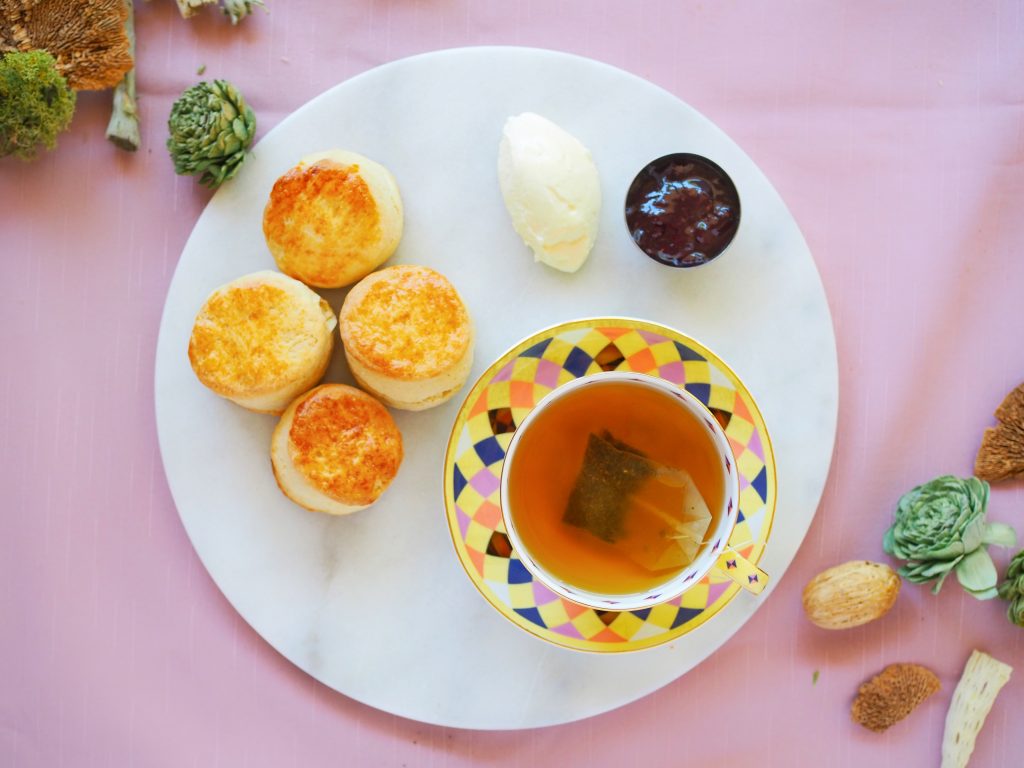
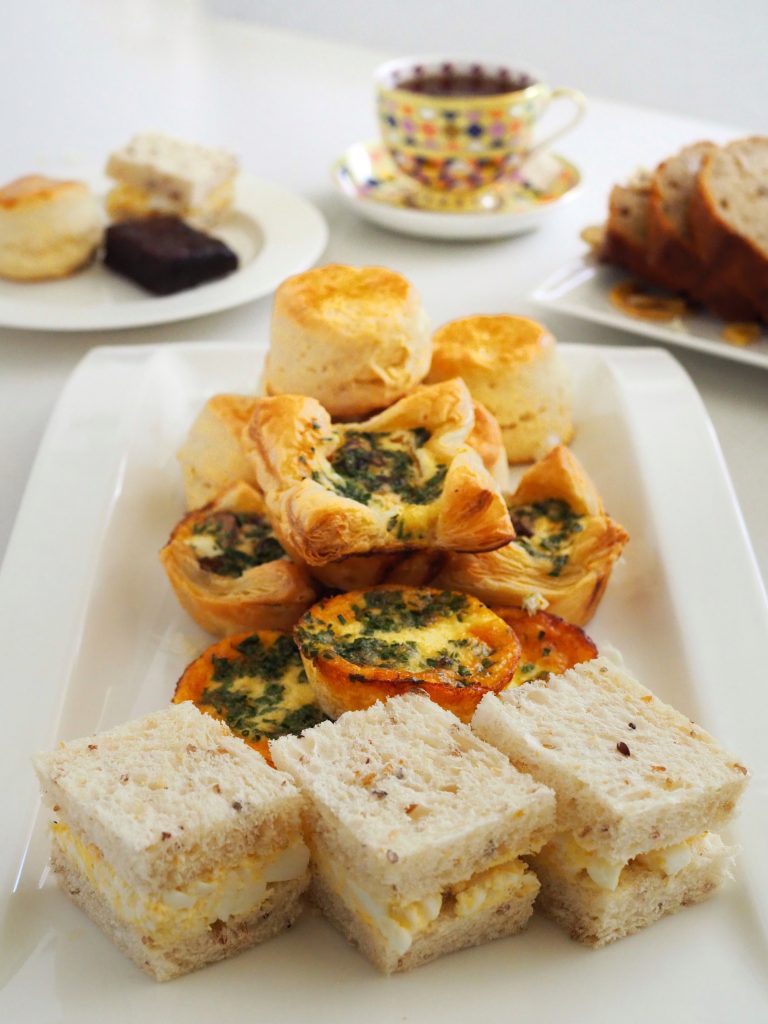
So there you have it, now you can try making you’re own scones at home. Make sure you don’t skip on the cream and jam! You can also have a DIY High Tea at home like the one below by getting in touch with me by email. I have been doing boxed catering for morning and afternoon tea that includes all the delicious items in the photo. Other than that I have also been doing Events by Mrs.Fancypants. So if you want to work with me, send me an email!
13 days before Christmas now, are you ready??? Why not try serving these for tea? Let me know what you think about this recipe if you do try it. Would love to hear your feedback and see your finished scones on social media.
Preheat oven to 200C. Sift the flour and baking powder together.
Using a food processor, a pastry cutter (aka dough blender), or your fingers, cut the butter into the flour mix until it resembles sand. The food processor will be the quickest way to do this, but I find using my fingers therapeutic. Transfer to a large mixing bowl.
Make a well in the centre then add egg and the milk. Combine in the bowl until it comes together as a dough.
Lightly dust a bench top with flour for kneading. Turn the dough over, sprinkle a touch of flour if the dough is too wet then knead until you get a smooth dough that is not sticky. Do not overwork the dough or your scones will not rise as much.
Line 2 trays with baking paper. Roll the dough out to 2cm thickness and using a 5cm round cutter, cut the scones. Place the scones at least 2cm apart on the tray. Re-roll and cut until you use up all the dough.
Let the scones rest for 20 minutes. Make the egg wash by combining egg yolk and water. Brush the top of the scones with the egg wash and bake for 15 minutes or until the tops and bottoms are golden and you see the sides cracking from the scones rising.
Serve with clotted cream or double cream and jam.
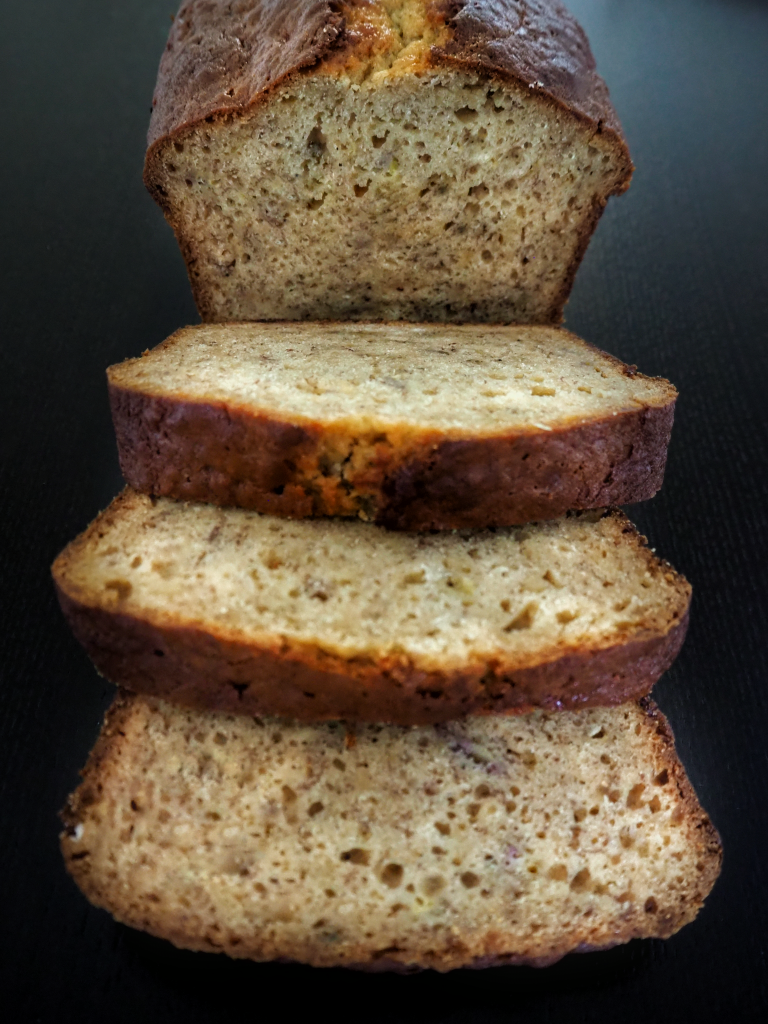
You guys have requested for a video on how to create swirls in your batter. Swirls or marbling or ripples give another dimension to your cake and looks very impressive when sliced and served. The great thing is, it’s quite easy to do. I made a video using my Classic Banana Bread recipe and jazzed it up with some chocolate swirls so you can see how easy it is.
https://youtu.be/uA5NEOAeUgE
Like I said, the recipe is my Classic Banana Bread but I added cocoa powder to some of the batter. Also, this is an easier method where you don’t need a mixer and also just uses 2 bowls. I wrote the recipe below so that you can see the difference in the methods, but both yield the same great outcome. This just proves that there is more than one way to skin a cat!
I hope you try this–both the recipe and the marbling–and don’t forget to let me know how you go. I promise you, this banana bread recipe is the champion of all banana bread recipes out there, and there won’t be any turning back after you make this. Have fun baking and eating!
Preheat oven to 175C. Grease and line a large loaf pan (9x5x3in or 23x13x8cm) with baking paper. See notes.
In a medium bowl, mix together wet ingredients and mashed bananas.
Make a well in the centre of the dry ingredients then pour and mix in wet ingredients.
Take 1 cup of the batter then mix with cocoa powder. Set aside.
Pour 1/3 of the light batter into the baking pan, then pour 1/2 of the dark batter. Repeat until batters are finished.
Take a knife and draw a figure 8 4-5 times in the batter. Bake for 75 minutes turning halfway. It's done when toothpick inserted comes out clean.
Let’s face it, if you buy an expensive cut of steak, you wouldn’t use it for a stir-fry. So what is the secret to that melt-in-your-mouth beef that won’t cost you a fortune? Well, there are a number of ways to tenderise meat, you can soak in a brine, use a salt and spice rub and air it out in the fridge, or simply massage it with bi-carb soda. For a stir-fry I prefer using bi-carb soda. For a roast, I normally choose soaking in brine.
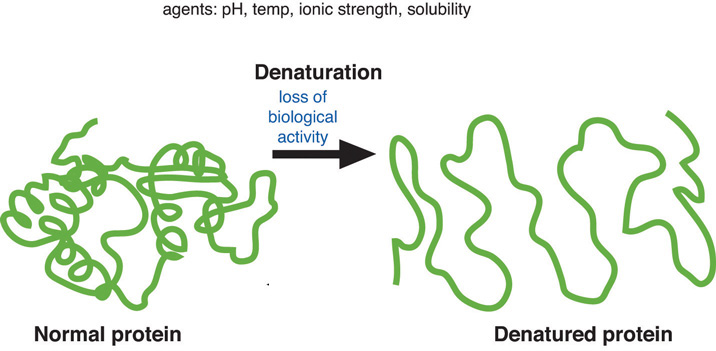
Using bi-carb soda or baking soda to tenderise meat works differently than using a salt brine. Baking soda neutralizes acid and raises the pH level on the surface of the meat, causing the outside of the meat to become more basic. This chemical reaction makes it more difficult for the proteins inside the meat to tense up, and when proteins can’t bond together, the meat stays tender when cooked instead of toughening up.
Also, this method is the fastest method to tenderise meat, so it’s perfect for a stir-fry.
I will talk about brining and how the process makes meat more tender on a different post, with a recipe for a brine and a roast. But basically, the salt breaks down the protein bonds and transforms into a string of amino acid that then links with water. Therefore keeping the meat from drying out.
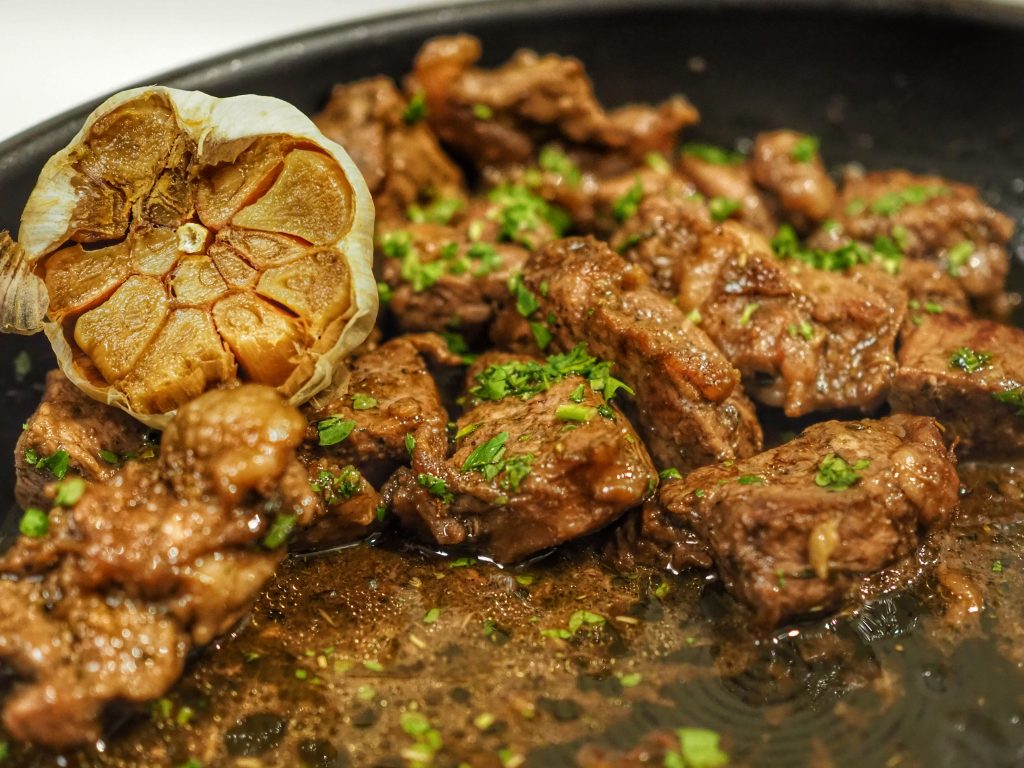
Today’s recipe is my version of a Filipino dish I loved ordering from a once popular Japanese joint in Makati, Philippines. This was probably more than a decade ago, and I’m not even sure if they still exist. It’s rich in flavour because of the roasted garlic, vincotto and Worcestershire sauce. Now, don’t fret it you don’t have vincotto, you may use a mix of honey and balsamic vinegar. It is not exactly the same, but you get a similar outcome for this recipe.
If you want to try and make this with vincotto, you can find it in specialty food shop and gourmet shops. In Australia, you can shop at Simon Johnson or Maggie Beer.
I can’t wait for you to try and make this, it’s quick, easy and so delicious! Tag me on Instagram and Facebook or use #mrsfancypantsrecipes to connect!
Tenderise the meat by sprinkling bi-carb soda and massaging it evenly. Leave in the fridge for 15-20 minutes then wash off completely with cold water. Drain.
Mix the roasted garlic and beef with your hands until the garlic is mashed.
Mix the olive oil, vincotto, worcestershire and chopped thyme in a medium bowl. Then add the beef to the liquid and mix through.
Melt the butter in a wide saute pan over med-high heat. Pan should fit the beef cubes in one layer.
When butter starts bubbling, place the beef in, trying not to get too much of the liquid. Reserve liquid. Cover with a lid and cook for 2 minutes.
After 2 minutes, open the lid and add the rest of the liquid. Bring to the boil to thicken sauce to desired consistency then turn heat off and serve immediately with steamed rice.
Notes
If you don't have vincotto or vino cotto, you can substitute 1 tbsp honey and 1 tbsp balsamic vinegar.
If you don't have fresh thyme, use 1/2 the amount of dried herbs.
I’ve been getting a lot of questions about brown butter, so I decided to talk about it so I could share some insight on why I use it in my recipes instead of normal melted butter.
Beurre noisette, or commonly referred to as brown butter, is the French culinary term for melted butter that is toasted until it is hazelnut brown. But that opens it up to more questions like, how do I know if it’s hazelnut brown, or is it roasted hazelnut or raw hazelnut? And just saying brown butter–I realised from first-hand experience–doesn’t mean people would understand what you’re talking about, especially if the person reading your recipe started baking today.
So let’s dig deeper and understand what beurre noisette is on this short post. I hope after you read this, I have taken the guesswork out of whether your butter has transformed to beurre noisette, and if it’s worth taking the extra time to brown your melted butter.
Let’s get into the science: The browning of food is called a Maillard reaction. This is a chemical reaction that occurs between the amino acids and the sugars in food when heat is applied. It happens when you sear meat, brew beer, toast bread, roast marshmallows and of course, brown butter. The list goes on, but you get the point. However, this process should not be confused with caramelisation.
A Maillard reaction creates new flavour compounds. The process is actually many sets of small reactions between amino acids and sugars where they continuously form flavour compounds, break them down and form new flavour compounds, and so on. This produces different sets of flavours and aromas to different types of food, and as I mentioned, gives it a distinctive brown colour.
I’ve made a video to serve as a visual aid when you start making brown butter, or beurre noisette. So no need to get anxious when you see brown butter on the ingredients list and no, you can’t get it from the shops, sorry… Watch my short video, and see how easy it is to make!