Do you like having picnics at the park? I didn’t when I lived in the Philippines, mainly because of the heat. When I moved to Australia, there are so many beautiful green spaces that it was just unacceptable not to have picnics! Don’t you agree?

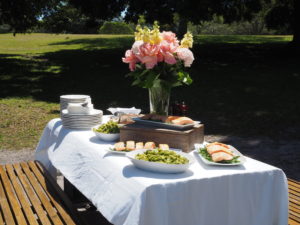
Centennial park is such a great location, it has unlimited parking, a bicycle rental, a few playgrounds, BBQs, picnic tables, plenty of trees, a number of well-maintained gardens, coffee kiosks, and public toilets scattered around. It’s a great place to host a picnic. So I did just that, and it was a lovely sunny day perfect for a gathering with friends.

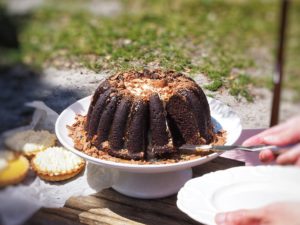
The food was simple and stress-free. I prepared salmon, green beans, chicken and pesto, plus a variety of desserts. The standout dessert was my version of Better than Sex Cake. Which I called Better than Anything because there were young children present and I didn’t want to be the bad aunt!

To be honest, I don’t get why anyone would say anything is better than sex, but this cake is better than any bundt I’ve made or had! So should I call it Better than Any Bundt? Hmm.. Yeah, I’m sticking with it! Better than Any Bundt!

The recipe is pretty easy, there are a couple of components, like the Chantilly cream, salted caramel and crushed flake bars. Read the notes section for substitutes and vegan option! Now here are some photos from our picnic!

Difficulty: Easy

Better than Any Bundt

Makes 1 x 10-cup bundt

Ingredients

    Chocolate Cake
  • Caramel sauce
  • Chantilly cream

Instructions

0/10 Instructions
    For the cake:
  • Preheat oven to 170C. Grease a 10-cup bundt pan with softened butter diligently then dust with cocoa powder.
  • In a large bowl, sift together flour, cocoa powder, baking powder and bi-carb soda. Mix in salt and sugar. Make a well in the center.
  • Add the eggs, yogurt/sour cream, oil and vanilla and mix until smooth. Whisk in the boiling coffee. The batter will be runny, so don't worry.
  • Pour the batter in the pan and bake for 65 minutes or until a skewer inserted comes out clean. Remove from oven and cover with a plate. Leave for 10 minutes.
  • Remove plate and gently pull the sides of the cake away from the pan. Invert the cake onto a cooling rack and it should slide out easily. Cool completely.
  • Make the caramel
  • Place sugar in a heavy-based sauce pan. Leave it on medium heat until it melts and starts to colour.
  • Once sugar turns amber quickly whisk in the diced butter. If it separates, remove from heat and keep whisking. Once it comes back together return to the burner and cook for 1 minute.
  • Turn heat off then add the cream slowly. It will sputter so be careful. Then add the salt and cool down.
  • Make the Chantilly cream
  • With a cold and cold whisk, whisk the cold cream until stiff but doesn't look grainy. Whisk in the vanilla until incorporated. Set aside in the fridge.
  • Assembly
  • Once the cake is completely cool, pour the cooled down caramel sauce in the middle of the bun then cover with the whip cream. Drizzle remaining caramel sauce on top with the chunks of flake bars.

Notes

  1. You can use other chocolate that you like, I've tried Malteser and Twix
  2. Sour cream and yogurt work well in this cake, although I like the result with yogurt better.
  3. For a vegan version: replace the cream with plant-based cream for the Chantilly cream and the caramel, replace the butter with Nuttelex, the flake bars with vegan chocolate bars and use my vegan chocolate cake recipe here.
  4. For tips on preventing your bundt cake from sticking, please read this post.

Beat the Heat

In Australia, February is the hottest month of the year. Obviously, I’m inclined to keep the oven off as much as I can. Enter superb panna cotta recipes. What is a panna cotta? This cream based Italian dessert seems simple to make, the basic recipe includes cream, sugar, vanilla and gelatin. Seems easy enough, right? Well, sort of… A perfect panna cotta jiggles on the plate and melts in your mouth. So you need the perfect ratio. That’s what I’m here for today.

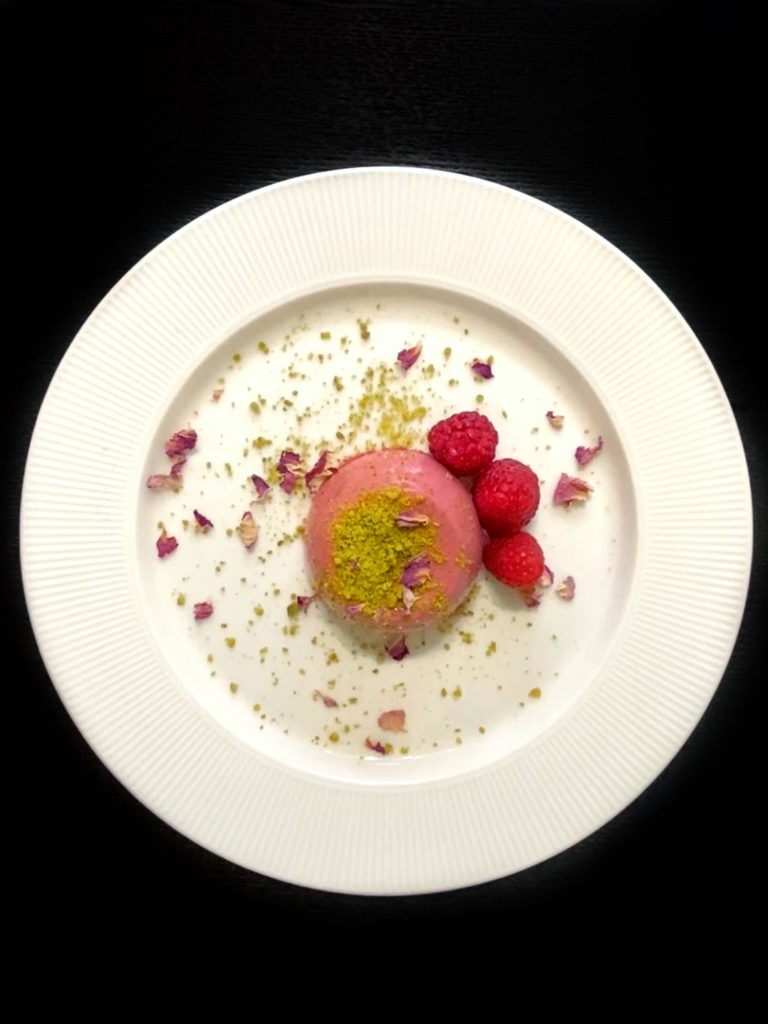
I will share with you my recipe for raspberry panna cotta today. I use raspberry puree and I add a touch of vanilla to the mix too. You can serve this in a lovely dessert glass or you can use dariole moulds to set them and turn them out. I like mine simple with a little sprinkling of pistachios, a couple of fresh raspberries and some dried rose petals give it a hint of another flavour. It’s light and enjoyable and won’t leave you feeling guilty for having dessert.

This is also a perfect dessert to serve on a Valentine’s Day dinner or any romantic dinner, really. You can make it the day before and just focus on flowers and the rest of dinner on the day. Add a chocolate heart to make it extra romantic!

Yields: 4 Servings Difficulty: Easy

Raspberry Panna Cotta

Serves 4

Ingredients

0/9 Ingredients

Instructions

0/7 Instructions
  • Lightly oil, 4 200mL panna cotta moulds or 4 nice dessert cups.
  • Blend the raspberries and water until super smooth then push through a fine sieve. You should yield 150mL. Set aside.
  • Bloom gelatin in cold water. In a saucepan, bring cream, vanilla and sugar to the boil. Turn off the heat and add 150mL of raspberry puree. Stir until incorporated.
  • Squeeze off excess water from gelatin and add to cream mix. Stir until gelatin is dissolved. If you want to make the panna cotta more pink, add a drop of red food gel and stir until it blends together.
  • Strain panna cotta using a fine sieve and divide between 4 moulds. Set in the fridge for at least 4 hours or longer if turning out.
  • To serve: you can turn out the panna cotta onto a plate by breaking the seal between the panna cotta and the mould by pressing the panna cotta edge lightly with your finger until you create an air pocket. Then turn it over onto a plate. Otherwise, you can serve them in the cups you have set them in.
  • Decorate with crushed pistachios and fresh raspberries.

My First Sahog @ Home with Filipino Food Movement

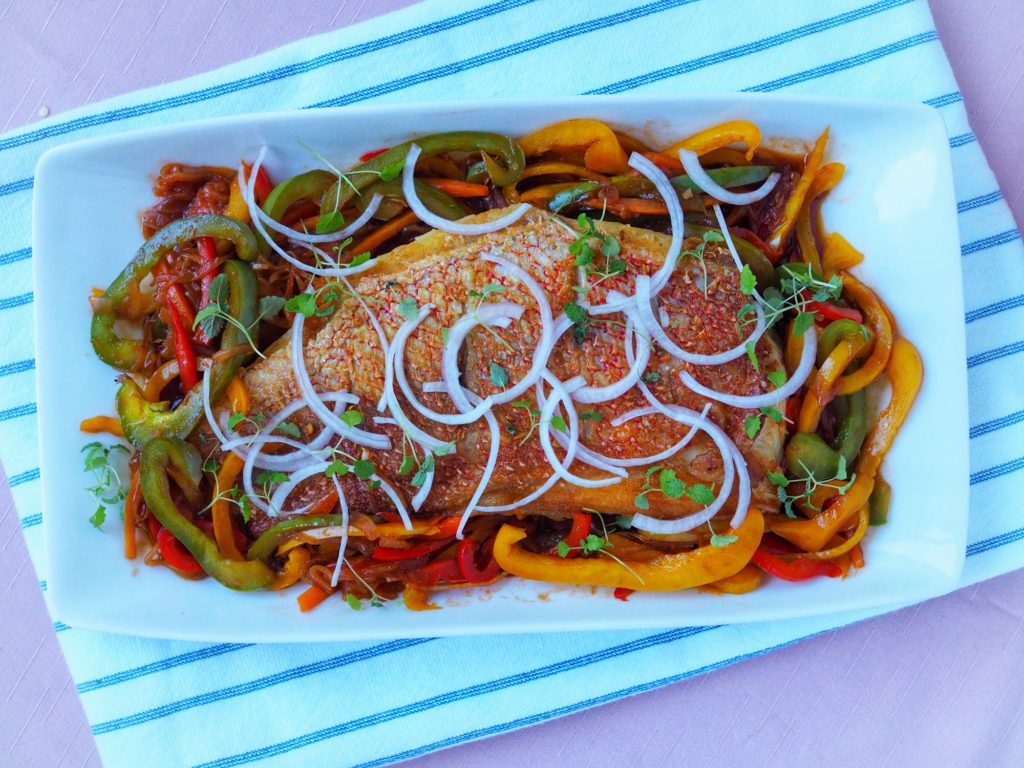
Today, I did my first IG Live with Filipino Food Movement. I cooked Filipino sweet and sour fish, or escabeche. And no, I didn’t use cornstarch, or pineapple or ketchup! This is the real deal, I even used fresh tomatoes.

Escabeche is a Filipino dish traditionally consist of fried whole fish, capsicum, onions and sweet and sour sauce. I love making this because it’s easy, quick and delicious! If you’re feeding kids, then you can opt for fillets instead of whole fish so there will be no bones. If you don’t want to fry the fish, you can bake, steam or grill. I’ve tried the sauce on a few white fish and prawns and it’s beautiful. I haven’t tried it on salmon or any oily fish, though. You can make a big batch of sauce and because of the vinegar content, it actually keeps quite well. Although, truthfully, it hasn’t lasted more than a few days in my fridge, so I don’t know how long it would last. I imagine it would be similar to atchara which is pickled vegetables in Filipino. Just make sure you store it in a clean, airtight container.

Watch the video below if you wish to cook along with me. It took about 30 minutes but you can even shorten that by making the sauce in advance.

On the video I used fresh cherry tomatoes. For a quick and economical version that tastes just as nice, you can use a good quality tomato paste. I also like to use sukang iloko because of it’s darker colour and acidity. In Australia, you can get it from your local Filipino store, or you can use sherry vinegar as an alternative. In the Philippines, if you don’t have the options mentioned in your pantry, you can opt for cane sugar vinegar but your escabeche sauce won’t yield the same vibrant colour.


View this post on Instagram


A post shared by FFMA (@filipinofoodmovementau)

Tips on frying fish:

During the live video, I gave a couple of tips on how to best fry fish:

  1. Use a non-stick pan with plenty of room for the fish. The right pan for the job is always important. If you’re worried about food sticking to the pan when frying, then non-stick is your friend.
  2. Hot oil is key but don’t use oil that has a low smoke point like olive oil.
  3. Pat the fish dry and cut a few slits on the skin. Drying the fish and cutting slits on the skin ensures your fish doesn’t curl up when the skin hits the hot oil.
  4. Cook on the presentation side. Whether you took the skin-off the fish or not, there is always a presentation side. When the fish has skin, the presentation side is the skin side, otherwise, it’s the other side. Cook your fish longer on the presentation side until it’s almost done. This gives you maximum colour. Then flip and finish on the other side for a couple of minutes.

Now you’re ready to try my escabeche recipe. It’s super easy, and absolutely delicious, so I hope you give it a shot and let me know what you think in the comments section.

Difficulty: Easy Prep Time: 10 Mins Cook Time: 30 Mins Total Time: 40 Mins

Escabeche

(Filipino Sweet & Sour Fish)

Serves 4

Ingredients

Instructions

0/8 Instructions
  • Slice all the vegetables and ginger into similar size strips or julienne. Mince the garlic.
  • Heat about 3 tbsp cooking oil in a heavy-base sauté pan. Sauté the garlic then add the onion and ginger. Cook until onions and ginger are soft and translucent then add the tomatoes or tomato paste, whichever one you're using.
  • If using fresh tomatoes, cover with a lid and cook down tomatoes for 10 minutes. If using tomato paste, cook out the tomato paste without the lid for 2 minutes.
  • Add the vegetables, stir and cover for 10 minutes until vegetables are soft and tomatoes are breaking down (if using fresh tomatoes).
  • While simmering the sauce, fry the fish. In a wide frying pan with plenty of room for the fish, heat 2 tablespoons cooking oil. Pat fish dry and season with salt. Once the oil is hot, place the fish in the pan and leave until skin is crispy and golden, about 6 minutes, your fish should look almost done.
  • Flip the fish and cook the other side for 1-2 minutes depending on the thickness of your fish. Remove from pan and drain off excess oil with paper towel.
  • Finish your sauce by adding vinegar and brown sugar. Bring to the boil then simmer until the sauce is the consistency that you like. Remove from heat.
  • To serve, spoon the sauce on the serving platter and place the cooked fish on top. Season with pepper and serve with steamed rice.

Notes

  1. Fish options: I like using snapper, barramundi, swordfish and coral trout. Any white fish will do.
  2. Cooking method for fish: You can fry, grill, bake or steam.
  3. Make-ahead. You can make the sauce in advance and just cook the fish on the day. Makes it a lot easier and the sauce keep every well in the fridge in an airtight container for 3-5 days.

Risotto is a dish that people try to avoid when having guests over. Why? Because as the host, you also want to spend time with your friends and risotto has a reputation for being time and attention consuming to cook. Who wants to be in the kitchen most of the night when they can hear laughter coming from the other room? I’m guessing not you.

But wouldn’t you want to impress your friends when you bring out plates of creamy, steaming hot, delicious smelling risotto for their main? I know I would, and believe me, they are always impressed.

So here are my solid tips on serving risotto at your next dinner party:

Choose an easy to follow and tested recipe. This is always important. Never–and I mean NEVER–make a dish for the first time on the day you are having a dinner party. This is simply a recipe for disaster. So choose a recipe way beforehand and test it out, because then you can adjust it to your liking, or find a better recipe if it doesn’t work for you.

Now that you have a recipe, make sure you prepare all the ingredients. Measure your rice, wine and stock, chop your vegetables and protein, and bring your stock to the boil. Most importantly, prepare a wide, shallow dish or tray that will fit the risotto in a thin layer and will also fit in your fridge.

Start making the risotto. Most risotto recipes start with sautéing eschallots and garlic in oil. Do not burn, sweat them until soft without color, otherwise you’ll either get a burnt or raw after taste in your risotto.

Follow the rest of the recipe only until your rice is al dente. Meaning, do not finish cooking, but cook it until it almost ready. Now you have to be quick.

Transfer the risotto in the tray that you prepared earlier. Spread it out until you only have a thin layer. Then trace crisscross lines along the risotto with the wooden spoon and place it in the fridge to cool down completely.

When you’re ready to serve. When you’re ready to serve, bring your leftover stock to the boil. In a wide pan place 1/4 cup of hot stock for every 1 cup of risotto, then add the cold risotto. Stir to loosen it up and finish it according to the recipe you’re following.

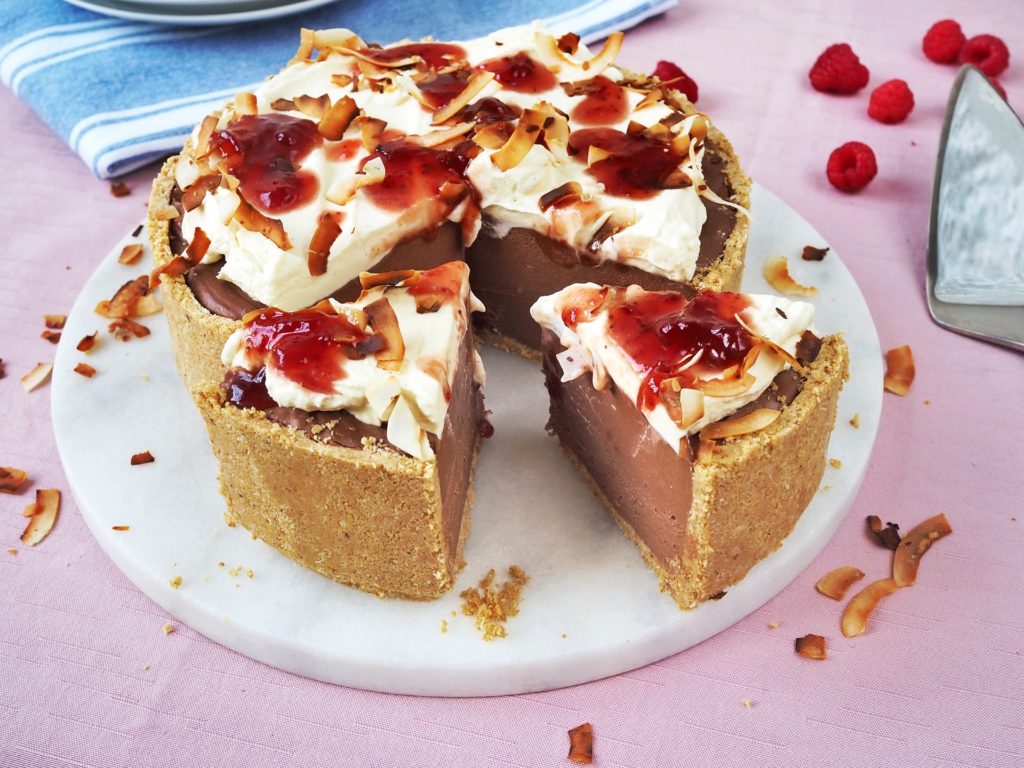
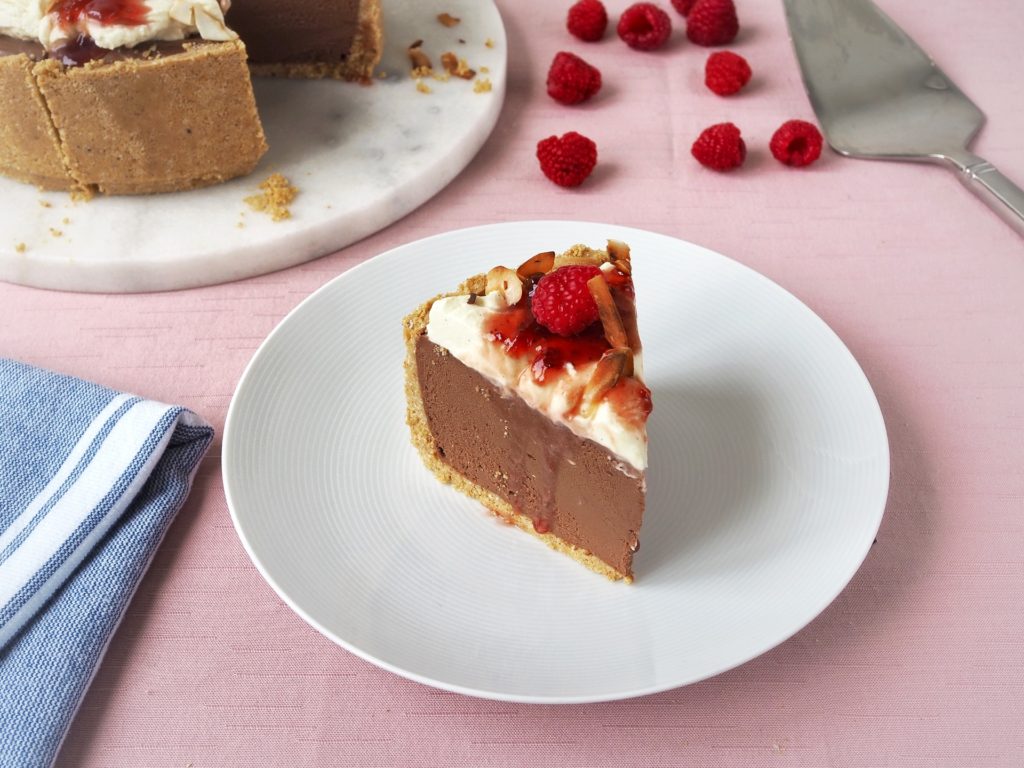
What is a Lamington? It’s an Aussie bakery staple of sponge cakes sandwiched with a raspberry jam filling dipped in chocolate then rolled in coconut. Here, I take the flavours of a classic lamington and make a cheesecake from it. Why? Because I like lamingtons and cheesecake and was inspired by the Delicious Bake Club Challenge when they featured a Lamington Cheesecake Recipe. I made this to compete and win the Breville Wafflemaker–which I unfortunately didn’t! I didn’t follow their recipe and used my no bake cheesecake as a base. Their recipe is baked in the oven and contains eggs, my recipe is no-bake, no eggs and uses different ratios.

Will this measure up to a lamington? Unfortunately not, much as I wanted it to. The flavours are there but a good cake base makes a really good lamington and obviously, there’s no cake here. But the flavour combination is still delicious! I hope you like it. Remember to bring all your ingredients to room temperature for a smooth finished product.

 
Difficulty: Easy

Chocolate Lamington Cheesecake

Makes 1 x 20cm cheesecake

Ingredients

    For the crust
  • For the cheesecake
  • For the Chantilly cream

Instructions

0/5 Instructions
  • Place chocolate in a heatproof bowl. In a small pot, bring coconut cream almost to the boil then pour on top of the chocolate. Let it stand for a minute then whisk until smooth. Set aside to cool down.
  • In a large bowl, mix digestive biscuit crumbs and brown butter until it resembles wet sand. Take a 20cm (8in) round springform pan and press crumbs into the bottom and all the way up the sides with the back of a measuring cup. Chill until filling is done.*
  • In the bowl of your stand mixer fitted with a whisk attachment, or a large mixing bowl with a handheld mixer, whisk cream cheese on medium speed until smooth. Turn up mixer to high speed then add sugar a spoonful at a time and mix until smooth.
  • Turn mixer down add the melted chocolate and cream. Whisk until smooth. Pour filling into prepared pan, then with a hot offset spatula or spoon, flatten the top. Chill to set for at least 4 hours.
  • To serve: Warm raspberry jam to make it more liquid and easy to drizzle. Whip cream and sugar until medium. Dollop or pipe the cream on the cheesecake, drizzle jam on top and sprinkle coconut flakes.

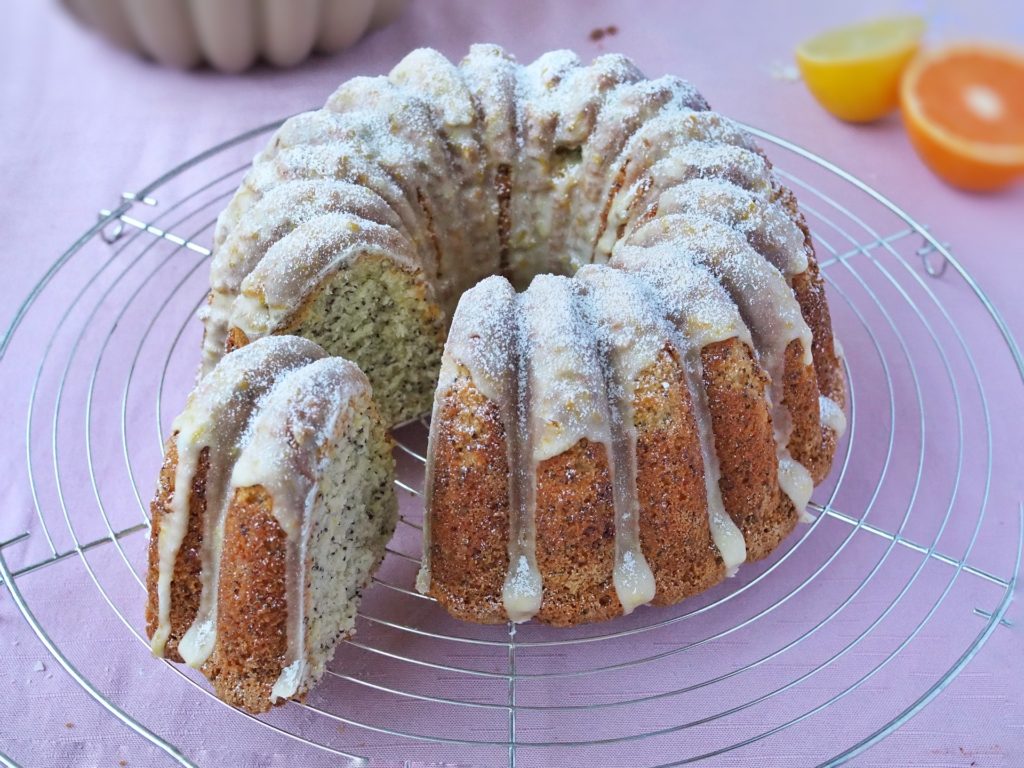
Winter always posts a challenge to me recipe-wise because of the “limited” fresh produce availability. But lately, I’ve learnt that it might just be me who is limiting my creativity. So this winter I am actively testing different citrus like cara cara, yuzu, bergamot on top of my normal blood oranges, navel oranges, limes and lemons in my recipes. In this one, you could use any citrus you have available, except maybe grapefruit. But I like the combination below best. You have play with it and let me know in the comments section which citrus combo tickled your fancy!

This is a straight up bundt cake that could also be baked in a large loaf tin. You can watch my bundt cake tutorial below to avoid getting your cake stuck in the pan.


View this post on Instagram


A post shared by Joanne | Mrs.FancyPants (@mrs.fancypants.recipes)

If you make this recipe, tag me using @mrs.fancypants.recipes on social media or use #mrsfancypantsrecipes or #mrsfancypantsbakes so I can see them! If you have other questions or comments, please feel free to use the comments section below. Now time to get your whisk out and give this recipe a try! I promise you won’t regret it. Happy baking!!!

 
Difficulty: Medium

Citrus & Poppy Seed Cake

Makes 1 x 10-cup bundt cake or 1 large loaf cake

Ingredients

    For the cake
  • For syrup:
  • For glaze

Instructions

0/15 Instructions
  • Measure all your ingredients then preheat oven to 175C. If using softened butter, grease your bundt pan now. Do this by brushing the bundt pan with the softened butter using a small pastry brush, being careful to get the butter into each nook and cranny. Sprinkle flour over the butter and tap around lightly to distribute. Turn pan over and tap lightly to remove excess flour. If you're using melted butter, DO NOT GREASE YOUR PAN YET.
  • Sift flour, salt and baking powder together. Set aside.
  • In the bowl of your stand mixer with the paddle attachment on medium-high, cream sugar and butter until light and fluffy.
  • Add eggs one at a time, incorporating well after each addition.
  • Turn mixer down to low then add lemon zest.
  • Add half of the flour mixture gradually using a spoon, mix well.
  • Mix the sour cream and lemon juice together then add to the batter. Mix until incorporated.
  • Fold in the rest of the flour mix. Set aside.
  • If you're using melted butter, make sure its not hot. Brush the bundt pan with the butter using a small pastry brush, being careful to get the butter into each nook and cranny. Sprinkle flour over the butter and tap around lightly to distribute. Turn pan over and tap lightly to remove excess flour.
  • Pour cake batter into the pan. Bake for 50 minutes or until the skewer comes out clean. Meanwhile make the syrup.
  • Combine all the ingredients for the syrup in a small pan. Bring to the boil until sugar is dissolved and you get a slightly thick consistency. Cool down.
  • When cake is ready, remove from oven and cover with a large plate for 10 minutes. Use kitchen mitts to invert pan and remove cake. Your cake should slide out perfectly.
  • Make several small holes on your cake using a toothpick then brush the cake with the syrup. Leave to cool completely.
  • When cake is completely cool, make the glaze by placing the icing sugar in a medium bowl and whisking the juice in. Start with half and keep adding until you get the consistency you want just be careful that you don't make the glaze too thin, test it by checking how quick it drips from your spoon. You want a slow drip to get that nice drizzle effect.
  • Leave the glaze to set for 10-15 minutes then your cake is ready to serve.

Being in lockdown may mean I can’t cater for your private events, however, it shouldn’t mean you can’t have the same great food to enjoy on weekends. So for the first time, I will be offering my favourite dishes to be enjoyed in the comfort and safety of your home.

Every week, I will have a different set menu designed to share between 2 adults. As always, the food will be made to the same high standards using top notch produce. I will do most of the cooking, and all you need to do is finish the dishes at home or reheat. Subscribe to my mailing list to get the weekly menu ahead of everyone!

Order cut-off & Delivery:

  • A small delivery fee will be charged for lasagne orders only. Orders above $100 are free for a radius of 25KM.
  • To keep in line with the Public Health order, I am working by myself in the commercial kitchen. This means that quantities are limited every week, so get your order in as early as possible to avoid missing out.
  • All orders must be made every Thursday 3PM. A confirmation email will be sent to you as proof that your order has been received.
  • All orders will be delivered every Saturday between 10AM to 4PM. You will receive a narrower time window on the day.
  • Covid Safe Practices will be followed to ensure all of our health and well-being. Contactless delivery is in place, unless there is no place to leave your order safely.

Order now!


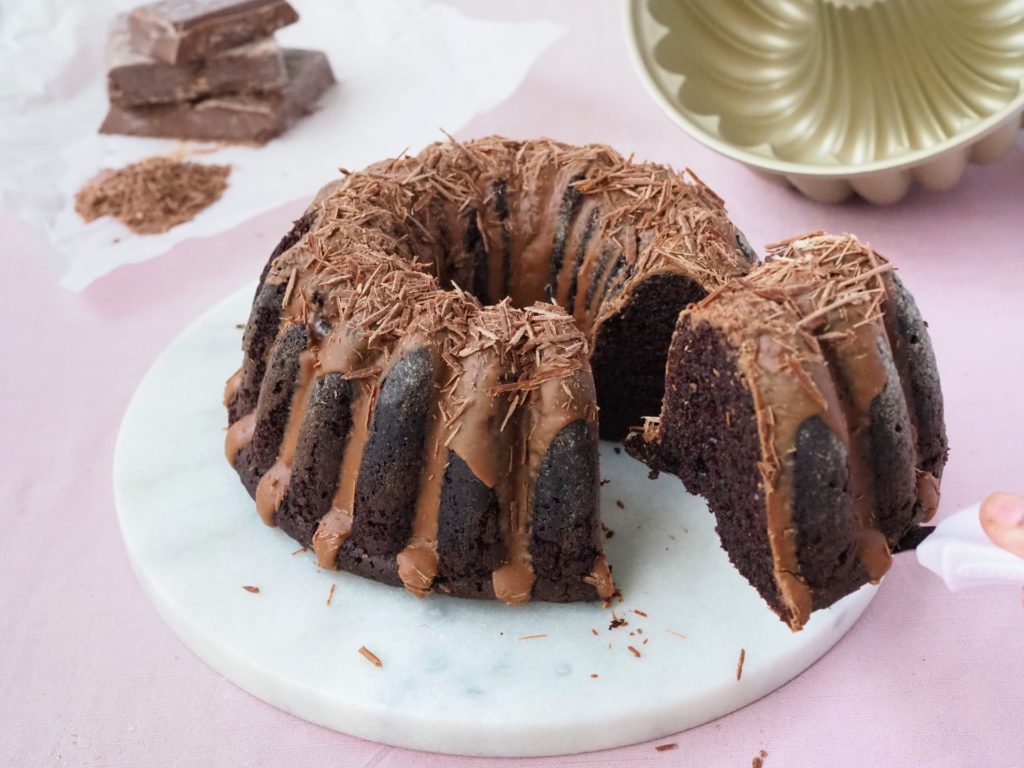
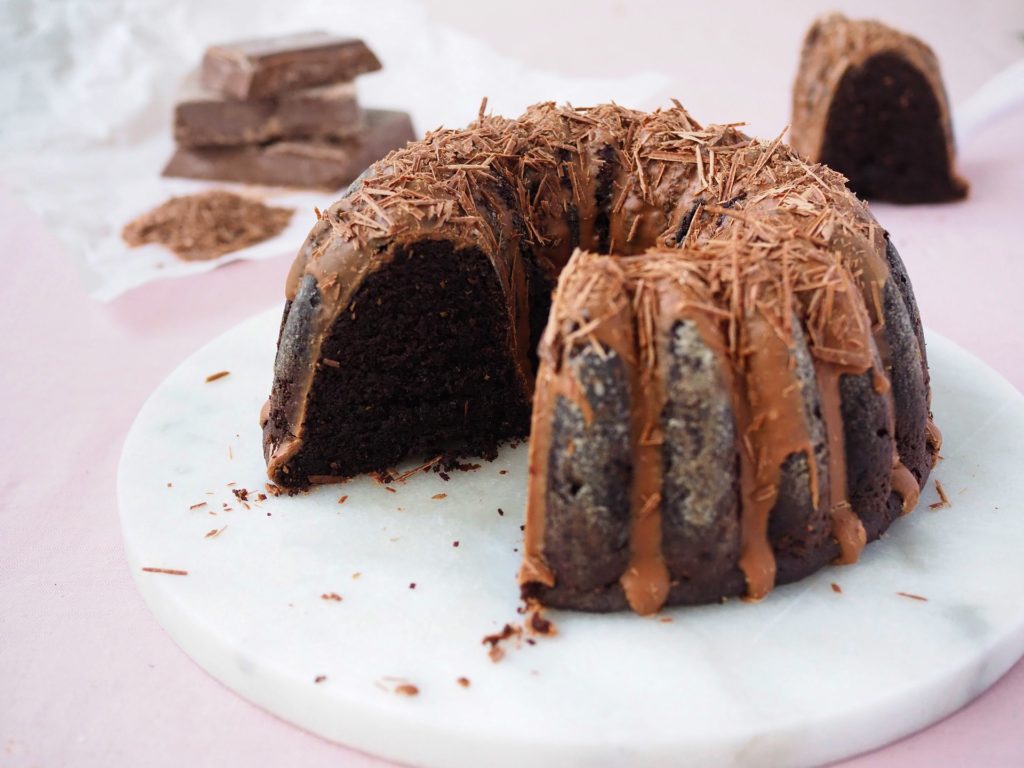
I’ve been craving for chocolate cake, and I wanted to make one that wouldn’t make me feel as guilty as my normal recipe but still taste as great. My chocolate bundt cake recipe is soft and fluffy, with intense chocolate flavor, can be made in one bowl and to top it all off it’s low fat and vegan! Definitely best in class ????

If you don’t have any dietary restrictions, feel free to use large eggs and buttermilk and omit the vinegar. I used chickpea flour instead of eggs and oat milk instead of buttermilk. If you don’t have a bundt pan, you can bake this pan in a 23x33cm brownie pan too, just need to reduce baking time to 35 minutes! Is there anything not to love yet?!?!

The recipe below has notes and written as detailed as possible to help you get the best result. As usual, bundt cake baking best practices are recommended to prevent getting your cake stuck in the pan. Grease your pan well and dust with flour, or in this case cocoa powder because flour leaves white spots on the cake. If you’re not fussed about the white spots, please feel free to use flour as normal. Finally, use a plate to cover the pan for 10 minutes after removing it from the oven. Invert onto a cooling rack and cool completely before starting the glaze. The glaze was made from Valrhona Amatika, which is a vegan chocolate. The glaze is the same glaze I used for my sachertorte recipe. I made a sugar syrup then poured that into the chocolate. I then mixed it until it cools and thickens slightly then drizzle on top of cake. Let it set slightly before finishing with the chocolate shavings. Then you’re ready to serve.

If you make this recipe, tag me using @mrs.fancypants.recipes on social media or use #mrsfancypantsrecipes or #mrsfancypantsbakes so I can see them! If you have other questions or comments, please feel free to use the comments section below. Now time to get your whisk out and give this recipe a try! I promise you won’t regret it. Happy baking!!!

 
Difficulty: Medium

Best Chocolate Cake

Makes 1 x 10-cup bundt

or

1 x 33x23cm brownie pan

Ingredients

    For the cake:
  • For the glaze and decoration

Instructions

0/8 Instructions
  • Preheat oven to 170C. Mix the milk with vinegar and let stand for 15 minutes. Grease bundt pan with oil and dust with cocoa powder. If not using a bundt, see notes.
  • In a large bowl, sift together flour, cocoa powder, baking powder and bi-carb soda. Mix in salt and sugar. Make a well in the center.
  • Add the eggs, milk, oil and vanilla and mix until smooth. Whisk in the boiling coffee. The batter will be runny, so don't worry.
  • Pour the batter in the pan and bake for 65 minutes or until a skewer inserted comes out clean. Remove from oven and cover with a plate. Leave for 10 minutes.
  • Remove plate and gently pull the sides of the cake away from the pan. Invert the cake onto a cooling rack and it should slide out easily. Cool completely.
  • Make the glaze only when your cake has cooled. In a small sauce pan, mix together water and sugar. Bring to the boil, and keep boiling for 3 minutes. Take off from heat and let cool until the bubbling subsides.
  • Slowly pour the sugar syrup on the chocolate and mix with a wooden spoon until glossy. Keep stirring until the mix thickens and cools slightly. If it becomes too thick add 1 teaspoon of hot water at a time until your desired consistency.
  • Drizzle the glaze on top of the cake and leave until the glaze stops dripping. Sprinkle with shaved chocolate and serve.

Notes

  1. If you have no dietary restrictions, you can use buttermilk and omit the vinegar.
  2. Any vinegar will do.
  3. 2 chickpea eggs is 2 tbsp chickpea flour mixed with 2 tbsp water. If you're not after a vegan recipe, you can use 2 large eggs instead.
  4. Any oil will do, just keep in mind that strong flavored oils will lend a hint of its flavor to the cake.
  5. If you're using a rectangular pan, simply grease the pan and line with baking paper. Bake for 35 minutes or until a skewer comes out clean.

I was born in Manila, and as a chef, I wish I could say that I cook amazing Filipino food, but I’ve mostly cooked Western food my entire life. One thing I could say is, I have tried to incorporate Filipino flavours especially in baking. Although sometimes, that feels a little bit like taking the easy way out. I am proud of my heritage, and maybe someday I would go back and learn more about native ingredients and incorporate them in my cooking as well.

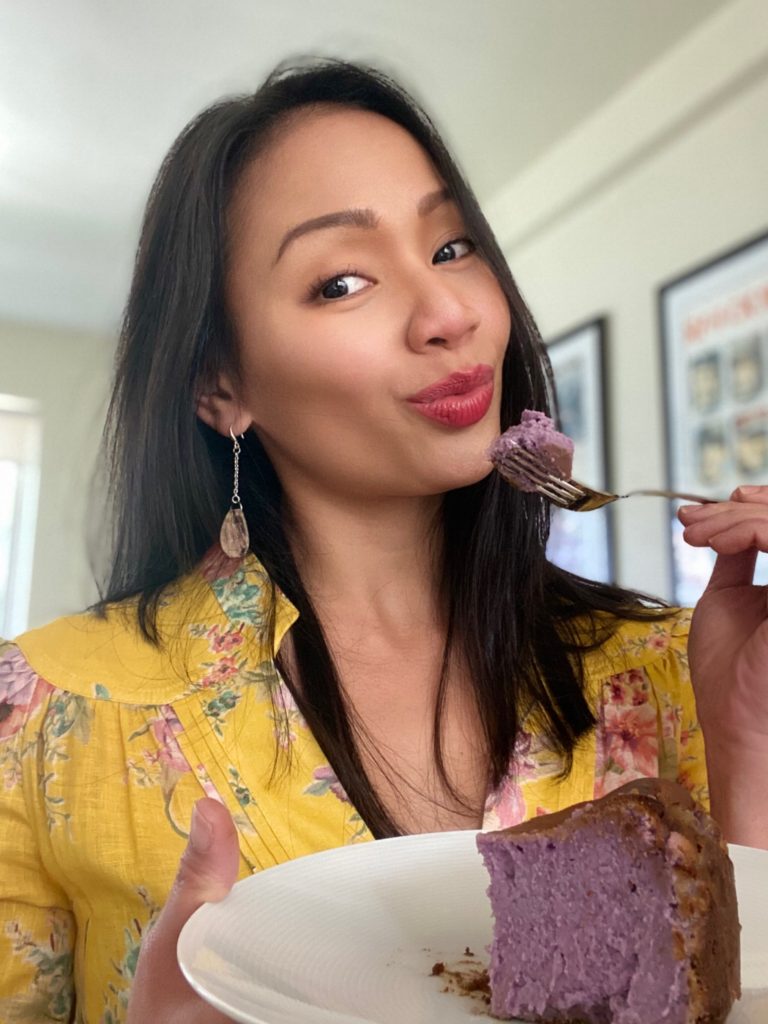
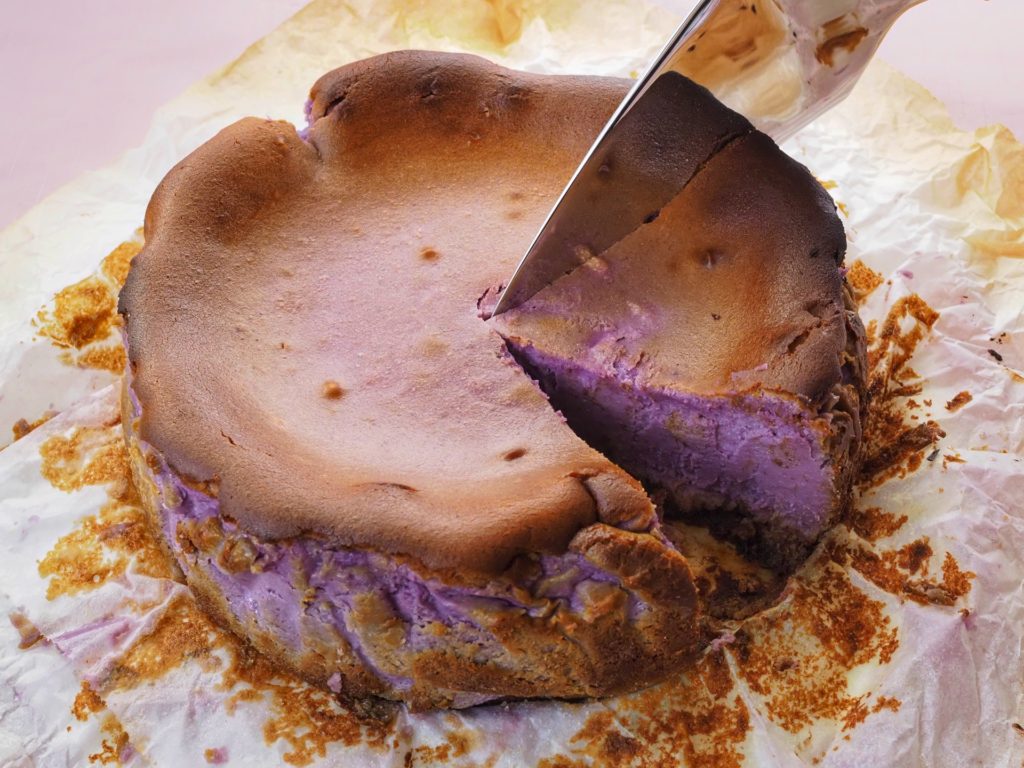
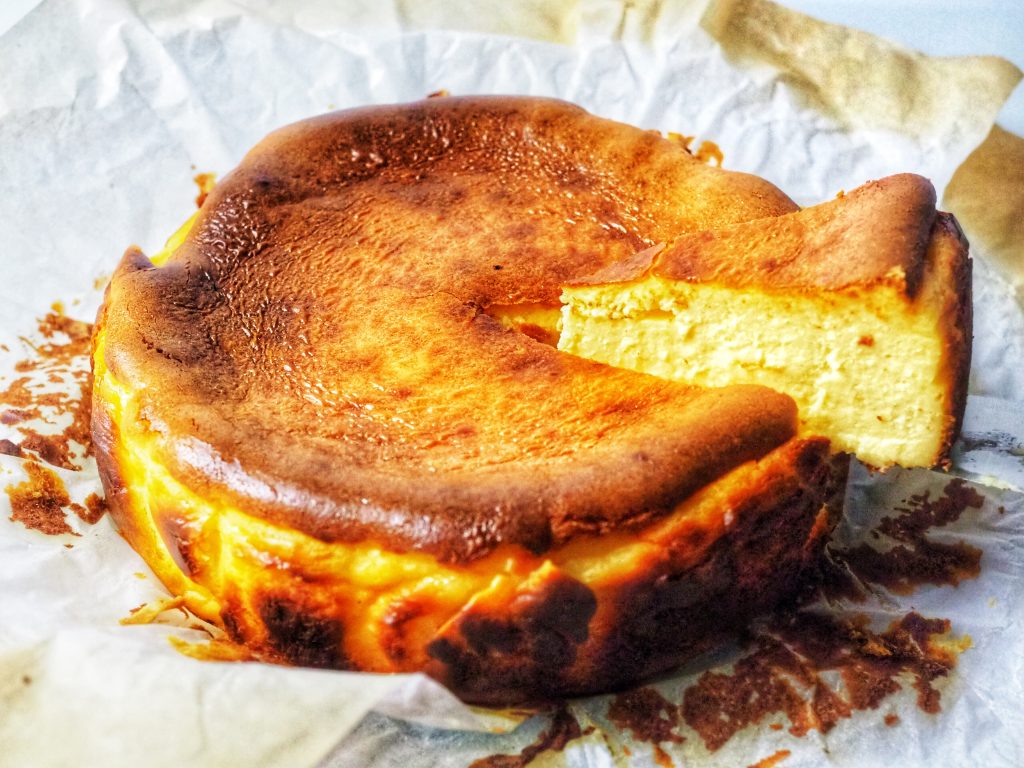
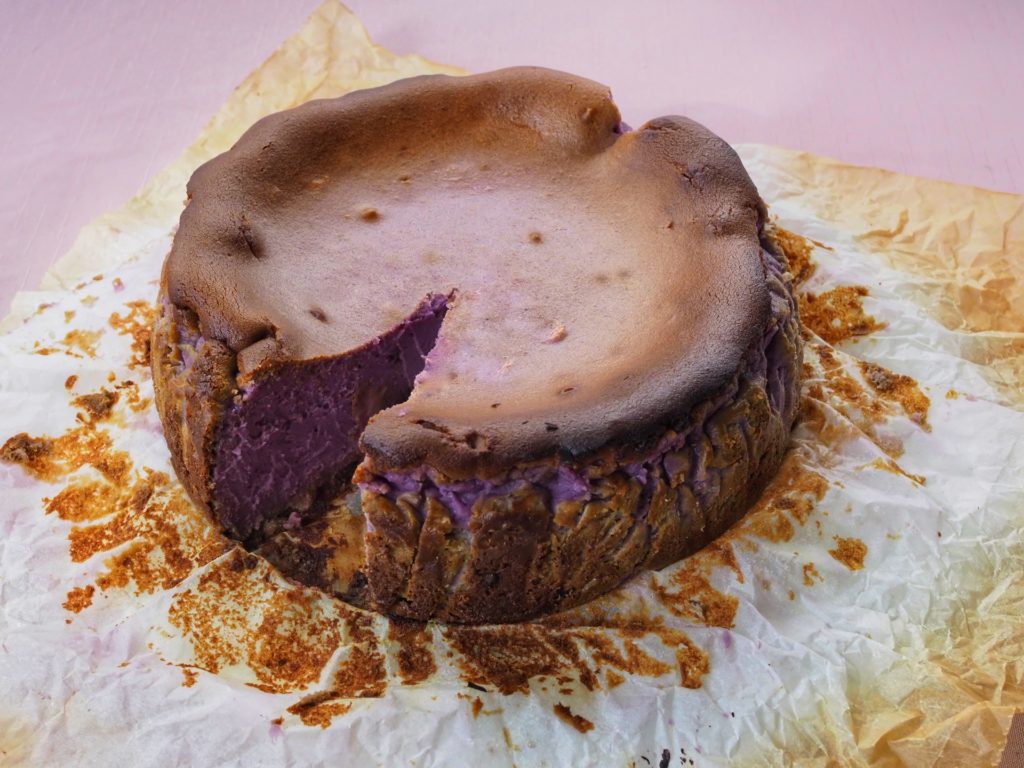
Here, I’m sharing with you my ube cheesecake recipe La Viña style. What is it? You know how a crustless, burnt cheesecake have been trending for a few years? One that is more commonly know as Basque Cheesecake? Well, this is the ube version, with homemade ube jam as well. I call it La Viña cheesecake because that’s the name of the restaurant in San Sebastian where people flock to have a taste of the original version. It is a crustless cheesecake that is caramelised outside and soft in the middle.


View this post on Instagram


A post shared by Joanne | Mrs.FancyPants (@mrs.fancypants.recipes)

If you want the original recipe as per the video above, I published my easy to follow recipe here. Just remember whichever version you are making, start with room temperature ingredients so the batter incorporates quickly and you will not get a lumps. The idea is to get a caramelised outside that serves as your crust, so this entails baking at a very high temperature. I preheat my oven to 220C and line a 23cm or 9in springform with baking paper and ensure there is an overhang. The overhang protects the cheesecake from getting too burnt too fast, and it also supports the cheesecake when it puffs up, which prevents overflowing.

Now with the ube version, it is also straightforward to make with the addition of making your own ube jam. Why would you want to make an ube version? Because my recipe of this is absolutely delicious and the natural purple colour of ube gives this (and basically most ube desserts) a really pretty purple hue. Ube jam is basically cooked ube, pureed and mixed with milk and sugar and cooked until its thick like peanut butter or Nutella. Let your ube jam cool to room temperature before using it for the cheesecake. I use all the ube jam yield in this recipe, but feel free to double the batch because it is really nice on warm bread rolls with a touch of butter.

To make the cheesecake, combine the ube jam, cream cheese, eggs, cream and sugar in a large bowl. Mix until smooth then sift over flour and fold in until incorporated. Pour the batter in your lined springform and bake for 1 hour. The cheesecake will still be jiggly in the centre. Remove from oven and let cool on a rack for at least 2 hours. Serve at room temperature to retain that soft, custardy texture. If you have leftovers, you can eat it as is or reheat in the microwave for 10sec per slice to get that softness back.

The detailed recipe is below for you to try. I would love to see your finished products, so tag me on your social media posts @mrs.fancypants.recipes or use #mrsfancypantsrecipes. If you have any questions, feel free to comment below. ???? Happy baking!

 
Difficulty: Easy

Ube Cheesecake à la La Viña

Makes 1 x 23cm springform

My ube variation of the famed Basque burnt cheesecake!

Ingredients

    For the ube jam (halaya)
  • For the cheesecake

Instructions

0/7 Instructions
    First make the ube jam:
  • Place ube and water in a small saucepan. Bring to a boil over medium heat, lower heat to a simmer, and cover. Simmer until ube most of the water has evaporated.
  • Remove from the pan and transfer to a large bowl. Use a masher to finely mash the ube, or if using grated ube, this step shouldn't be necessary. Push through a fine sieve for a really smooth texture, optional.
  • Mix together mashed ube, milk, and sugar then transfer to a frying pan. Cook over low heat, stirring constantly to avoid burning for 30 minutes uncovered. Add butter cubes and continue cooking until the ube has a deep purple colour and very thick consistency similar to peanut butter spread. Cool down to room temperature.
  • Make the cheesecake
  • Start with room temperature ingredients. Preheat oven to 220C. Line a 9” springform with baking paper, make sure you have an overhang of at least 5cm.
  • Mix cream cheese, ube, sugar and cream. Add eggs one by one, fully incorporating after each addition. Sift flour into the batter and mix just until the flour is incorporated. Do not over mix.
  • Pour into the pan and bake for 60 minutes. The top should be caramelised but cheesecake should be jiggly.
  • Take out of the oven and rest for at least 2 hours at room temperature. Serve warm, consume immediately. (see notes if making ahead)

Notes

  1. Note on UBE: This can be purchased from Asian/Filipino stores. If fresh ube is unavailable, you can use grated ube.
  2. Note on milk: I use jersey cow milk because there's no carabao milk available in Australia. But you can use normal full cream milk from the supermarket. Light or skim milk doesn't give the same richness to the ube jam.
  3. For leftovers: If you have leftovers, you can eat it as is or reheat in the microwave for 10sec per slice to get that softness back.
  4. Update on sweetness: To make the cheesecake less sweet, you can reduce the sugar in the ube jam by 50g.

These days so much of our way of life is influenced by what we see on social media. Take food trends for instance, bakeries get a cult following from people posting their products and rating it as “lit” or whatever the new word for cool is. I’m sure the younger generation can’t imagine what life must have been life before Facebook or Instagram or Tik Tok, but the recipe I’m sharing with you today pre-dates social media. It became famous all over the world that they kept the recipe in a vault–or so the story goes.

My recipe has been adapted from the recipe published on Hotel Sacher’s website, Hotel Sacher is a world famous hotel in Austria. It was built by Eduard Sacher, the son of pastry chef Franz Sacher who developed the cake recipe. The cake is made of a generous helping of apricot jam sandwiched between two sponge cakes and covered with a shiny chocolate glaze. There are plenty of recipes out there, most of them have almond meal, but I’m a stickler for tradition, so I went straight to the source and worked on that recipe.

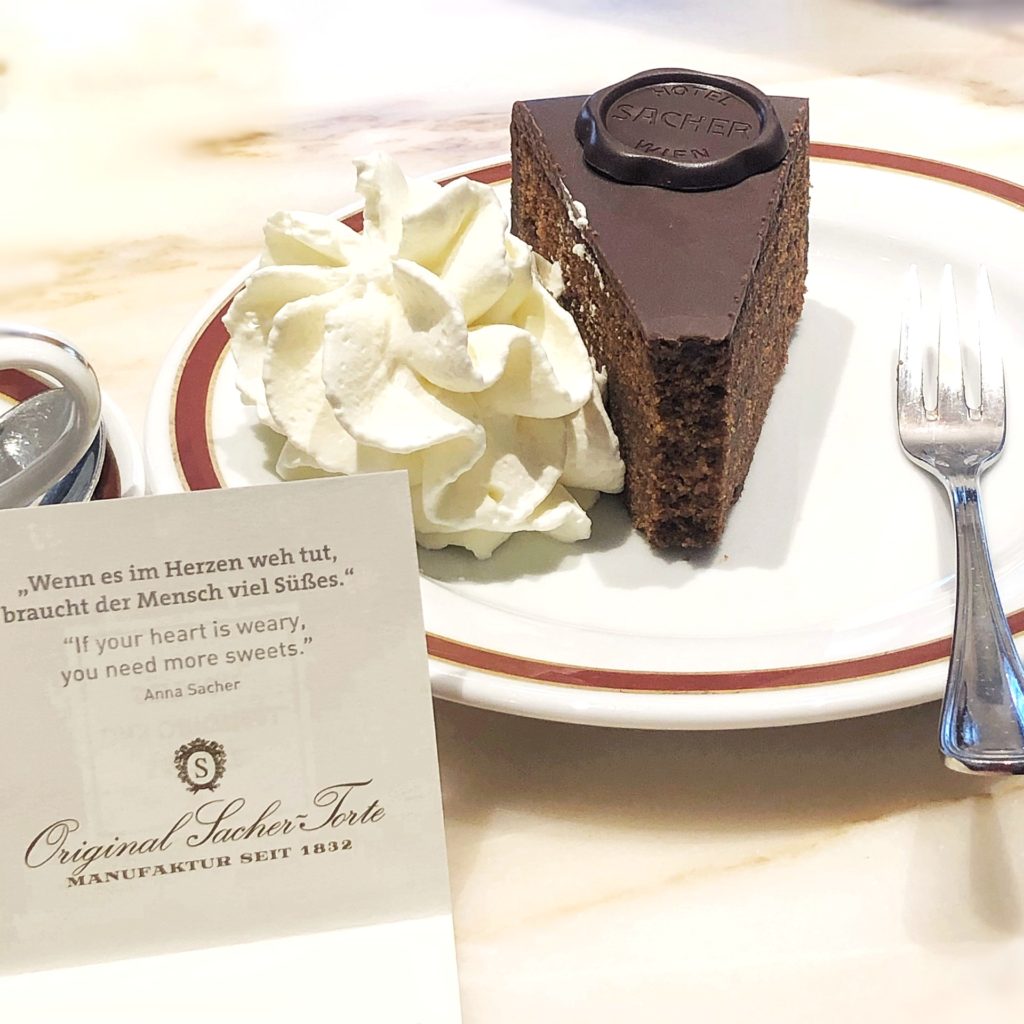
I tried the sachertorte at Hotel Sacher in Salzburg. Pictured above is Mirabell garden in Salzburg.

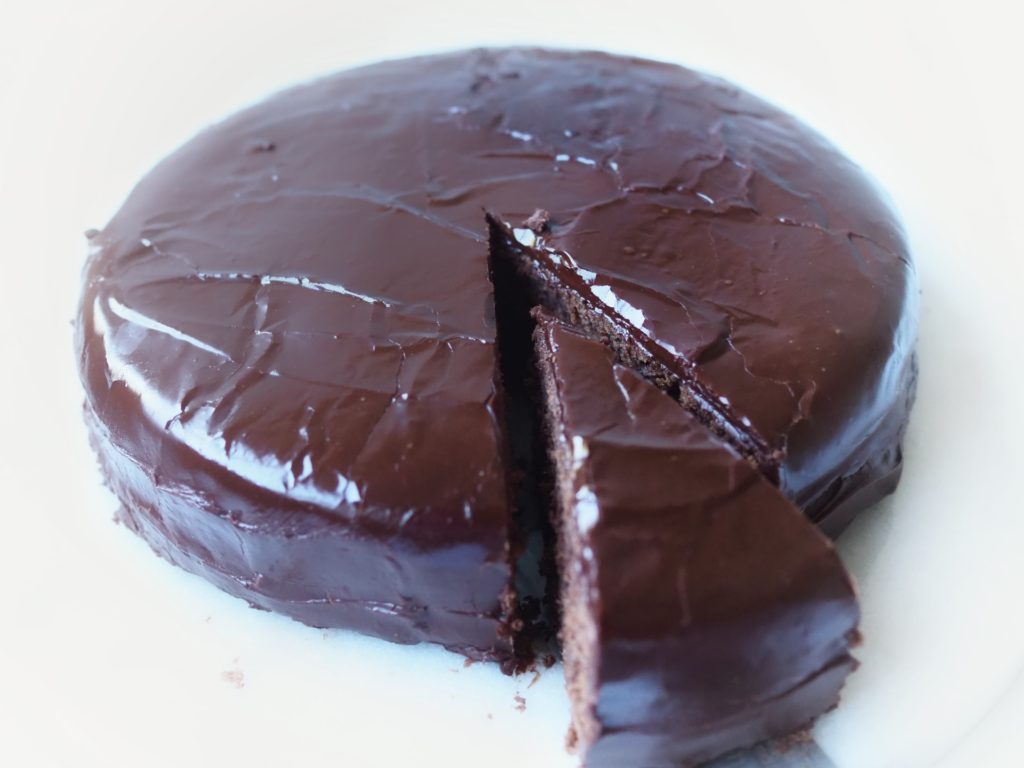
The sponge cake is a chocolate genoise, meaning the recipe does not use a chemical leavener. Egg whites are used to give the cake height, so it’s important to gently fold them in. The generous apricot jam helps moisten this otherwise dry chocolate cake, and the chocolate glaze also protects it from further drying out. A word of caution, cool down the cake before even starting the glaze. The glaze sets quickly and will form a skin if left out too long, so it’s best to make it when the cake is ready to be glazed. You don’t need fancy piping techniques, just an offset spatula. Oh and try not to move the cake until the glaze is completely set, otherwise you will get cracks, just like mine below. The glaze should set in a couple of hours in room temperature or an hour if chilled.

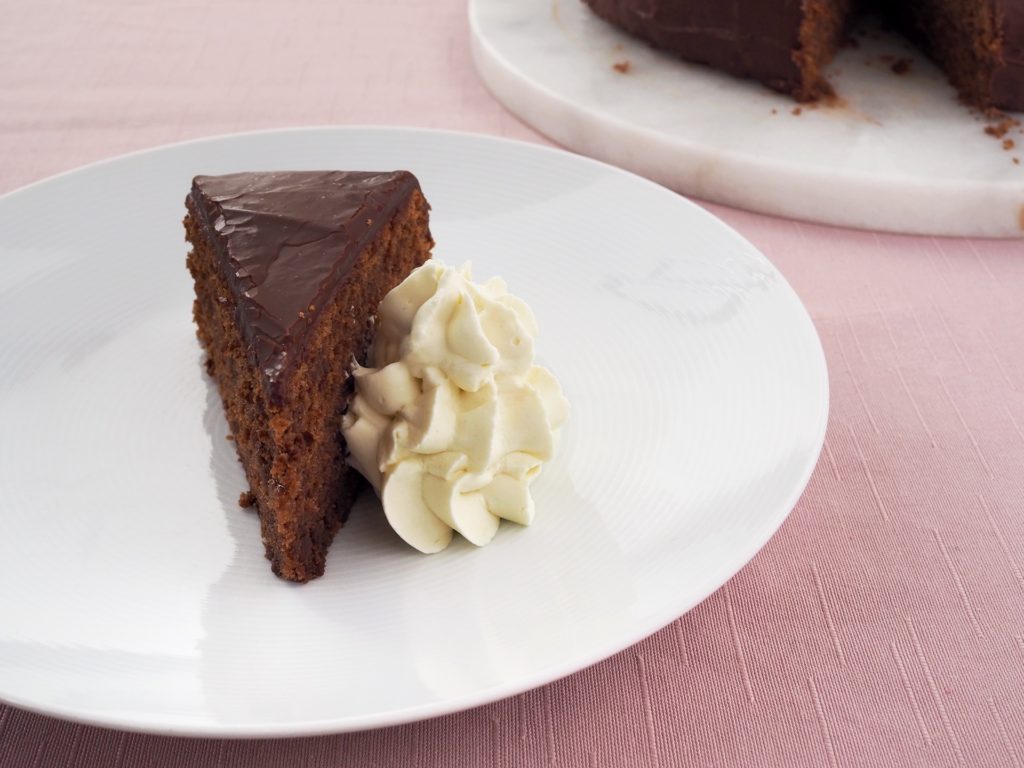
Again, this is a very basic recipe, quite easy to follow and make at home, so please, if you are just starting off baking cakes, give this one a try. The cake is traditionally served with a big helping of whipped cream, but my recipe calls for white chocolate chantilly cream. However, vanilla ice cream also pairs well with this cake. Or just have it as is with coffee is great too.


View this post on Instagram


A post shared by Joanne | Mrs.FancyPants (@mrs.fancypants.recipes)

Finally, like I said, if you’re looking for a super moist chocolate cake, this is not the recipe for it. But this is delicious and easy to make with no frosting involved. Below is a photo of the original sachertorte that I had in Salzburg, and next to it is my homemade version, finished in 2 hours. I enjoy it by itself with coffee, and I didn’t find it too dry at all. Let me know what you think if you give this recipe a try. If you post photos, feel free to use #mrsfancypantsrecipes or tag @mrs.fancypants.recipes, this helps me see your creations and gives me feedback on what recipes I should post. If you also have any questions, comment below and I’ll make sure to respond. That’s it for my sachertorte recipe. Again, if you’re after a simple, delicious and quick cake recipe, don’t wait any longer. Preheat your ovens and bake away! Happy baking!

 
Difficulty: Easy

Sachertorte

Makes 1 x 24cm cake

Ingredients

    For the cake:
  • For the glaze:
  • For the white chocolate cream

Instructions

0/12 Instructions
  • Place milk, chocolate and sugar in a small heatproof bowl and place on top of a pot with simmering water, making sure the water doesn't touch the bottom your bowl. Once chocolate is melted, take the bowl of the heat then mix in the cream. Chill for at least 2 hours.
  • Preheat oven to 170C. Greases and line a 24cm cake pan.
  • In a medium bowl, make a meringue by whisking the egg whites and sugar together on medium until glossy. Set aside.
  • In the bowl of your stand mixer, cream butter and sugar until fluffy. Add yolks one at a time mixing after each addition. Add warm melted chocolate. Fold in flour then fold in meringue.
  • Pour batter into the cake pan and bake for 45 minutes or until a toothpick comes out with just a few crumbs.
  • Remove from oven and let cool completely. Remove from the pan and cut in half so that you have a sandwich. Place the halves on a cooling rack, cut part facing up.
  • Warm the apricot jam until smooth. Using a palette knife or brush, spread the jam onto the cut side of each layer of the cake. Put the cake back together like before, the jam should be in between the cake sandwiches. Place the cake on a rack and put a tray underneath the rack. Set aside.
  • In a small sauce pan, mix together water and sugar. Bring to the boil, and keep boiling for 5 minutes. Take off from heat and let cool for 2 minutes until the bubbling subsides.
  • Slowly pour the sugar syrup on the chocolate and mix with a wooden spoon until glossy. Keep stirring until the mix thickens and cools slightly. If it becomes too thick just use an offset spatula to spread it.
  • Cover the whole cake with the glaze, use an offset spatula if the glaze is too thick. Leave the cake to set until the chocolate glaze is hard. If you move or touch the cake at this stage it will crack. You can place the rack in the fridge of you want it to set faster.
  • When you're ready to serve, whisk the white chocolate cream until stiff. Place in a piping bag with a large star nozzle.
  • Dip the blade of a knife in hot water and cut cake slices. Pipe the white chocolate cream on the side.