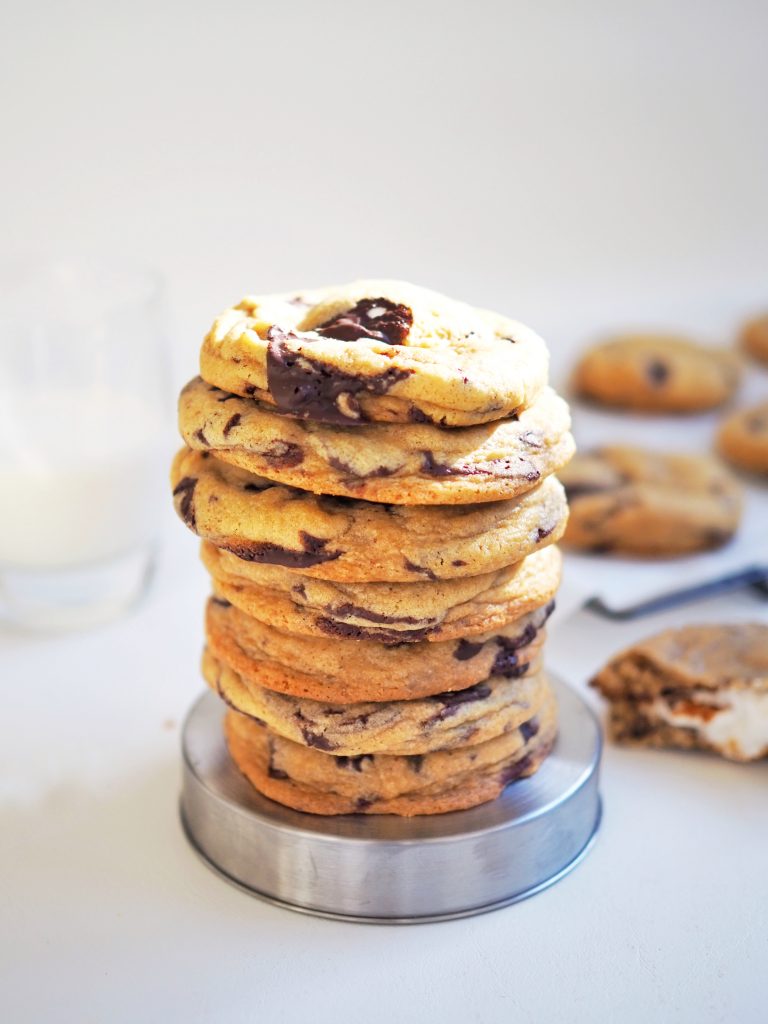
These are my favorite cookies ever, the chunky chocolate in every bite and the soft vanilla dough is just divine. the dough can be rolled to make a slab or portioned into 12 balls. This is the same cookie dough base as my M&M cookies but I use chopped dark baking chocolate like Valrhona Guanaja 70% or something similar. If you have kids, you might want to use semi-sweet or milk chocolate just so it’s not too bitter. I find using white chocolate makes this too sweet for my liking, but you can also give that a try.

The cookie dough can be put together in less than 15 minutes, then chilling time is an 1 hour plus baking time of 12-15 minutes. If you’ve never made cookies before, watch the short video below as a guide. I find that a lot of beginners need a little bit of guidance when it comes to cookie baking, so make sure you follow the recipe to the T if you’re making this for the first time. Good luck & happy baking!

https://www.instagram.com/tv/CJFpoR-BkEg/?utm_source=ig_web_copy_link
 
Difficulty: Easy Prep Time: 15 Mins Cook Time: 18 Mins Total Time: 33 Mins

Chunky Chocolate Cookies

Makes 12

  I like to use chunks of dark chocolate for this recipe, and I prefer Valrhona Guanaja 70% but it’s not accessible to everyone. You can use any good quality chocolate, and if you have kids, use semi-sweet chocolate instead to give it a tad more sweetness.    

Ingredients

Instructions

0/5 Instructions
  • In the bowl of your stand mixer, cream butter & sugar together on high until light and fluffy, about 4 minutes.
  • Meanwhile, in a medium bowl, sift together dry ingredients.
  • Add egg and vanilla, mix until incorporated then bring the mixer down to low. Gradually spoon the dry ingredients into the batter, then add the chocolate chunks. Cover the dough and chill for at least 1 hour up to 1 day. (See notes)
  • Preheat oven to 170C. Divide the dough into 12 equal size balls (around 65-70g if you’re using a scale). Roll each portion into a ball then place cookies on a tray lined with baking paper.
  • Bake cookies at 170C for 15-18 mins. The edges will be light brown and the centre will be soft, pop out of the oven and let cool for 5 minutes then transfer to a cooling rack and cool down completely in the fridge. (See notes)

Notes

  1. One reason for cookies spreading is if you over-cream your cookies. On the video above, you will be able to see the process clearly.
  2. This dough needs to be chilled otherwise the cookies will spread. You can make these cookies ahead and chill for 1 day. If you leave it in the fridge for more than one day, the cookies will not rise in the oven.
  3. This recipe is also freezer friendly. To freeze, follow the recipe up to stuffing the cookies with marshmallows then pop the balls on a plate lined with baking paper and freeze for 1 hour. Once the balls are frozen on the outside, they can be placed in freezer bags.
  4. To bake cookie dough from the freezer, take the dough out and place them on a tray line with baking paper, then preheat oven to 170C. The preheating time allows the cookie dough to thaw a little. When the oven is ready bake the cookies for 14 mins. Then cool as instructed.
  5. I like to let the cookies cool down and set in the fridge instead of room temperature. It takes less time and the cookies retain their softness in the centre.


It’s the week of Christmas and everyone is rushing around trying to get ready. Kids are on school holidays and parents are trying to find time between them and wrapping presents plus heading to the supermarkets to shop for their Christmas menus. Traffic is heavy and queues are long, but if you are super organised and aren’t running around like a headless chicken, you might actually have a few minutes to spare to put together a batch of cookies for the kids and Santa on Christmas Eve!

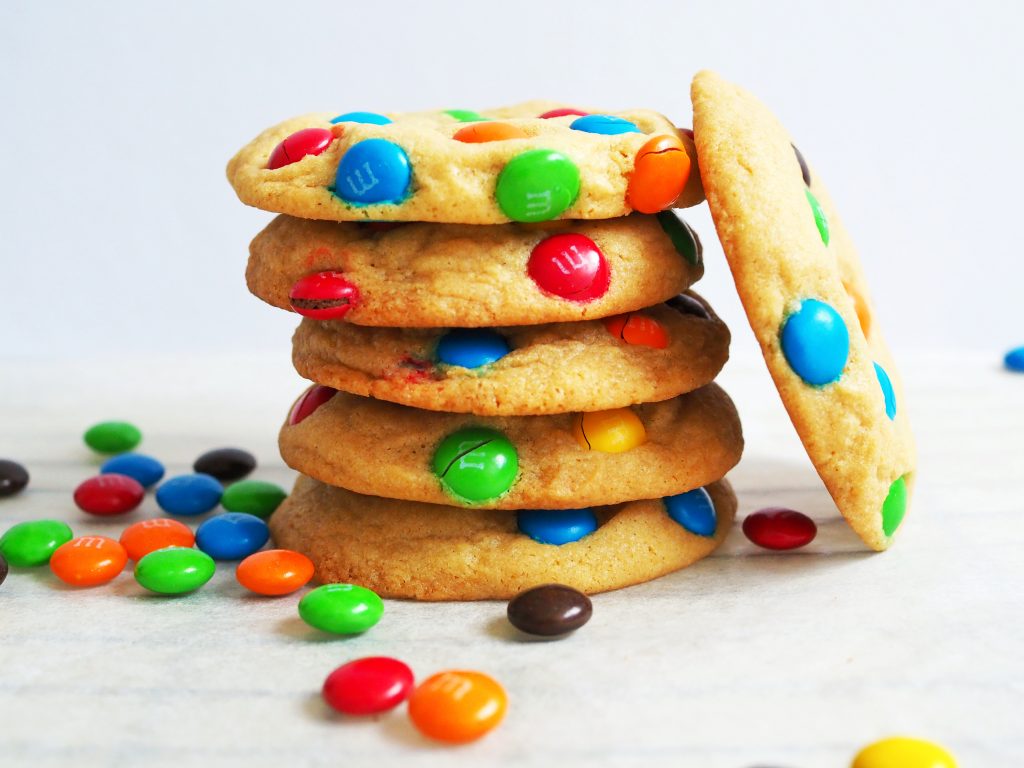
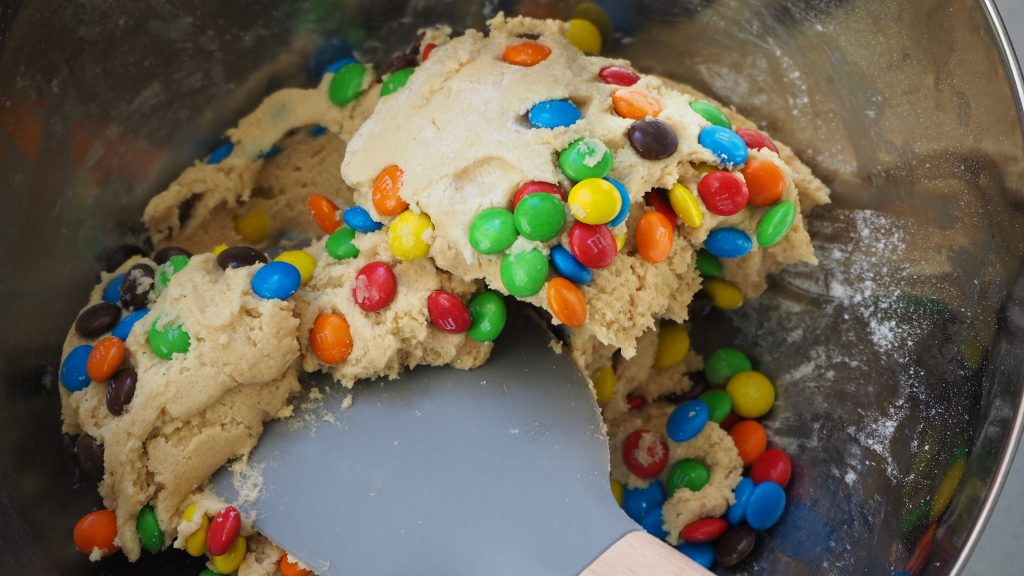
I have plenty of great, tried and tested cookie recipes in my collection but today, I’m sharing the colourful m&m cookie recipe. It’s perfect for Christmas because it looks so festive with the bright colours, plus everybody loves m&ms and they can be bought anywhere in the world. You can use the minis or the regular m&ms or mix them together, just make sure you use the same amount stated on the recipe. Don’t forget the glass of milk for Santa!

Watch how easy this dough is put together, if you’re new at baking cookies, it’s helpful to see what light and fluffy is like when creaming butter and sugar. Have fun and let me know how you go by tagging me on Instagram or Facebook or via the comment section below. Hope you have a wonderful Christmas and a much better 2021!!!

https://www.instagram.com/tv/CJFpoR-BkEg/?utm_source=ig_web_copy_link

 
Difficulty: Medium

M&M Cookies

Makes 1 dozen cookies

Ingredients

Instructions

0/4 Instructions
  • In the bowl of your stand mixer, cream butter & sugar together on high until light and fluffy, about 4 minutes. Meanwhile, in a medium bowl, sift together dry ingredients.
  • Add egg and vanilla, mix until incorporated then bring the mixer down to low. Gradually spoon the dry ingredients into the batter, then add 3/4 of the m&ms and reserve the rest. Cover the dough and chill for at least 1 hour up to 1 day. (See notes)
  • Preheat oven to 170C. Divide the dough into 12 equal size balls (around 65-70g if you’re using a scale). Roll each portion into a ball then place cookies on a tray lined with baking paper. Press the rest of the m&ms on the cookie dough.
  • Bake cookies at 170C for 15-18 mins. The edges will be light brown and the centre will be soft, pop out of the oven and let cool for 5 minutes then transfer to a cooling rack and cool down completely in the fridge. (See notes)

Notes

  1. One reason for cookies spreading is if you over-cream your cookies. On the video above, you will be able to see the process clearly.
  2. This dough needs to be chilled otherwise the cookies will spread. You can make these cookies ahead and chill for 1 day. If you leave it in the fridge for more than one day, the cookies will not rise in the oven.
  3. This recipe is also freezer friendly. To freeze, follow the recipe up to stuffing the cookies with marshmallows then pop the balls on a plate lined with baking paper and freeze for 1 hour. Once the balls are frozen on the outside, they can be placed in freezer bags.
  4. To bake cookie dough from the freezer, take the dough out and place them on a tray line with baking paper, then preheat oven to 170C. The preheating time allows the cookie dough to thaw a little. When the oven is ready bake the cookies for 14 mins. Then cool as instructed.
  5. I like to let the cookies cool down and set in the fridge instead of room temperature. It takes less time and the cookies retain their softness in the centre.
 

Oh I love holiday posts, and I’m lucky that I’m in Sydney so I feel like I have more time to post my holiday baking because even if it’s now the 1st of November here, it’s still Halloween in the US! So bookmark this for next year, guys, because these are so good, you’s want to individually wrap them for trick or treat!

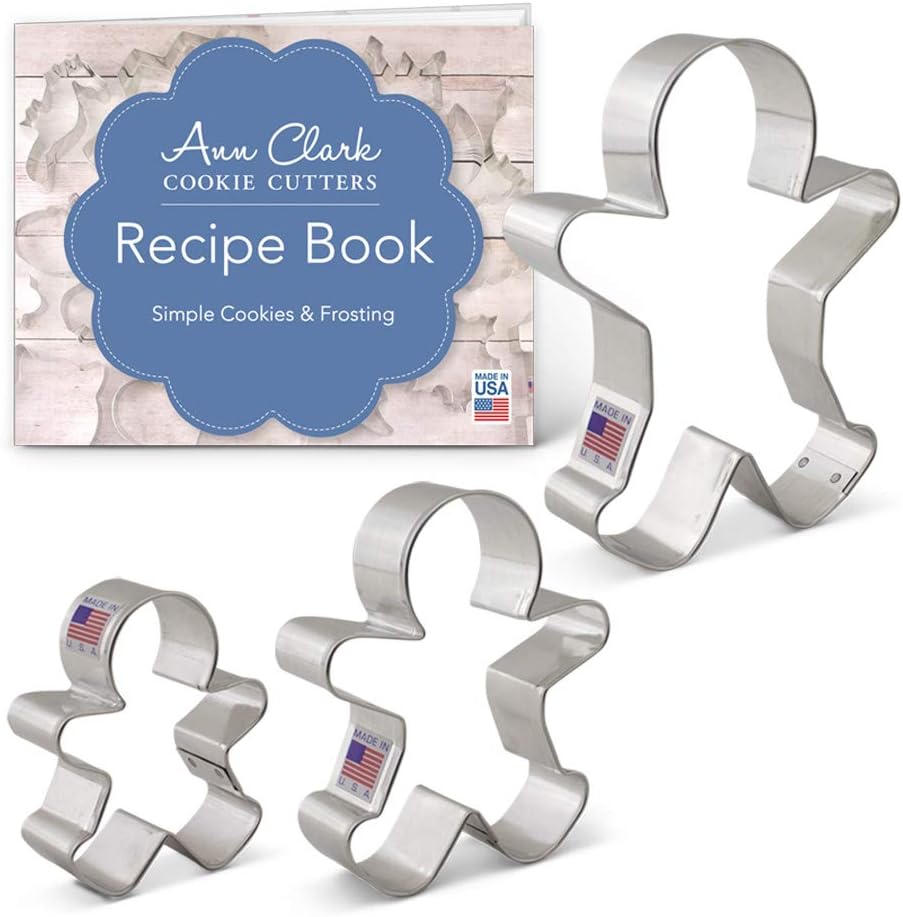
When you make these you’ll need your gingerbread man cutout. I like getting multi uses out of cookie cutters, to get the most out of my tools, and so I try to come up with creative things to use them for. Besides, Christmas is just around the corner, and it’s good to get these cutters out now.

Click on the photos to shop for the products. Most products ship internationally.

Mrs.Fancypants earns a small commission from affiliate links, when you buy the products above. If you’re in Australia, feel free to check the availability on advertised sites.

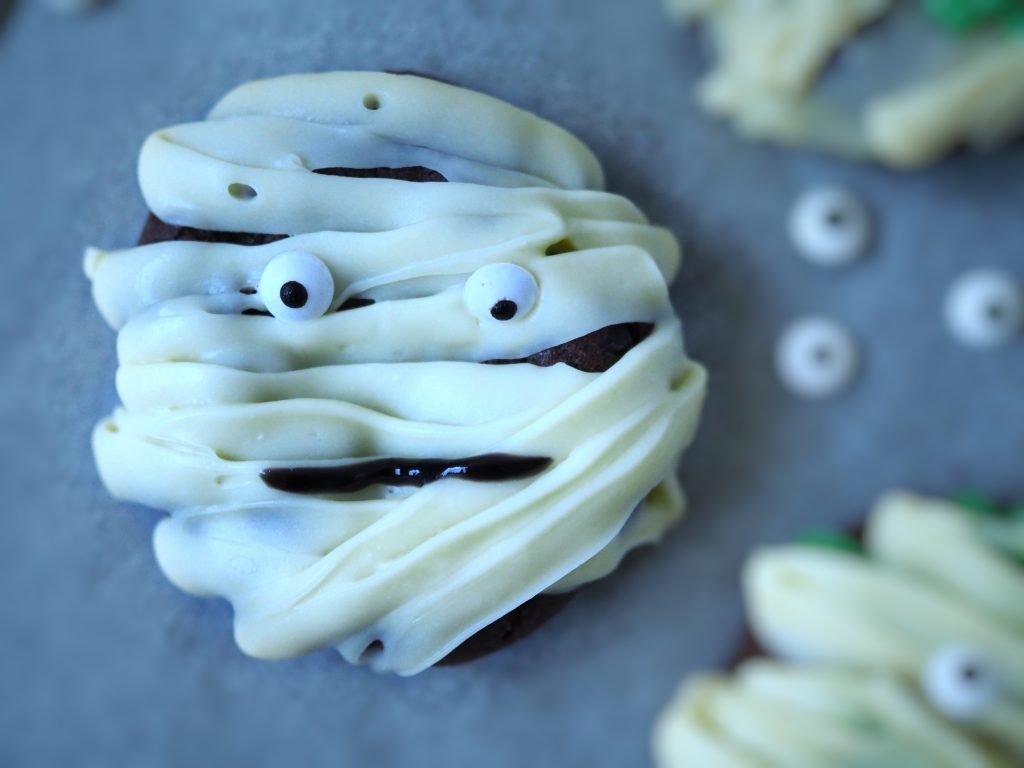
I was inspired to make these cookies because I was looking at Halloween movies to watch and saw The Mummy series, and remembered how we used to love the original version as kids. We found Brandon Fraser so funny, too bad they stuffed up the remake.

The Mummy isn’t a horror movie though, so I quickly passed it and settled on Insidious: The Final Key. Now this one, it’s definitely spine tingling. Or at least for screwy-cats like me. I have a love-hate relationship with horror movies, I’m the person who will shriek in the cinema and cover her eyes half the time. How about you? Do you like horror movies? Which ones do you like best?

I get a lot of questions about stand mixers, and these are my recommendations. It comes with a caveat though, I only recommend you get one if you bake a lot because they are not cheap. Otherwise, a hand mixer is the more practical option.

Click on the photos to shop for the products. Most products ship internationally.

Mrs.Fancypants earns a small commission from affiliate links, when you buy the products above. If you’re in Australia, feel free to check the availability on advertised sites.

Again, bookmark this for next year, and also get your Gingerbread man cutouts ready for Christmas! Because I have plenty of treat recipe coming your way. Happy Halloween! Don’t get spooked!

 
Difficulty: Easy

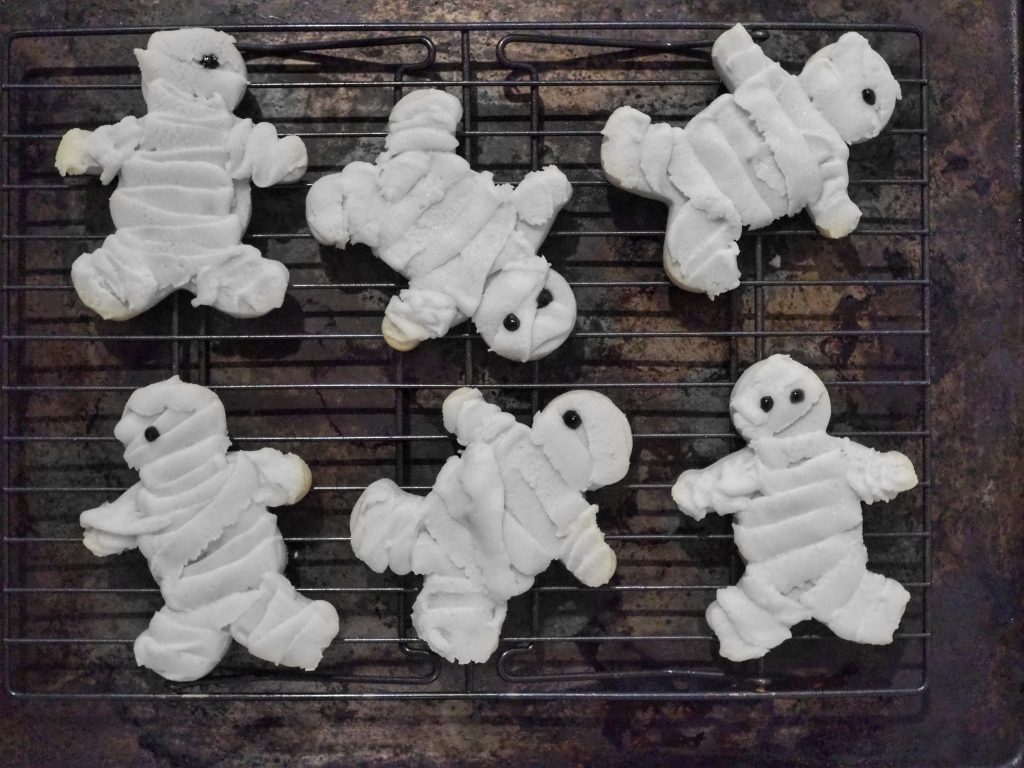
Mummified Sugar Cookies

Makes 18-20 cookies

Prep Time: 20 mins

Chill Time: 1 hour

Bake time: 12-15 minutes

Ingredients

    For the sugar cookies:
  • For the ganache:

Instructions

0/6 Instructions
  • Start by making the ganache for mummy wrapping. Place white chocolate, cream, and butter in a medium microwaveable bowl and melt together for 30 second increments. Stir after each 30 seconds so as to prevent the chocolate from seizing. Set aside to cool down.
  • Make the cookie dough: In the bowl of your stand mixer, cream butter & sugar together on high until light and fluffy, about 4 minutes. Meanwhile, in a medium bowl, sift together dry ingredients.
  • Add egg and vanilla, turn mixer down then add milk. Gradually spoon the dry ingredients into the batter. Divide into 2 and flatten into discs to make rolling easier later. Cover the dough and chill for at least 1 hour or up to 1 day.
  • Preheat oven to 170C. Sprinkle flour on your work bench then roll dough out to 3-5mm thickness. Using a gingerbread man cut out, cut out 18-20 cookies. Save the trimmings then roll them altogether so the dough doesn't get too floury.
  • Place cookie on a baking tray lined with baking paper and bake for 12-15 minutes or until the sides are light brown and cookie feels set on top but still soft. Cool down for 10 minutes then transfer to a cooling rack to cool down completely.
  • To assemble: Place the ganache in a piping bag. Pipe the ganache on the cookie to make it look like mummy wrapping. Then using your black writing gel, dot the eyes/eye of the mummies. Leave to set in the fridge for 1 hour then serve.

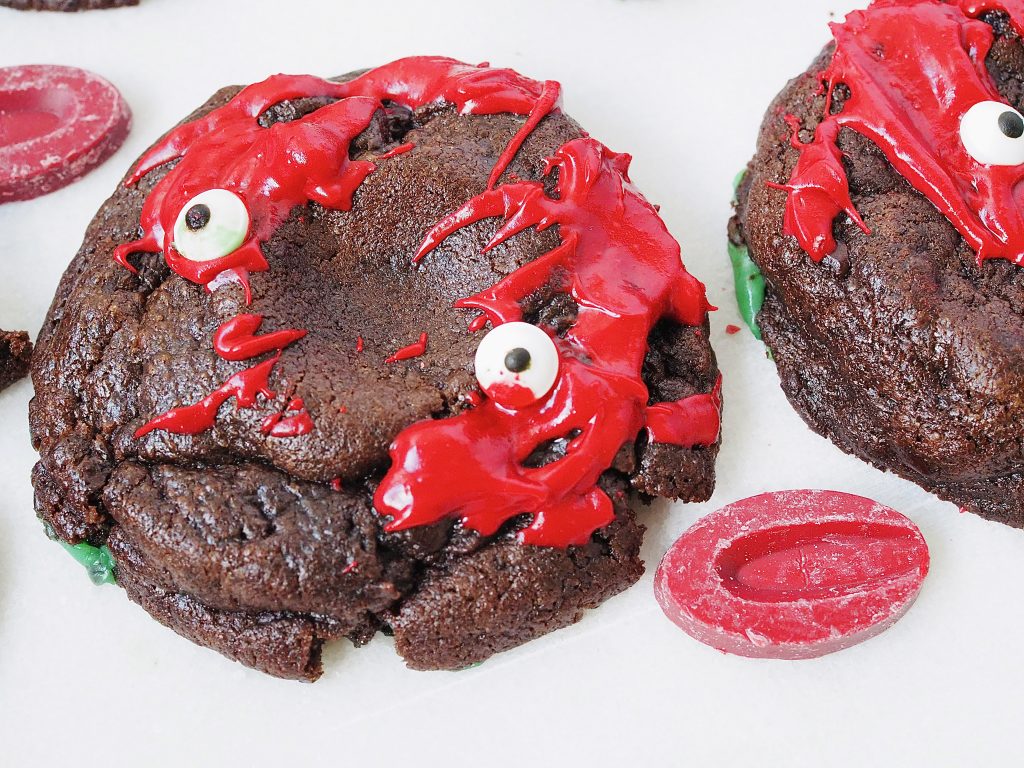
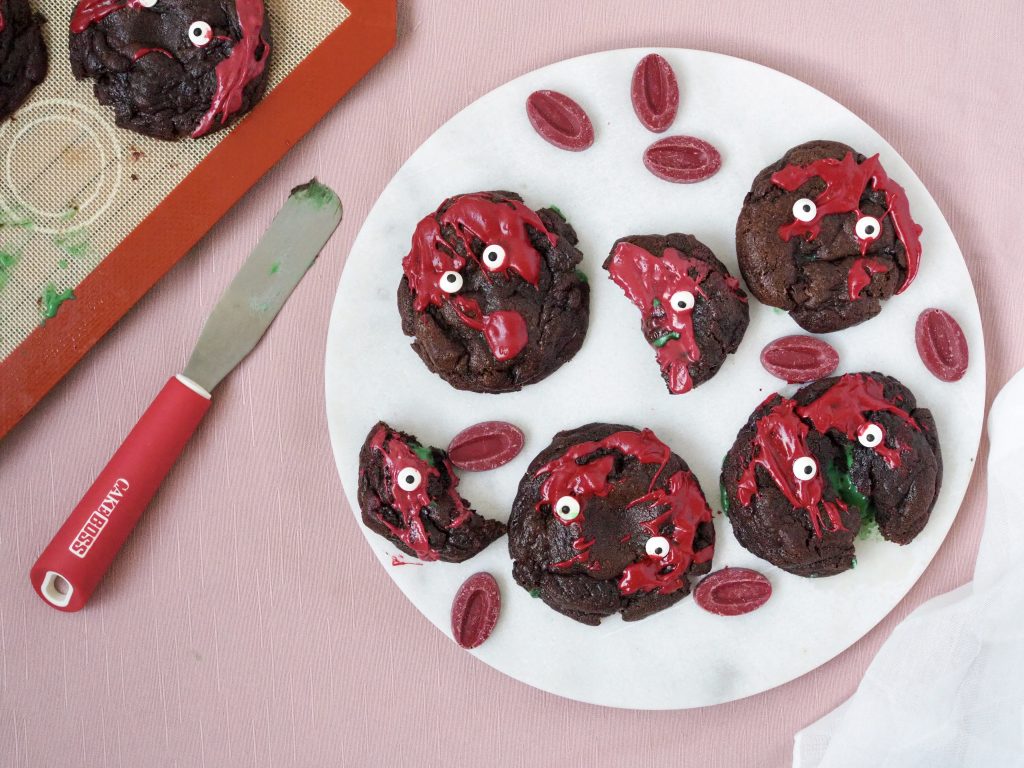
I wasn’t going to do a Halloween post because there’s so much going on. However, it was just too tempting not to post! So I decided to mummify my cookie recipes and below you’ll find step-by-step instructions on how to make my monster horror cookies. They are yummy, and looks bloody and is filled with green goo!

What are you doing this halloween??? My favorite thing to do is to watch spooky movies. When we were growing up my sisters and I would watch the “Magandang Gabi, Bayan” Halloween special. Every year! It’s a weekly Filipino magazine show aired on Saturdays and they have the best Halloween specials because of the spooky ghost stories. Tell me about your halloween traditions.

Also, if you can get your hands on Valrhona Inspiration Chocolate, do try them. They are the bomb! There are fruit flavours that you can treat like chocolate. It totally blew my mind when I first tried it. I used raspberry for the blood and I only had to add a touch of red gel colour in the end. I hope you can try it too!

The coffee intensifies the chocolate flavor and the white chocolate gives it a good balance of sweetness, but I would love to know your thoughts, so please, if you try making these tomorrow, share your comments below, I would love to hear them. Also post and tag on Instagram for Halloween tomorrow!!! HAPPY HALLOWEEN EVERYONE! Have a spooky time!

GET 10% OFF APPLE COMPUTERS UNTIL 4 NOV!!!

I get a lot of questions about stand mixers, and these are my recommendations. It comes with a caveat though, I only recommend you get one if you bake a lot because they are not cheap. Otherwise, a hand mixer is the more practical option.

Click on the photos to shop for the products. Most products ship internationally.

Mrs.Fancypants earns a small commission from affiliate links, when you buy the products above. If you’re in Australia, feel free to check the availability on advertised sites.

 
Difficulty: Easy

Halloween Horror Cookies

Makes 16 cookies


Ingredients

    For the Green Goo and Mummy Wrapping
  • Cookie dough
  • For the Blood

Instructions

0/9 Instructions
  • Start by making the ganache for mummy wrapping and green goo. Place white chocolate, cream, and butter in a medium microwaveable bowl and melt together for 30 second increments. Stir after each 30 seconds so as to prevent the chocolate from seizing.
  • Divide ganache in half then colour half with green food colouring. Set aside to cool down. When it's set but still pliable, scoop 16 small balls of green ganache using a teaspoon or a Parisienne scoop.
  • Make the cookie dough: In the bowl of your stand mixer, cream butter & sugar together on high until light and fluffy, about 4 minutes. Meanwhile, in a medium bowl, sift together dry ingredients.
  • Add eggs one by one, turn mixer down then add coffee. Gradually spoon the dry ingredients into the batter, then add the chocolate chunks. Cover the dough and chill for at least 1 hour or up to 1 day.
  • Preheat oven to 170C. Divide the dough into 16 equal size balls (around 85g if you’re using a scale). Break in half then make an indent in the centre place a portion of green goo in the indent then seal with the other half by rolling each portion into a ball then place cookies on a tray lined with baking paper.
  • Bake cookies at 170C for 12-15 mins. The edges will be light brown and the centre will be soft, pop out of the oven and cool down completely before frosting.
  • Place the white chocolate ganache in a piping bag then pipe ribbons of mummy wrapping on half of the cookies. Place 1 or 2 candy eyes and let set.
  • Meanwhile make the blood by melting Valrhona inspiration raspberry chocolate then mixing in the canola oil and red food colouring. If you don't have raspberry chocolate, simply use white chocolate and add another drop of red food colouring.
  • Use the red chocolate to splatter blood on the other half of the cookies, then attach one or two eye balls. Leave to set then enjoy!

Notes

  1. you can use instant coffee by mixing 1 tsp with 1tbsp hot water. cool down before using.

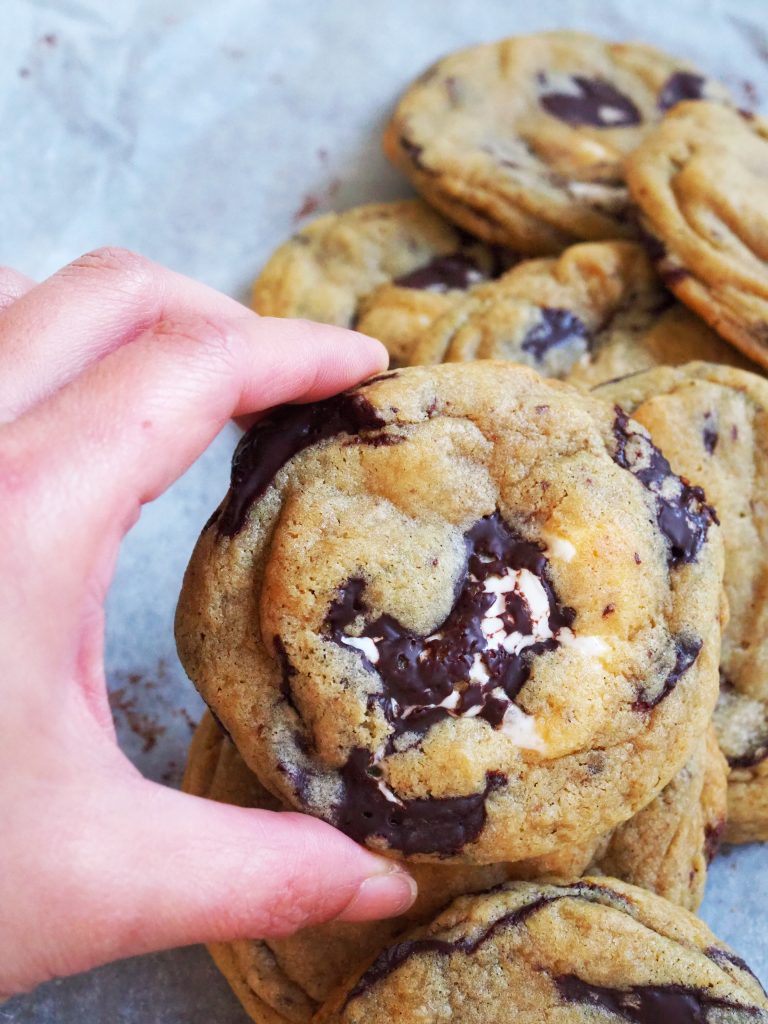
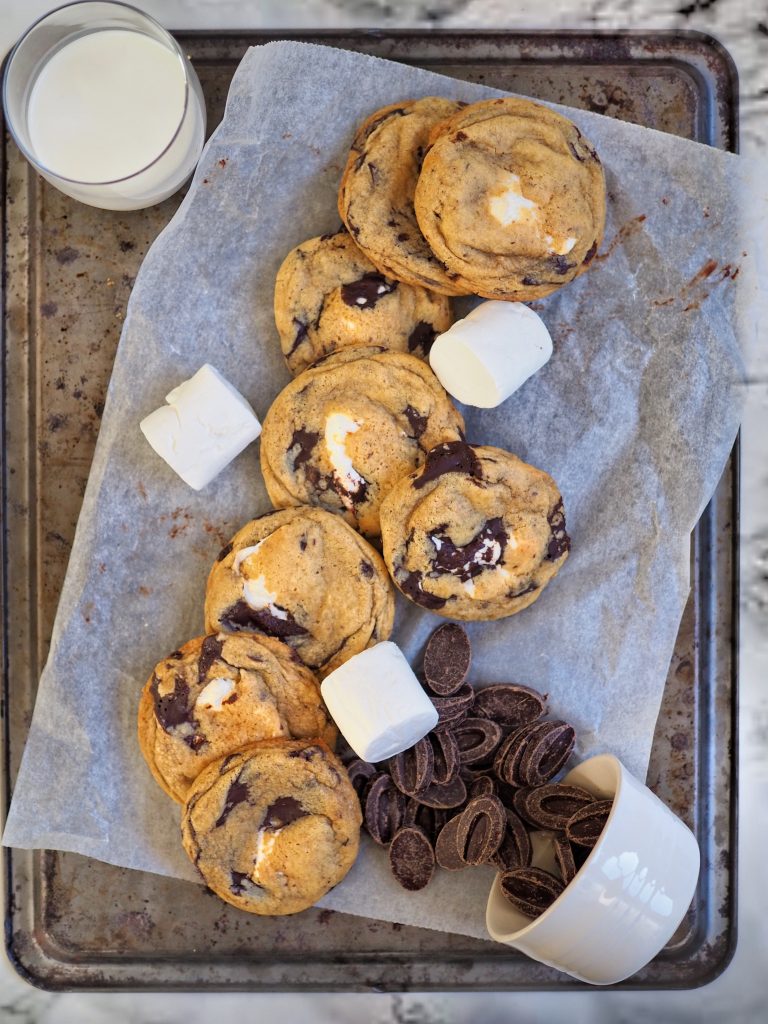
What are s’mores? It’s a sandwich of 2 biscuits, toasted marshmallows and chocolate. Perfect for when you have campfires and fireplaces, but what about the days when you don’t? Well, that’s exactly what these cookies are made for. These marshmallow stuffed cookies will give you the satisfaction of having s’mores even without the fire, plus you can double down and make ice cream sandwich s’mores! Oooooooohhh… I don’t know about you, but the inner fat kid in me is drooling!

So let’s talk about the recipe… It’s basically my chunky chocolate cookie recipe stuffed with marshmallows. I love homemade marshmallows, but they don’t work in this recipe, so just get store-bought marshmallows and we’ll tackle homemade marshmallows next time. I know some of you live in warmer climate, so the dough balls might be softer and warmer after stuffing. I recommend popping them back in the fridge for half an hour while preheating your oven. This way your cookies will not spread so much. I also like to cool the cookies down in the fridge after leaving them out for about 5 minutes. Mostly because they set faster that way, therefore I can eat them quicker, but also because these cookies come out of the oven soft and I want them to stay soft but also set so they don’t fall apart, and the fridge gives me that result. However, if you have higher EQ than me, then feel free to leave them on the bench and hopefully your housemates don’t end up devouring them.

https://www.youtube.com/watch?v=5Hp7Nb6vn4w

If you’re a beginner baker, I recommend watching the video above and reading my recipe notes. This way, you have a visual guide of how the critical part of the recipe is done. If you start with a good dough, there is a huge chance for gooey cookie success unless you skip chilling or you burn your cookies while baking.

Click on the photos to shop for the products. Most products ship internationally.

Mrs.Fancypants earns a small commission from affiliate links, when you buy the products above. If you’re in Australia, feel free to check the availability on advertised sites.


One thing people ask me a lot is if they need a stand mixer and which one I recommend. I personally use Kenwood Chef Sense XL (pictured below) which I now have for 4 years. Keep in mind that I use it almost everyday and I also make dough, so the big capacity is great and it’s an investment for me. If you really want a Kitchenaid, I think the Kitchenaid Artisan KSM160 is good value because you get 2 size bowls for the price, and of course, you get to choose from an array of colours. But if I am to buy a Kitchenaid and I didn’t have my Kenwood, I would choose the Kitchenaid Proline Mixer KSM7581 which is more for serious bakers and professionals like me. However, if you’re just trying baking out, a hand mixer would do the job and save you $$$ if you realise it’s not for you. Before I bought my big mixer, I would knead my dough by hand and only had the Sunbeam Beatermix Pro, which I still keep in the drawer in case of emergency!

Click on the photos to shop for the products. Most products ship internationally.

Mrs.Fancypants earns a small commission from affiliate links, when you buy the products above. If you’re in Australia, feel free to check the availability on advertised sites.

Now it’s time to make these indulgent s’mores cookies! Don’t forget to take photos of your work and tag me on Instagram and Facebook. Seeing your photos and hearing how my tips and recipes help when you bake totally brightens my day. So please remember to connect! Have fun baking and eating!

 
Difficulty: Medium Prep Time: 20 Mins Cook Time: 12 Mins Total Time: 32 Mins

S’mores Cookies

Makes 12

  You will need the recipe for Mrs.Fancypants Chunky Chocolate Cookies. You can find the recipe here. The steps are identical up to step 3, then for the S’mores cookies, you will need to stuff the cookies with marshmallows.

Ingredients

Instructions

0/6 Instructions
  • In the bowl of your stand mixer, cream butter & sugar together on high until light and fluffy, about 4 minutes.
  • Meanwhile, in a medium bowl, sift together dry ingredients except the marshmallows.
  • Add egg and vanilla, mix until incorporated then bring the mixer down to low. Gradually spoon the dry ingredients into the batter, then add the chocolate chunks. Cover the dough and chill for at least 1 hour up to 1 day. (See notes)
  • Divide the dough into 12 equal size balls (around 65-70g if you’re using a scale). Roll each portion into a ball then flatten into a disc and place a marshmallow in the centre. Fold edges to seal then roll back into a ball.
  • If the cookies feel soft and warm after rolling, chill again for 30 minutes while preheating oven to 170C. Place cookies on a tray lined with baking paper.
  • Bake cookies at 170C for 12 mins. The edges will be light brown and the centre will be soft, pop out of the oven and let cool for 5 minutes then transfer to a cooling rack and cool down completely in the fridge. (see notes)

Notes

  1. Recipe for Mrs.FP Chunky Chocolate Cookies here.
  2. Use store-bought marshmallows because homemade marshmallows just dissolve in the heat of the oven.
  3. One reason for cookies spreading is if you over-cream your cookies. On the video above, you will be able to see the process clearly.
  4. This dough needs to be chilled otherwise the cookies will spread. You can make these cookies ahead and chill for 1 day. If you leave it in the fridge for more than one day, the cookies will not rise in the oven.
  5. This recipe is also freezer friendly. To freeze, follow the recipe up to stuffing the cookies with marshmallows then pop the balls on a plate lined with baking paper and freeze for 1 hour. Once the balls are frozen on the outside, they can be placed in freezer bags.
  6. To bake cookie dough from the freezer, take the dough out and place them on a tray line with baking paper, then preheat oven to 170C. The preheating time allows the cookie dough to thaw a little. When the oven is ready bake the cookies for 14 mins. Then cool as instructed.
  7. I like to let the cookies cool down and set in the fridge instead of room temperature. It takes less time and the cookies retain their softness in the centre.