School holidays are coming and a lot of parents are looking for fun things to do with their kids. If you can’t order my Christmas Cookie Tree Kit, you don’t have to miss out on all the fun! I am sharing the recipe and the video for assembly so you can make this at home too.

Growing up, I never really associated gingerbread house with Christmas because in the Philippines they’re not really popular, however, everybody associates Christmas trees with Christmas, so I thought making a Christmas Tree made of cookies would be so cool! I use vanilla sugar cookies for the base and icing sugar and food colouring for the icing. You can use a small star nozzle for some fancy piping, or just leave it as is for something more straight forward. I made 2 trees to shoot this video and I used different styles in each so you can see and decide how you want to decorate yours.

In the end, this is all about getting your creative juices running and having some fun. The best part is, this makes a great centrepiece for your Christmas table and everyone can have a piece after the feast! Nom nom nom.


View this post on Instagram


A post shared by Joanne Marie Press (@mrs.fancypants.recipes)


I suggest you watch the video before you start assembling the tree. The important thing is to get the correct consistency of the icing. Now, if you are in Sydney, then you’re lucky! You can still order my kit from Mrs.Fancypants Kitchen. I only have a few delivery slots left for Christmas, so make sure you put your Christmas order in soon. There are so many goodies available in the kitchen, so don’t hold back. They’re only available for a limited time.


Have fun making this! It will keep the little ones busy for sure. Don’t forget to let me know how you fared via the comments below or by tagging me on social media. I hope you have a very Merry Christmas and a brighter 2021 with your loved ones!


Difficulty: Medium

Christmas Cookie Tree

Makes 2 Christmas Trees


Ingredients

Instructions

0/9 Instructions
  • In the bowl of your stand mixer with the paddle attachment, cream butter and sugar until light and fluffy. Add vanilla & egg and beat on high until combined.
  • Meanwhile sift cornflour, salt and flour together. Turn beater down to low and spoon the dry ingredients until combined.
  • Dust a bench top with flour then roll out the dough to 3mm thickness. If its too soft put it in the fridge for 15 minutes.
  • Using an 8pc star cutter set, cut-out one of each size then the same number of the smaller sizes. You will use the smaller stars in between each layer to give your tree height and make piping the leaves easier later.
  • Finally cut-out one more smallest star for your topper. You should have at least 17 stars for 1 tree. This recipe makes enough dough for 2 trees. Place them carefully on a lined baking tray and chill for 30 minutes while you preheat your oven to 180C.
  • Bake the cookies for 12-15 minutes or until the bottoms are light brown but the tops should still be quite light. Set aside until cookies are completely cooled down.
  • Get a piping bag ready. In a small bowl mix icing sugar, food colour and liquid flavouring if using. Start by adding 5ml of water then stir. Your icing should look like a thick paste so that it doesn't run and drip down your tree. Watch the video to see the consistency of my icing. If the mix is too thick, add 1/2 tsp of water at a time until you get a good paste-y consistency.
  • Transfer icing to a piping bag and nip a the tip. Pipe some icing to cover your star topper then cover it with gold sprinkles and let dry, if you don't want to use gold sprinkles, use the Christmas sprinkles or just dust the cookie with icing sugar without any icing.
  • Using the icing as glue, build your tree one cookie after another just like the video. When you reach the top, use some more icing as glue to stick the star topper on the tree. Dust with icing sugar for snowy effect.


Oh I love holiday posts, and I’m lucky that I’m in Sydney so I feel like I have more time to post my holiday baking because even if it’s now the 1st of November here, it’s still Halloween in the US! So bookmark this for next year, guys, because these are so good, you’s want to individually wrap them for trick or treat!

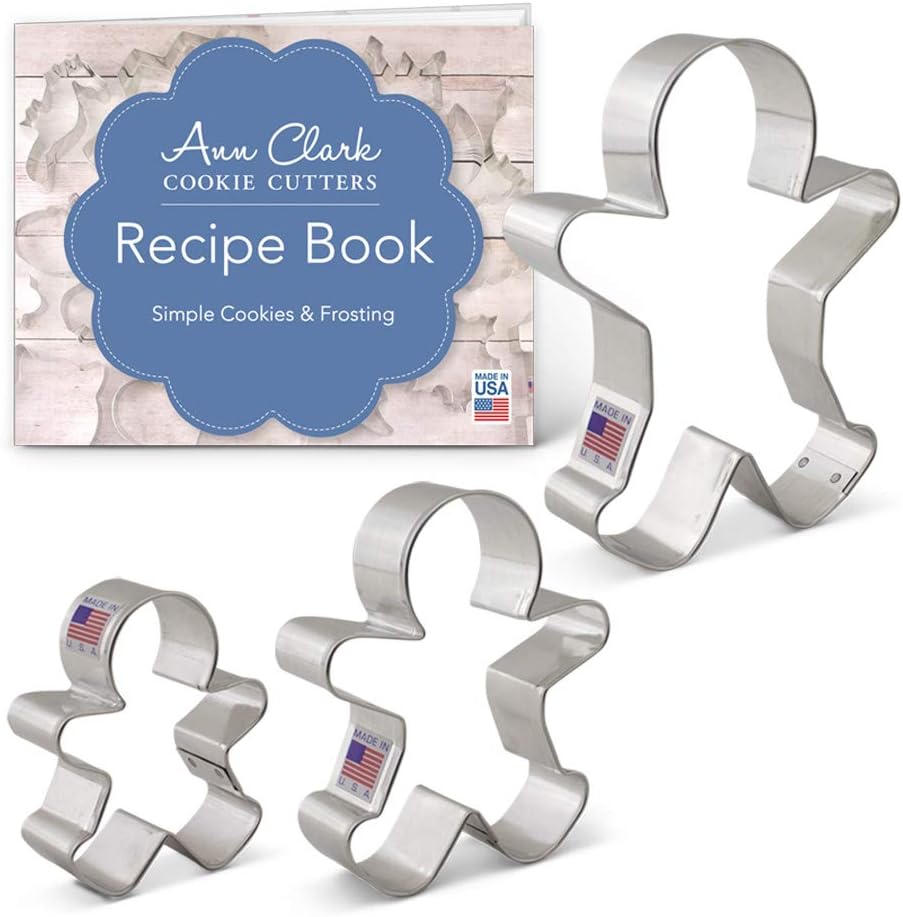
When you make these you’ll need your gingerbread man cutout. I like getting multi uses out of cookie cutters, to get the most out of my tools, and so I try to come up with creative things to use them for. Besides, Christmas is just around the corner, and it’s good to get these cutters out now.

Click on the photos to shop for the products. Most products ship internationally.

Mrs.Fancypants earns a small commission from affiliate links, when you buy the products above. If you’re in Australia, feel free to check the availability on advertised sites.

I was inspired to make these cookies because I was looking at Halloween movies to watch and saw The Mummy series, and remembered how we used to love the original version as kids. We found Brandon Fraser so funny, too bad they stuffed up the remake.

The Mummy isn’t a horror movie though, so I quickly passed it and settled on Insidious: The Final Key. Now this one, it’s definitely spine tingling. Or at least for screwy-cats like me. I have a love-hate relationship with horror movies, I’m the person who will shriek in the cinema and cover her eyes half the time. How about you? Do you like horror movies? Which ones do you like best?

I get a lot of questions about stand mixers, and these are my recommendations. It comes with a caveat though, I only recommend you get one if you bake a lot because they are not cheap. Otherwise, a hand mixer is the more practical option.

Click on the photos to shop for the products. Most products ship internationally.

Mrs.Fancypants earns a small commission from affiliate links, when you buy the products above. If you’re in Australia, feel free to check the availability on advertised sites.

Again, bookmark this for next year, and also get your Gingerbread man cutouts ready for Christmas! Because I have plenty of treat recipe coming your way. Happy Halloween! Don’t get spooked!

 
Difficulty: Easy

Mummified Sugar Cookies

Makes 18-20 cookies

Prep Time: 20 mins

Chill Time: 1 hour

Bake time: 12-15 minutes

Ingredients

    For the sugar cookies:
  • For the ganache:

Instructions

0/6 Instructions
  • Start by making the ganache for mummy wrapping. Place white chocolate, cream, and butter in a medium microwaveable bowl and melt together for 30 second increments. Stir after each 30 seconds so as to prevent the chocolate from seizing. Set aside to cool down.
  • Make the cookie dough: In the bowl of your stand mixer, cream butter & sugar together on high until light and fluffy, about 4 minutes. Meanwhile, in a medium bowl, sift together dry ingredients.
  • Add egg and vanilla, turn mixer down then add milk. Gradually spoon the dry ingredients into the batter. Divide into 2 and flatten into discs to make rolling easier later. Cover the dough and chill for at least 1 hour or up to 1 day.
  • Preheat oven to 170C. Sprinkle flour on your work bench then roll dough out to 3-5mm thickness. Using a gingerbread man cut out, cut out 18-20 cookies. Save the trimmings then roll them altogether so the dough doesn't get too floury.
  • Place cookie on a baking tray lined with baking paper and bake for 12-15 minutes or until the sides are light brown and cookie feels set on top but still soft. Cool down for 10 minutes then transfer to a cooling rack to cool down completely.
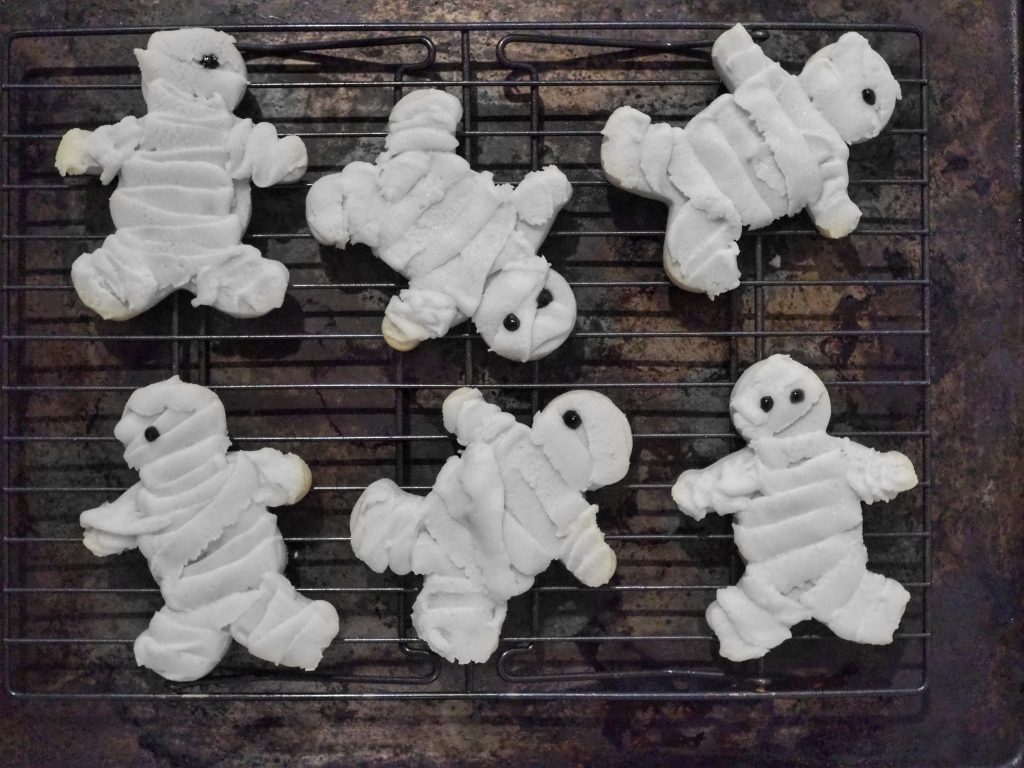
  • To assemble: Place the ganache in a piping bag. Pipe the ganache on the cookie to make it look like mummy wrapping. Then using your black writing gel, dot the eyes/eye of the mummies. Leave to set in the fridge for 1 hour then serve.