What is a beef stroganoff? When I was in uni, I would often go to The Chocolate Kiss cafe at the Ang Bahay ng Alumni in UP Diliman and order a plate of this yummy beef strips in cream sauce served on top of egg pasta. This was my first encounter with beef stroganoff. It was my favourite dish on their menu and I would love to go back and have that with a slice of their devil’s food cake or Kahlua butter cake. It would bring back so many memories!

Nowadays, I cook my own version of this dish, some people use chuck steak and slow cook their beef stroganoff. When I first started making it, I cooked it that way, but I’ve discovered that the rump gives you an equally yummy result for less cooking time and less fat in the meat. So I have now changed my recipe to use beef rump steaks. My beef stroganoff recipe takes half an hour to cook, is freezer friendly and can be made ahead. Make-ahead and freeze by putting in freezer-safe containers. To defrost, thaw thoroughly in the fridge and heat up in a pot.

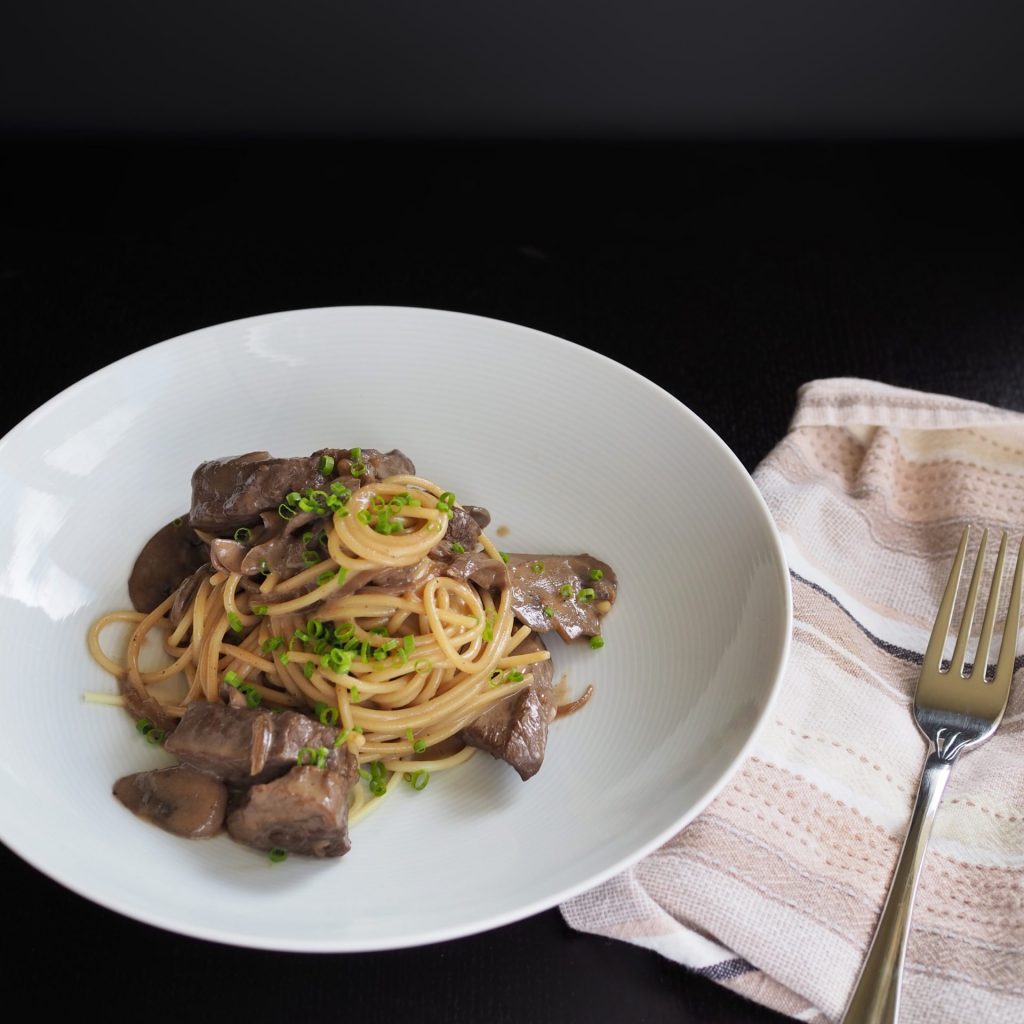
Try this recipe and let me know how much you love it! To add some colour, top with chopped chives or parsley.

 
Difficulty: Easy Prep Time: 10 Mins Cook Time: 20 Mins Total Time: 30 Mins

Beef Stroganoff

Serves 6

Ingredients

Instructions

0/5 Instructions
  • Cook egg pasta according to packet. Run under cold water and toss in a little olive oil. Set aside. Season rump slices.
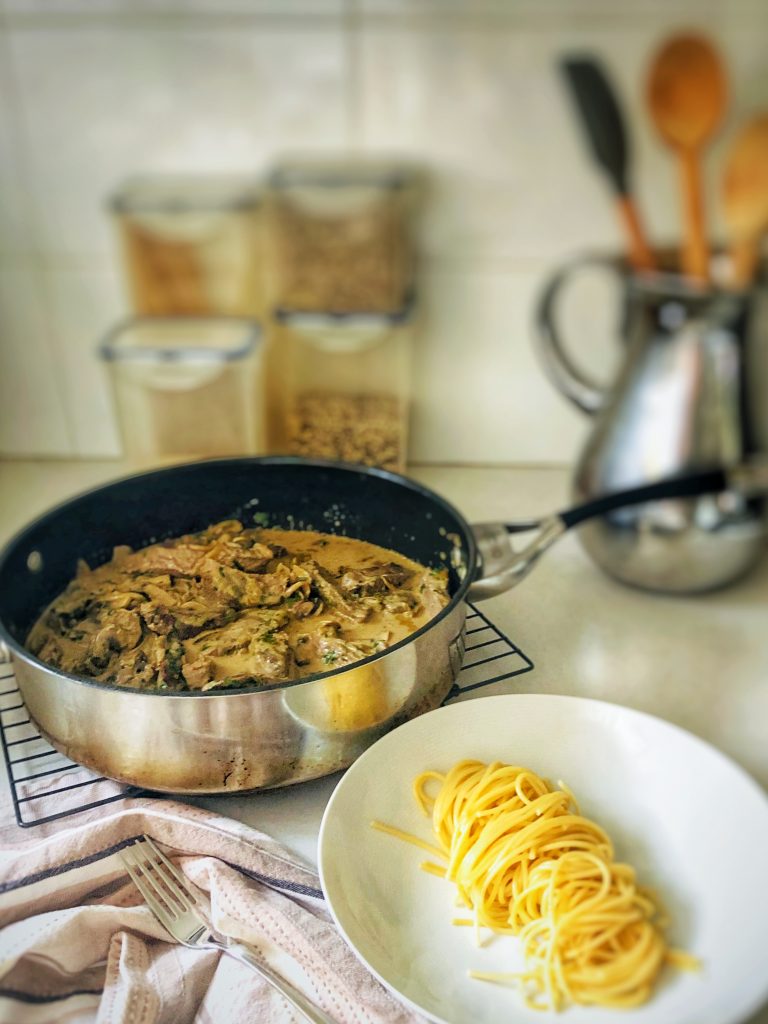
  • Heat oil in a deep wide pan until smoking. Brown beef on all sides, take out of the pan and set aside.
  • In the same pan, cook onions and push on the side of the pan. Add another tablespoon of oil and reheat. When oil is hot, cook mushrooms and add thyme. Drain off excess oil then add red wine. Reduce red wine to half then add beef stock. Bring to the boil then reduce to a simmer.
  • Add hot english mustard and sour cream, whisk until sauce is smooth and thick. Do not boil, this will cause the sour cream to split. Put the beef back into the pan and let simmer for 10 minutes.
  • Serve with cooked egg pasta.

Notes

  1. Can use button mushrooms or portobello.
  2. Can substitute with mash, rice, other pasta, as you wish.
  3. Make-ahead and freeze by putting in freezer-safe containers. To defrost, thaw thoroughly in the fridge and heat up in a pot.


I love cooking for family and friends, for me it’s the best part of being a chef. Sharing my food with people and seeing them enjoy it gives me so much happiness.

During the warmer months, it’s great to have a barbecue and toss together salads but winter dinners at our house are about slow-cooked meals with rich sauces and a creamy side dish like mash potatoes, mac & cheese, polenta and potato au gratin. Remember, carbs don’t count in winter! So tell me, what’s your favourite winter meal?

Now, one of my go-to slow-cooked meals is this classic winter dish of braised beef cheeks in red wine sauce. Serve it with blanched peas, and any of the side dishes above. Make a double batch and freeze some for a rainy day! Let me know what you think when you make it & don’t forget to snap a photo and use #mrsfancypants on Instagram for a chance to get featured!

Equipment Notes:

The best thing about slow cooked meals nowadays is that they are so easy for everyone. You can simply sear your meat before leaving for work then set-up your slow-cooker to do the cooking and finish the dish when you get home. The 2 slow-cookers below are highly recommended, though I use my oven for all my slow-cooking. Amazon sometimes have better prices than in-store and if you click on the photos, they will take you to shop on Amazon. However, if you are in a hurry, The Good Guys offer a free 2-hour click & collect service as well as next day delivery in Metro areas.

Click on the photos to shop for the products. Most products ship internationally.

 
Difficulty: Easy Prep Time: 10 Mins Cook Time: 5 Hr Total Time: 5 Hr 10 Mins

Braised Beef Cheeks in Red Wine Sauce

Serves 4-6


A perfect winter dish. Serve these tender beef cheeks with my velvety mash potatoes or creamy polenta.

Ingredients

Instructions

0/6 Instructions
  • Preheat oven to 200C. Heat up oil in a sauté/casserole pan until smokey. Season beef cheeks with salt & pepper then sear all sides in the hot pan until golden brown. Take off the pan and set aside.
  • Now add the onion and garlic. Cook the onion through without burning. Then add the carrot and celery. Drain off any excess oil. Pour red wine into the saucepan and quickly scrape the bits off the bottom then simmer until reduced by half.
  • Now add the herbs and the beef stock. Bring to the boil then pour into a braising pan or roasting dish. Add the beef cheeks, cover with baking paper then wrap tightly with aluminium foil.
  • Place the roasting pan in the oven and turn the oven down to 150C. Leave to cook slowly for at least 3 hours up to 5 hours.
  • Once done, remove the beef cheeks and set aside, then try to skim the fat off the top of the liquid and strain off all the vegetables to discard. If you have more time, I strain the liquid into another container and discard the vegetables. Then I let the liquid cool down in the fridge so the fat will solidify and I can easily scoop it out the next morning. Discard the fat.
  • Put the strained liquid and the beef cheeks into a pot and reduce down the liquid to a nice saucey consistency. Serve warm with creamy polenta or mash potatoes.


Update 08-08-2021: The US custom conversion was incorrect so I updated it to the correct amounts.
 
Someone asked me before, “if there was only one food you could eat everyday, for the rest of your life, what would it be?” And I didn’t even gave it a second thought, and answered, “Lasagna!”

I remember being obsessed as a kid with learning how to make lasagna. It’s my single favourite food but my mom never made it, we always used to get it from a restaurant or have it delivered. So I knew that if I wanted to be able to eat it anytime I want, I would have to learn how to make it. My mom, to this day, still has never made lasagna, but I suppose, now that I don’t live there anymore, no one really asks for lasagna anymore. Instead, when she comes to visit me, or I go and visit them, I make it for the family.


Today, 2 decades after I started learning how to make lasagna, I have my own recipe that I could probably recite it in my sleep. However, it wasn’t always that way. In the beginning, I felt really overwhelmed with how much work goes into making one tray of layered pasta. So if you feel that way, it’s okay, but don’t give up. My advise is to make the red sauce the day before then make the white sauce and build your lasagna the next day. That way, you don’t feel like you’ve spent half your day in the kitchen.

I broke down my tutorial into 2 parts. You can watch Part 1 where I make the bolognese (red sauce) then watch Part 2 for the mornay sauce (white sauce) and assembly. The full recipe can also be found below, where you’ll see you’ll be needing my bolognese recipe. I recommend freezing what you don’t use, that way you can make lasagna quicker next time or just have a back-up pasta sauce in your freezer ready to go when you don’t feel like cooking. Note there were a couple of typos in the video where it said 1/2 of my bolognese recipe, but you’ll need a whole recipe for a 9x13inch tray. And it said 100g flour and 100g of butter when it’s meant to be 200g of each.


Tips on cutting your lasagna

Everybody’s curious how when photographed, lasagne looks immaculate. Each layer can be distinguished, and each portion so clean cut. I’m sure it frustrated those of you who are still not in on the secret, because I was once like you! So I’ll let you in on it, okay? But promise me you’ll try it and leave a comment below!

  1. The truth about lasagna photos. The lasagna was probably cut cold, so the sauce and cheese is set which makes it easier for it to hole it’s shape and layers. I know because I’ve done shoots with cold lasagna.
  2. Serving a perfect slice of lasagna. There is a way to serve a perfect slice of lasagna that’s not bone dry. If you make my recipe, it will tell you to REST the lasagna for at least 15 minutes. If you really want a good slice, do it for 30 minutes, just make sure you keep it covered in foil. Let’s be honest, no one wants to take a bite of piping hot lasagne anyway, so don’t rush serving it and wait it out. Your patience will be rewarded.
  3. Cutting the lasagna. So you’ve let the lasagna rest, well done. Now prepare the plates, grab a sharp serrated knife or a sharp thin bladed chef’s knife and an offset turner–you know those things that you use to flip pancakes, meat fish when you’re frying. When you have those ready, cut up the lasagna into portions, make sure you’ve cut all the way through then lift each one onto a plate neatly. Don’t hesitate.

The lasagna you’ll see in the photo below was baked fresh and rested for 30 minutes. It was so photogenic but was also so delicious!

Yields: 8 Servings Difficulty: Medium Prep Time: 10 Mins Cook Time: 1 Hr Total Time: 1 Hr 10 Mins
Someone asked me before, “if there was only one food you could eat everyday, for the rest of your life, what would it be?” And I didn’t even gave it a second thought, and answered, “Lasagna!” Update 08-08-2021: Corrected the US customary conversions. Beef bolognese recipe follows.

Ingredients

0/11 Ingredients
  • Mornay sauce:
  • Topping:

Instructions

0/9 Instructions
  • This recipe makes a 9x13in baking tray. Preheat oven to 180C. On your stove, bring red sauce to the boil then turn flame off and set aside. Lightly grease baking dish then set aside.
  • Make mornay sauce:
  • Melt butter in a large saucepan. Add herbs to infuse the butter. When butter is starts bubbling, add flour and whisk for 3 minutes.
  • Gradually pour hot milk while continuously whisking, to avoid lumps in your sauce.
  • Bring to the boil then slow down to a simmer and stir pecorino romano until it melts. add nutmeg and season with salt and pepper to taste. Cover the surface of the sauce with plastic wrap to avoid getting skin on top of your white sauce. Set aside.
  • Assembly
  • Take your baking tray, white sauce, red sauce, pasta, salt and pepper, and grated mozzarella and place them within arms reach. To make layering easier, divide both sauces into 4 equal parts.
  • Take your baking tray and cover the bottom with 1 part of the red sauce. Cover with a layer of pasta.
  • Pour 1 part of the red sauce over the pasta then pour 1 part of the white sauce over the red sauce and season with salt and pepper. Cover with another layer of pasta. Repeat this step 2 more times.
  • Finally, pour the last part of the white sauce (you should only have white sauce and grated mozzarella left at this stage) and cover with all the grated mozzarella. Season with salt & pepper.
  • Bake at 180C for 45 minutes or until a knife goes through without any resistance. An Italian chef once told me that lasagna is the only pasta that should be overcooked, it should never be al dente.

Notes

  1. You'll need my recipe for beef bolognese. Find the recipe here.
  2. Lasagna will bubble up, and to avoid unnecessary mess and extra cleaning, I place my baking dish on a tray lined with baking paper to catch any drips.

Difficulty: Medium Prep Time: 15 Mins Cook Time: 2 Hr 15 Mins Total Time: 2 Hr 30 Mins

Beef Bolognese

This recipe makes up to 10 servings.

Ingredients

Instructions

0/4 Instructions
  • Heat a large pot with a little bit of oil, then brown bacon. Take bacon out and set aside.
  • In the same pot, heat vegetable oil and cook mushrooms. Push mushrooms to the side then saute onion and garlic. Add carrot, cook until soft. Keep the pan hot. Add mince beef, season with salt, pepper, worcestershire sauce.
  • When minced is browned, add the bacon, diced tomatoes, tomato paste, herbs and stock. Simmer until the sauce thickens, about 1 hour.
  • Finish with cheese and peas. Bring to a boil then add torn basil leaves, if using. Season with salt and pepper and sugar, according to your taste. If making ahead, no need to add the basil. Add when you reheat the sauce before serving.

Notes

  1. Can use speck instead of bacon, or can leave out the bacon, but it adds to the flavour of your sauce.
  2. If you don't have beef stock, feel free to use water and bouillon cubes/stock powder.
  3. I like that the peas give it a bit of color variety and additional vegetables. You can use frozen peas from the freezer just make sure you simmer for an additional 5 minutes.
  4. You can freeze this for up to 3 months.
  5. Feel free to use substitutions for the protein like, chicken, turkey, veal or pork or a mix of pork and veal. When you do substitute, you will also need to change the stock to chicken or vegetable stock.
  6. For vegetarian option, use vegetable stock, up the veggies in the recipe and for the protein use chickpeas, lentils or beans. You have to add the legumes towards the end so you don't end up with a soggy mess.
Bolognese for me is the single most convenient make-ahead dish of all time. Unlike lasagne, you don’t need to wait for the oven to preheat or don’t need a microwave to reheat.
I make a big batch of bolognese every so often for those days when I just don’t have time or energy to whip up something but also don’t want to get takeout. Or if I’m going away and want to keep my husband well-fed. Anyway, enough of that. So obviously, I’m here to share my bolognese recipe!
It’s pretty straight forward, and I’ve even made a video to serve as a guide. This video is part 1 of a 2 part video on how to make my lasagne. If you want a great lasagne recipe, check out my How to Make My Favourite Lasagna.


Difficulty: Medium Prep Time: 15 Mins Cook Time: 2 Hr 15 Mins Total Time: 2 Hr 30 Mins

Beef Bolognese

This recipe makes up to 10 servings.

Ingredients

Instructions

0/4 Instructions
  • Heat a large pot with a little bit of oil, then brown bacon. Take bacon out and set aside.
  • In the same pot, heat vegetable oil and cook mushrooms. Push mushrooms to the side then saute onion and garlic. Add carrot, cook until soft. Keep the pan hot. Add mince beef, season with salt, pepper, worcestershire sauce.
  • When minced is browned, add the bacon, diced tomatoes, tomato paste, herbs and stock. Simmer until the sauce thickens, about 1 hour.
  • Finish with cheese and peas. Bring to a boil then add torn basil leaves, if using. Season with salt and pepper and sugar, according to your taste. If making ahead, no need to add the basil. Add when you reheat the sauce before serving.

Notes

  1. Can use speck instead of bacon, or can leave out the bacon, but it adds to the flavour of your sauce.
  2. If you don't have beef stock, feel free to use water and bouillon cubes/stock powder.
  3. I like that the peas give it a bit of color variety and additional vegetables. You can use frozen peas from the freezer just make sure you simmer for an additional 5 minutes.
  4. You can freeze this for up to 3 months.
  5. Feel free to use substitutions for the protein like, chicken, turkey, veal or pork or a mix of pork and veal. When you do substitute, you will also need to change the stock to chicken or vegetable stock.
  6. For vegetarian option, use vegetable stock, up the veggies in the recipe and for the protein use chickpeas, lentils or beans. You have to add the legumes towards the end so you don't end up with a soggy mess.

“But first you need… a pumpkin!” ~fairy godmother to Cinderella. Fortunately, you won’t feel like Cinderella in her rags with this no-peel pumpkin soup recipe!

When I first started in a commercial kitchen, I remember having to peel & dice a box of pumpkin everyday for a week for a function that had pumpkin soup on the menu. It kept giving me Cinderella vibes, probably from the pumpkin and the manual labour… To make things worse for me, at one point, the kitchen ran out of gloves, so my hands were orange and were covered in residue which took ages to scrub off. Since then, I swore not to peel another pumpkin if I could help it. That’s how this no-peel recipe came about. Instead of peeling, I roast the pumpkin wedges in the oven to get some caramelisation that adds flavour and colour to the end result and, in my humble opinion, makes a better soup than the boiled version with less wastage. This version is thick and hearty, because that’s just how I prefer my soup, but you may loosen it up with a little more water, stock or cream to suit your taste.

I also made a how-to video in case you need any clarifications, but if you have more questions, feel free to shoot me an email at hello@mrs-fancypants.com

https://youtu.be/vT9v-9PVgzk

P.S. I use metric units in most of my recipes but I’ve included US measurements as well for your reference. I’ve tested the recipe using both units of measurement.


Having a hand blender makes blending hot liquids safer, and making pureeing a breeze. In the commercial kitchen, we use more powerful stick blenders but the ones pictured below are easier to find for home use in your local department store. (From left: Bamix Classic Hand Blender, Breville The Control Grip)

Click on the photos to see the items on Amazon


Difficulty: Easy Prep Time: 15 Mins Cook Time: 45 Mins Total Time: 1 Hr

This recipe makes 4 servings.

Ingredients

Instructions

0/4 Instructions
  • Preheat oven to 200C. Line a baking tray with baking paper. Cut pumpkin into wedges. Toss pumpkin in olive oil and garlic. Then sprinkle herbs, salt & pepper.
  • Roast for 30 to 45 minutes, until you can poke the pumpkin with a knife with no resistance. You should get a little caramelisation as well. Take out of the oven and carefully spoon half the pumpkin into a blender jug, leaving out the skin.
  • Mix the stock powder and water in a separate jug, then add half the liquid into the blender jug with half the pumpkin. Be careful with blending hot liquids, leave the lid a little bit ajar and start on the lowest setting and work your way to the highest setting. Blend until you have a very smooth soup. Pour into a medium pot and repeat with the rest of the pumpkin and liquid. Heat up the soup until you see bubbles forming.
  • Warm up the cream in a small pot. Add to the soup. Season with salt and pepper. Serve hot.


The perfect macaroni & cheese to me is one with plenty of melted cheese & sauce, perfectly seasoned, not soggy pasta and a gratinated top. Just the thought of it makes me salivate. If like me, you have been disappointed too many times when you’ve ordered mac & cheese only to be presented with a dry and underwhelming version, look no further. This is the recipe you’ve been waiting for…

I knew that becoming a blogger also entailed learning some photography and film basics. Visual presentation plays a huge part on getting people to come back to a website. So I took it upon myself to learn a few skills… It’s definitely not Cannes Festival worthy, but I promise to keep working on it! Remember, I am primarily a chef before a blogger. ?

This recipe has a white sauce base which is a basic béchamel with cheese melted through, and that, in French cuisine, is called Mornay sauce. Béchamel has so many uses, I love it on my ham & cheese toasties and pasta bakes and of course, in lasagna. I do advice that you take your time to cook the flour out in the beginning of making the sauce, otherwise, you get that raw flour taste, which is not very nice. A hint of spice gives this sauce depth of flavour and the cheese that you use will make the mornay sauce extra yum, so don’t skimp on the cheese.

Speaking of cheese, please grate your cheese fresh and try to avoid buying grated cheese. Store-bought grated cheese–although convenient–have caking agents and will affect the texture of your sauce.

Don’t be shy about burning the top a little, it’s so much better with a crispy crust.

Moving on, so I made my first video on how to make the sauce without lumps, I do apologise for the amateur filming & editing, hopefully, it serves its purpose. If you have more questions or clarifications, just reach out and I’d be happy to help. Tag me on your photos or include #mrsfancypants on your social media post! I would love to see what recipes you like!

P.S. I use metric units in most of my recipes but I’ve included US measurements as well for your reference. I’ve tested the recipe using both.

 
Difficulty: Easy Prep Time: 15 Mins Cook Time: 20 Mins Total Time: 35 Mins

This recipe makes 4 servings as a side dish.

Ingredients

    Pasta:
  • Mornay Sauce:
  • Toppings:

Instructions

0/5 Instructions
  • Cook pasta as per packaging instructions less 1 minute. Drain. Toss in the olive oil. Set aside.
  • Make the sauce:
  • Preheat oven to 200C. In a sauce pot over medium flame, melt butter. When butter starts to froth, add flour and nutmeg then whisk until it forms a paste. Keep whisking for 3 minutes to cook out flour.
  • Slowly add milk while whisking to avoid lumps. Keep whisking until your bechamel is smooth and thick. Turn down the heat to avoid burning.
  • Take pot off the heat. Add cheeses, stir with a wooden spoon until cheese melts. Fold in elbow macaroni. Season with salt and pepper.
  • Assemble your macaroni & cheese:
  • Take tray out and grind a few turns of black pepper and sprinkle with chopped chives. Serve.

Notes

  1. Always use fresh grated cheese, the packed grated cheese have anti-caking agents and would not result in the same smooth, lump-free sauce.
  2. Replace chives with parsley or if you have no herbs available, just skip it, it's only a garnish.
  3. I always boil pasta in salty water. As in the water should taste salty not just add a teaspoon of salt to your pot, this results in better tasting pasta!
  4. Use warm to hot milk but do not burn your milk.