My First Sahog @ Home with Filipino Food Movement

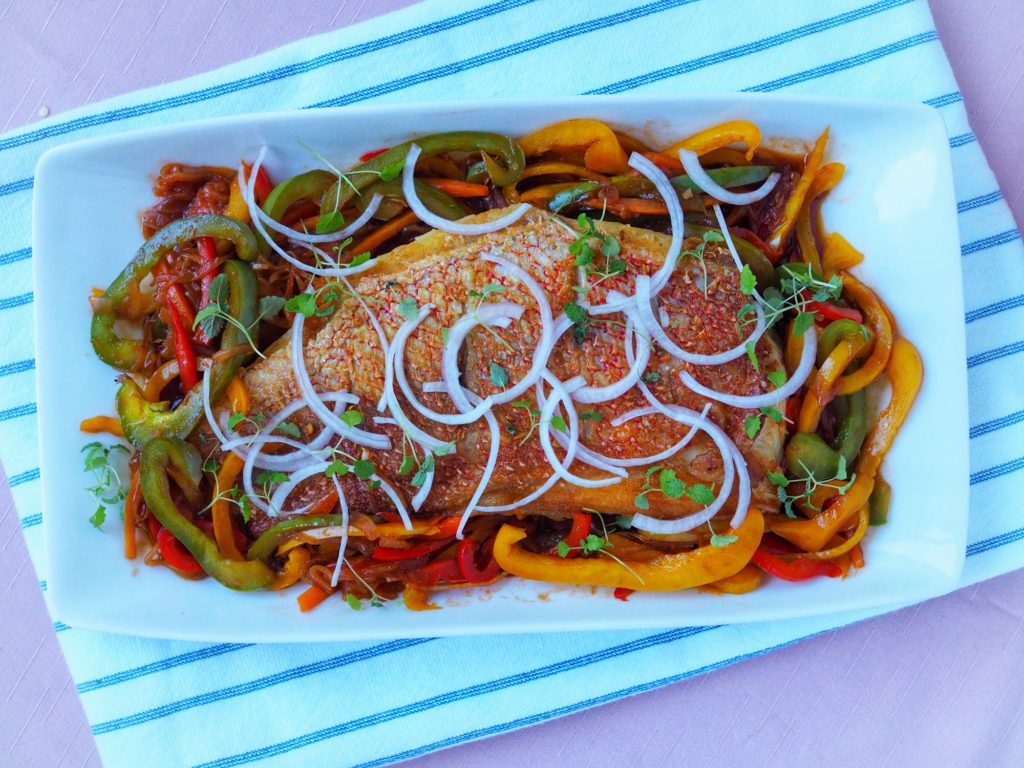
Today, I did my first IG Live with Filipino Food Movement. I cooked Filipino sweet and sour fish, or escabeche. And no, I didn’t use cornstarch, or pineapple or ketchup! This is the real deal, I even used fresh tomatoes.

Escabeche is a Filipino dish traditionally consist of fried whole fish, capsicum, onions and sweet and sour sauce. I love making this because it’s easy, quick and delicious! If you’re feeding kids, then you can opt for fillets instead of whole fish so there will be no bones. If you don’t want to fry the fish, you can bake, steam or grill. I’ve tried the sauce on a few white fish and prawns and it’s beautiful. I haven’t tried it on salmon or any oily fish, though. You can make a big batch of sauce and because of the vinegar content, it actually keeps quite well. Although, truthfully, it hasn’t lasted more than a few days in my fridge, so I don’t know how long it would last. I imagine it would be similar to atchara which is pickled vegetables in Filipino. Just make sure you store it in a clean, airtight container.

Watch the video below if you wish to cook along with me. It took about 30 minutes but you can even shorten that by making the sauce in advance.

On the video I used fresh cherry tomatoes. For a quick and economical version that tastes just as nice, you can use a good quality tomato paste. I also like to use sukang iloko because of it’s darker colour and acidity. In Australia, you can get it from your local Filipino store, or you can use sherry vinegar as an alternative. In the Philippines, if you don’t have the options mentioned in your pantry, you can opt for cane sugar vinegar but your escabeche sauce won’t yield the same vibrant colour.


View this post on Instagram


A post shared by FFMA (@filipinofoodmovementau)

Tips on frying fish:

During the live video, I gave a couple of tips on how to best fry fish:

  1. Use a non-stick pan with plenty of room for the fish. The right pan for the job is always important. If you’re worried about food sticking to the pan when frying, then non-stick is your friend.
  2. Hot oil is key but don’t use oil that has a low smoke point like olive oil.
  3. Pat the fish dry and cut a few slits on the skin. Drying the fish and cutting slits on the skin ensures your fish doesn’t curl up when the skin hits the hot oil.
  4. Cook on the presentation side. Whether you took the skin-off the fish or not, there is always a presentation side. When the fish has skin, the presentation side is the skin side, otherwise, it’s the other side. Cook your fish longer on the presentation side until it’s almost done. This gives you maximum colour. Then flip and finish on the other side for a couple of minutes.

Now you’re ready to try my escabeche recipe. It’s super easy, and absolutely delicious, so I hope you give it a shot and let me know what you think in the comments section.
Difficulty: Easy Prep Time: 10 Mins Cook Time: 30 Mins Total Time: 40 Mins

Escabeche

(Filipino Sweet & Sour Fish)

Serves 4

Ingredients

Instructions

0/8 Instructions
  • Slice all the vegetables and ginger into similar size strips or julienne. Mince the garlic.
  • Heat about 3 tbsp cooking oil in a heavy-base sauté pan. Sauté the garlic then add the onion and ginger. Cook until onions and ginger are soft and translucent then add the tomatoes or tomato paste, whichever one you're using.
  • If using fresh tomatoes, cover with a lid and cook down tomatoes for 10 minutes. If using tomato paste, cook out the tomato paste without the lid for 2 minutes.
  • Add the vegetables, stir and cover for 10 minutes until vegetables are soft and tomatoes are breaking down (if using fresh tomatoes).
  • While simmering the sauce, fry the fish. In a wide frying pan with plenty of room for the fish, heat 2 tablespoons cooking oil. Pat fish dry and season with salt. Once the oil is hot, place the fish in the pan and leave until skin is crispy and golden, about 6 minutes, your fish should look almost done.
  • Flip the fish and cook the other side for 1-2 minutes depending on the thickness of your fish. Remove from pan and drain off excess oil with paper towel.
  • Finish your sauce by adding vinegar and brown sugar. Bring to the boil then simmer until the sauce is the consistency that you like. Remove from heat.
  • To serve, spoon the sauce on the serving platter and place the cooked fish on top. Season with pepper and serve with steamed rice.

Notes

  1. Fish options: I like using snapper, barramundi, swordfish and coral trout. Any white fish will do.
  2. Cooking method for fish: You can fry, grill, bake or steam.
  3. Make-ahead. You can make the sauce in advance and just cook the fish on the day. Makes it a lot easier and the sauce keep every well in the fridge in an airtight container for 3-5 days.

Risotto is a dish that people try to avoid when having guests over. Why? Because as the host, you also want to spend time with your friends and risotto has a reputation for being time and attention consuming to cook. Who wants to be in the kitchen most of the night when they can hear laughter coming from the other room? I’m guessing not you.

But wouldn’t you want to impress your friends when you bring out plates of creamy, steaming hot, delicious smelling risotto for their main? I know I would, and believe me, they are always impressed.

So here are my solid tips on serving risotto at your next dinner party:

Choose an easy to follow and tested recipe. This is always important. Never–and I mean NEVER–make a dish for the first time on the day you are having a dinner party. This is simply a recipe for disaster. So choose a recipe way beforehand and test it out, because then you can adjust it to your liking, or find a better recipe if it doesn’t work for you.

Now that you have a recipe, make sure you prepare all the ingredients. Measure your rice, wine and stock, chop your vegetables and protein, and bring your stock to the boil. Most importantly, prepare a wide, shallow dish or tray that will fit the risotto in a thin layer and will also fit in your fridge.

Start making the risotto. Most risotto recipes start with sautéing eschallots and garlic in oil. Do not burn, sweat them until soft without color, otherwise you’ll either get a burnt or raw after taste in your risotto.

Follow the rest of the recipe only until your rice is al dente. Meaning, do not finish cooking, but cook it until it almost ready. Now you have to be quick.

Transfer the risotto in the tray that you prepared earlier. Spread it out until you only have a thin layer. Then trace crisscross lines along the risotto with the wooden spoon and place it in the fridge to cool down completely.

When you’re ready to serve. When you’re ready to serve, bring your leftover stock to the boil. In a wide pan place 1/4 cup of hot stock for every 1 cup of risotto, then add the cold risotto. Stir to loosen it up and finish it according to the recipe you’re following.

This tutorial has been a loooooong time coming. Since I published my banoffee pie recipe, I’ve had readers and friends asking me to make a honeycomb tutorial. I wasn’t ready because the honeycomb recipe I had then was from my notebook when I was an apprentice and I haven’t really experimented on how to get the best result, I just kept using this recipe and it worked for me, but I learnt it doesn’t always work for everyone, so today I made 4 batches of honeycomb and tweaked each one to see which one would give me the best result. Now I’m ready to share with you a Mrs.Fancypants approved recipe with matching photos and videos.

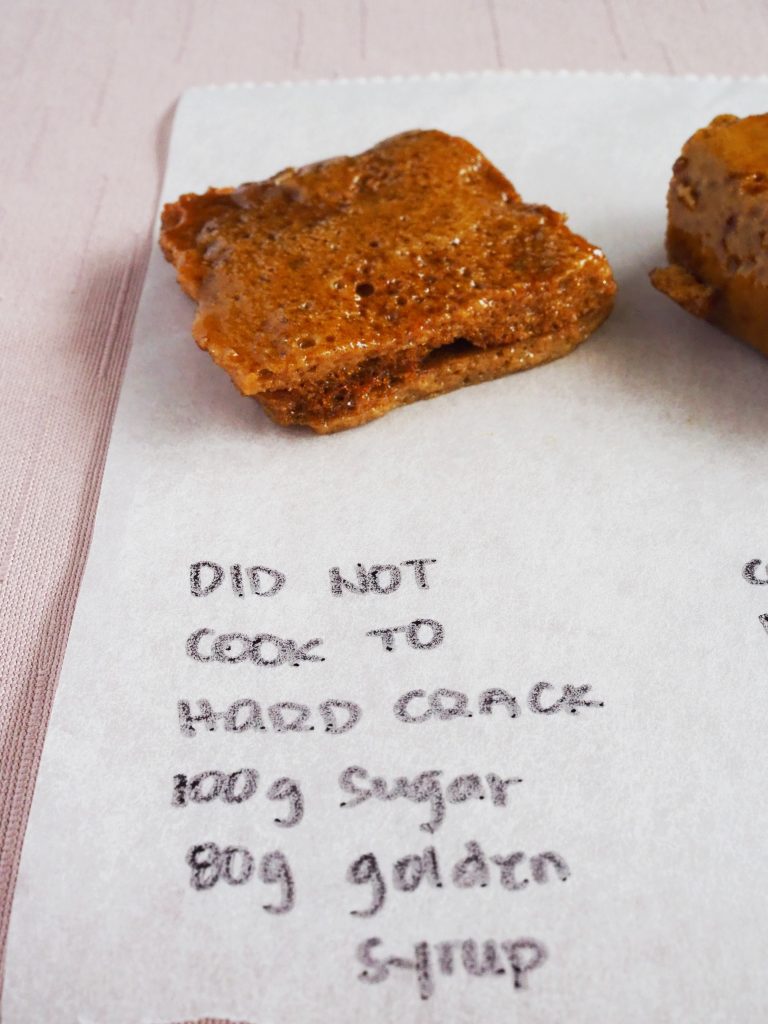
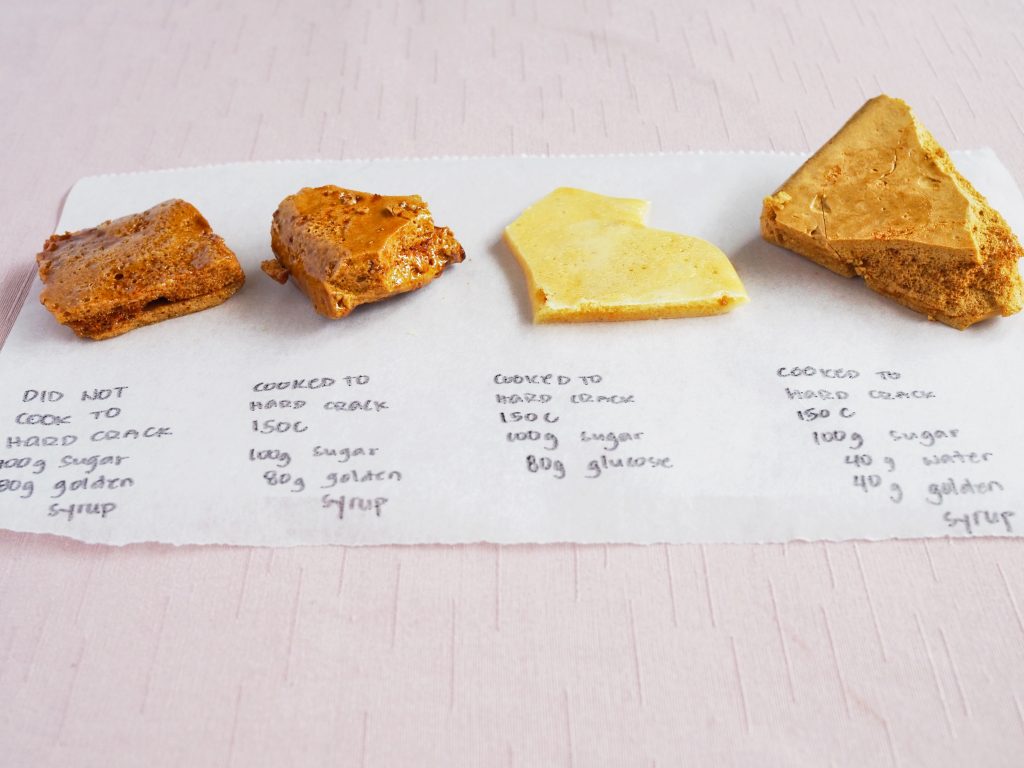
Test 1: This was my original scribbled recipe from the stone ages. LOL. I used 100g white sugar, 80g golden syrup and 8g bi-carb soda. I brought the sugar and golden syrup to the boil on medium heat and left it for 3 minutes then whisked in the bi-carb soda. I never really had a problem with this recipe, except that it was sickly sweet and has the after taste of bi-carb soda. The other thing wrong was, some readers just couldn’t get the right result and it’s frustrating for them (and me!). I knew this was because there were too many variables and there was no temperature specified for the caramel. I needed a recipe that was accurate so there’s less chance for failure.

Test 1

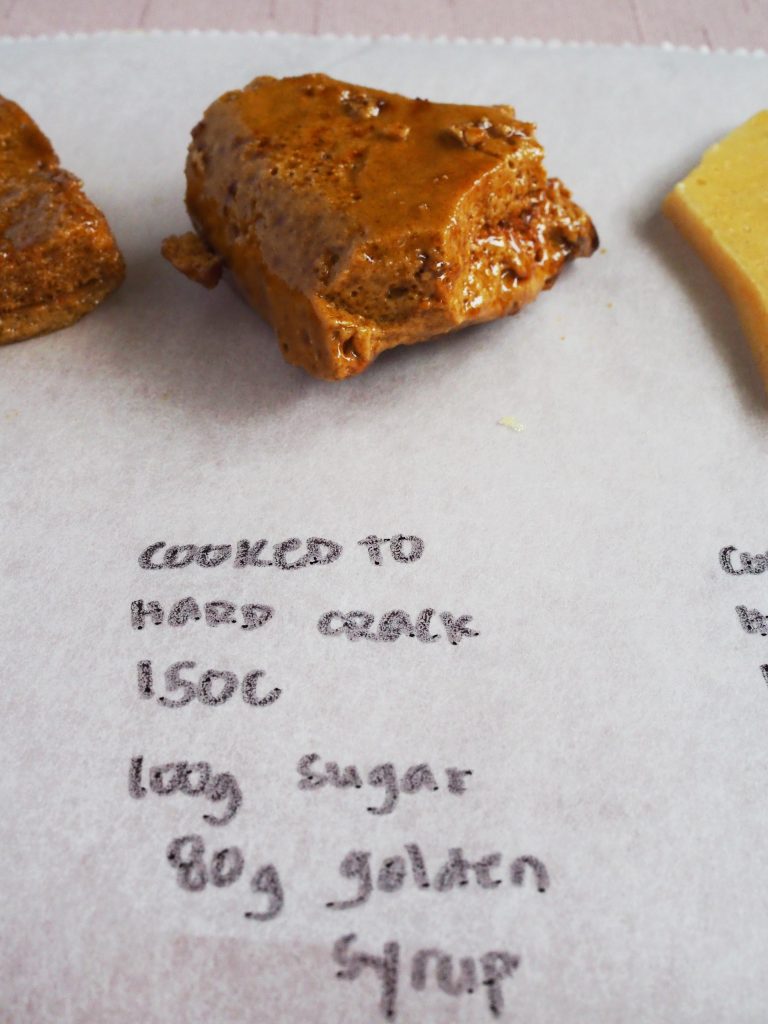
Test 2: So then came test 2. This is the same ratio as above, however, I pulled out my handy-dandy candy thermometer and heated my sugar to 150C (aka hard crack) then instead of whisking, I stirred the bi-carb soda using a wooden spoon. The sugar took 8 minutes from when I turned my stove on, to reach 150C. So in case you don’t have a thermometer, you can use a timer as a guide. This was great because it wasn’t sticky at all and it was super crunchy. However, I still found it sickly sweet. That’s where test 3 comes in.

Test 2

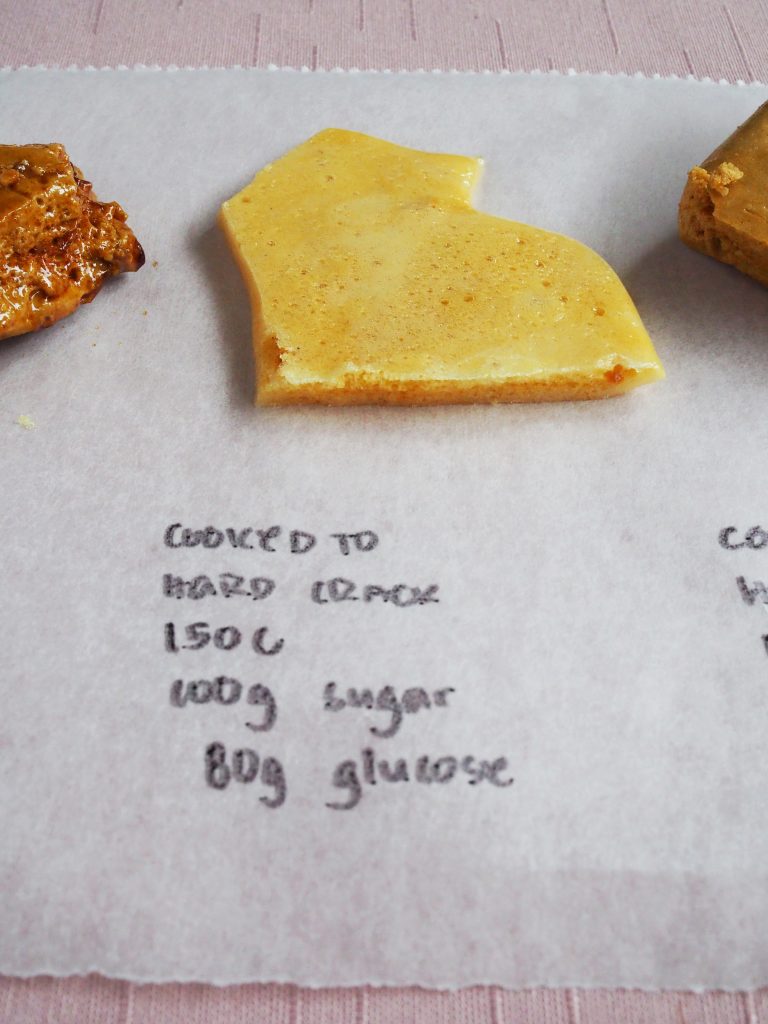
Test 3: I thought maybe use glucose instead of golden syrup. Glucose has very mild sweetness while golden syrup is 25% sweeter than sugar, I was just concerned about the colour. I was tempted to do half and half glucose and golden syrup, but I thought, if I wasn’t a chef, would I have golden syrup and glucose in my pantry at the same time, all the time? NO. So I stuck with glucose. It just didn’t turn out great, that’s all I could say. LOL. The result was pale and thin, more like a light caramel shard than honeycomb. So that’s that, back to the drawing board.

Test 3

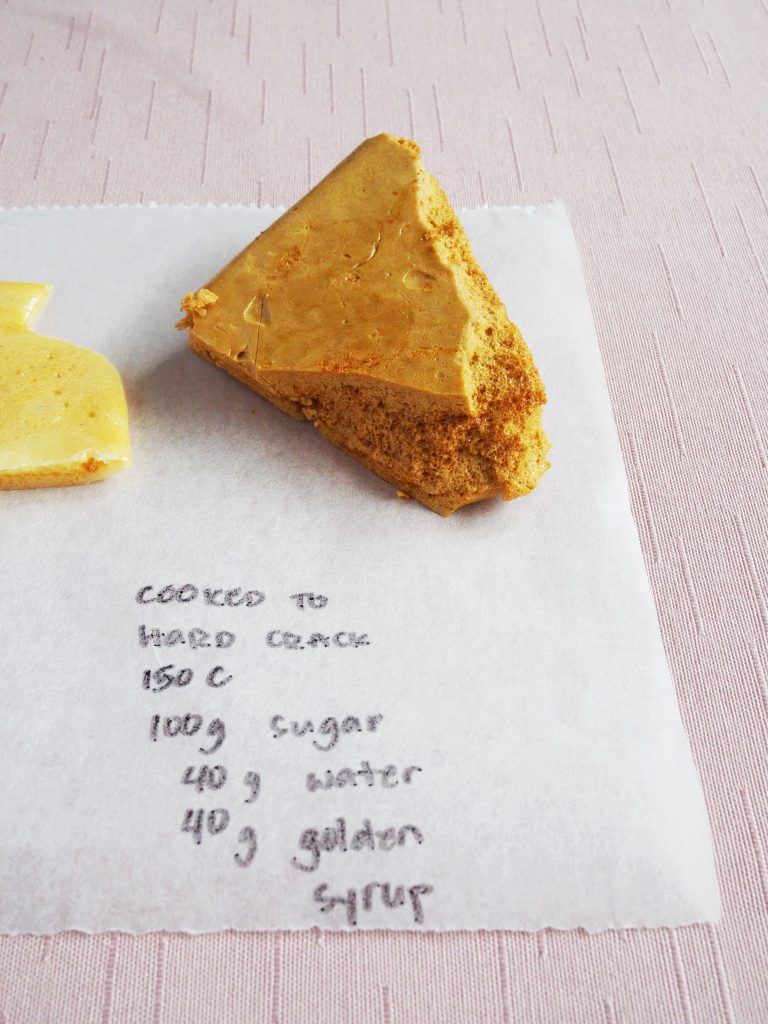
Test 4: Since I haven’t addressed the sickly sweet problem, I then thought back to golden syrup but half the amount then make up the other half with water. Same as before, on medium heat, bring the mix to 150C. This time it took 10 minutes. Again, in case you don’t have a candy thermometer, that’s your guideline, as well as the visual in the video. And if you watch and listen, you’ll see what I mean.

Test 4

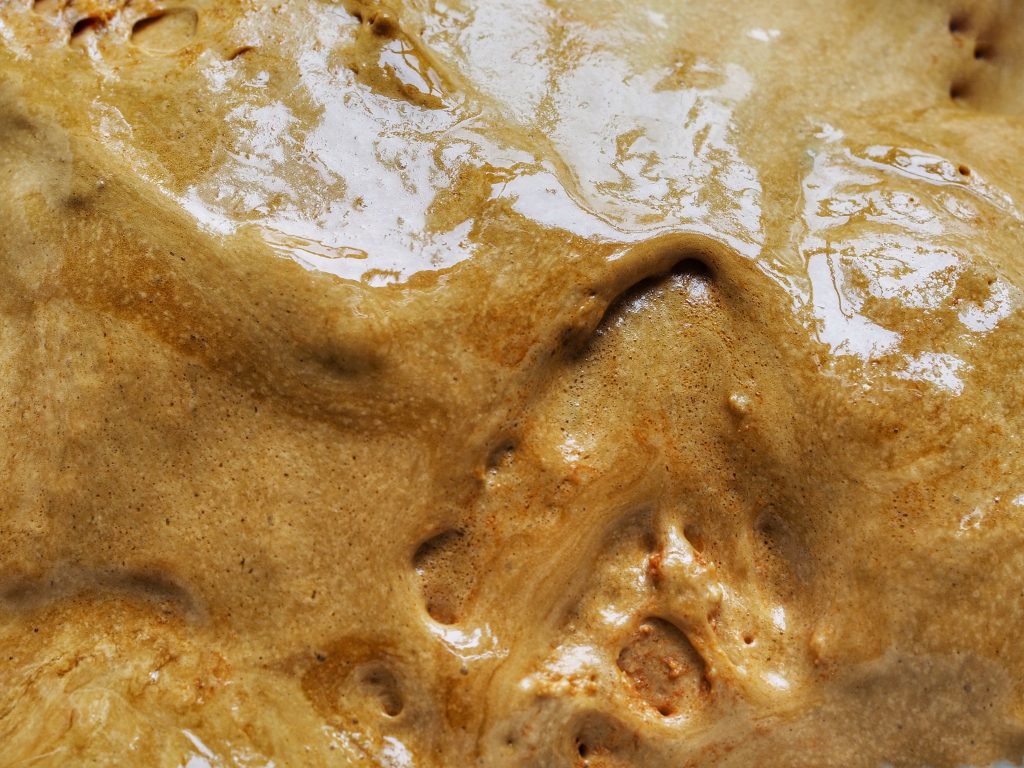
After all the experimentation and multiple tooth brushing to get rid of the sugar on my teeth, I’m happy to report that both test 2 & 4 gave me good results. Both were crunchy, aerated and golden. But I have to pick a winner, and I choose test 4 because it’s less sticky on top and easier to handle plus it sorted out the sickly sweetness that I didn’t like from test 2.

I also want to point out that both 2 & 4 didn’t have an after taste because the sugar is cooked to 150C the bi-carb soda dissolves in the mix easily, which is great. Test 1 has a bi-carb soda after taste and that used to bother me, but now with my tried and tested updated recipe, my honeycomb is exactly how I want it. I strongly recommend to get a candy thermometer, they come as cheap as $6 and totally worth skipping 2 coffees for.

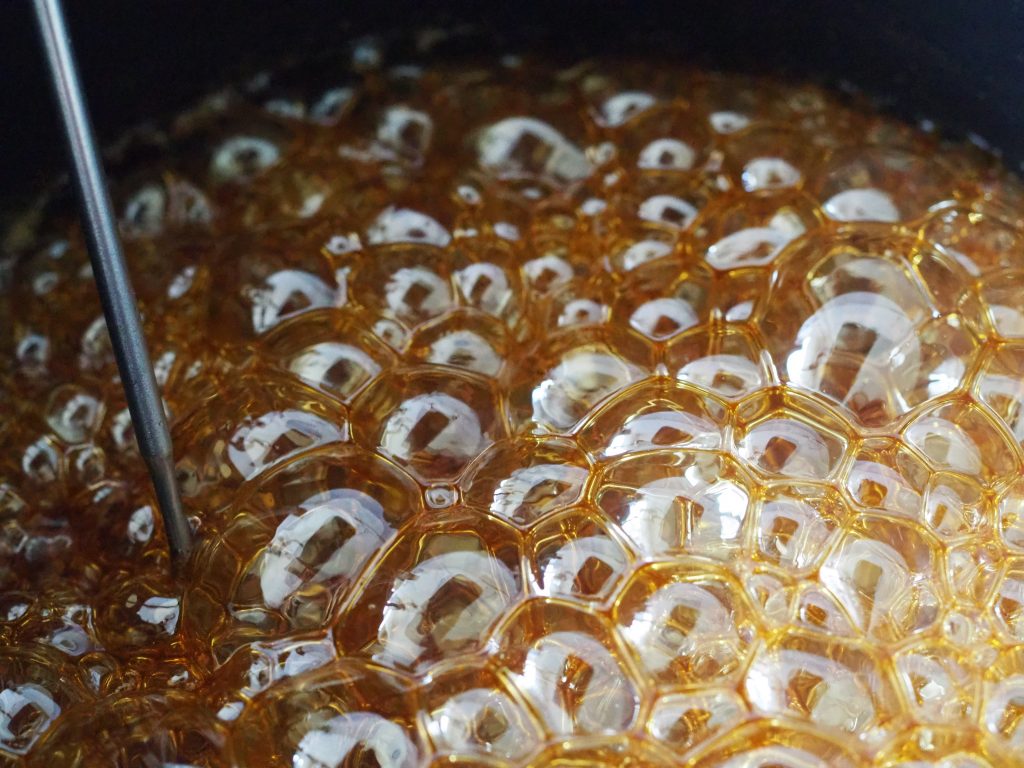
I made a video to serve as a visual guide. In baking and cooking, I like to get to know the process. I didn’t have time to do this in a commercial kitchen, because of course, I needed to be super quick, but when I can, I look for signs when I cook that when the food tells me it’s ready. Like when the bubbles slow down or they change size, small things like this. So please watch the video, you might pick up something new!

https://www.instagram.com/p/CJs0IkqB0QB/

So there you have it, now that you know how to make honeycomb, give my Banoffee Pie a go! I hope you learned something today, and please comment below for any questions and tag me on social media if you try this at home. Be careful in handling hot sugar, but more importantly have fun while cooking!

 
Difficulty: Medium

Failproof Honeycomb

Makes 2 cups

Ingredients

Instructions

0/6 Instructions
  • You will need a candy thermometer, a wooden spoon for mixing and a medium rectangular baking pan. Make sure everything you need is ready before starting the recipe.
  • Line a medium rectangular baking pan with parchment paper then grease lightly.
  • In a small sauce pot stir golden syrup, water and sugar together then put on a medium flame.
  • Leave the mixture on medium heat and bring it to the boil then clip on a candy thermometer, cook until candy thermometer registers 150C, about 10 minutes from when you put the sugar on the heat.
  • Turn off the heat then sprinkle bi-carb soda and use a wooden spoon incorporate the bi-carb into the mix. This will make your honeycomb bubble. Do not over mix or you will not get aeration on your honeycomb.
  • Turn over onto your prepared baking pan and let set for a few hours then you can snap or cut it into small pieces.

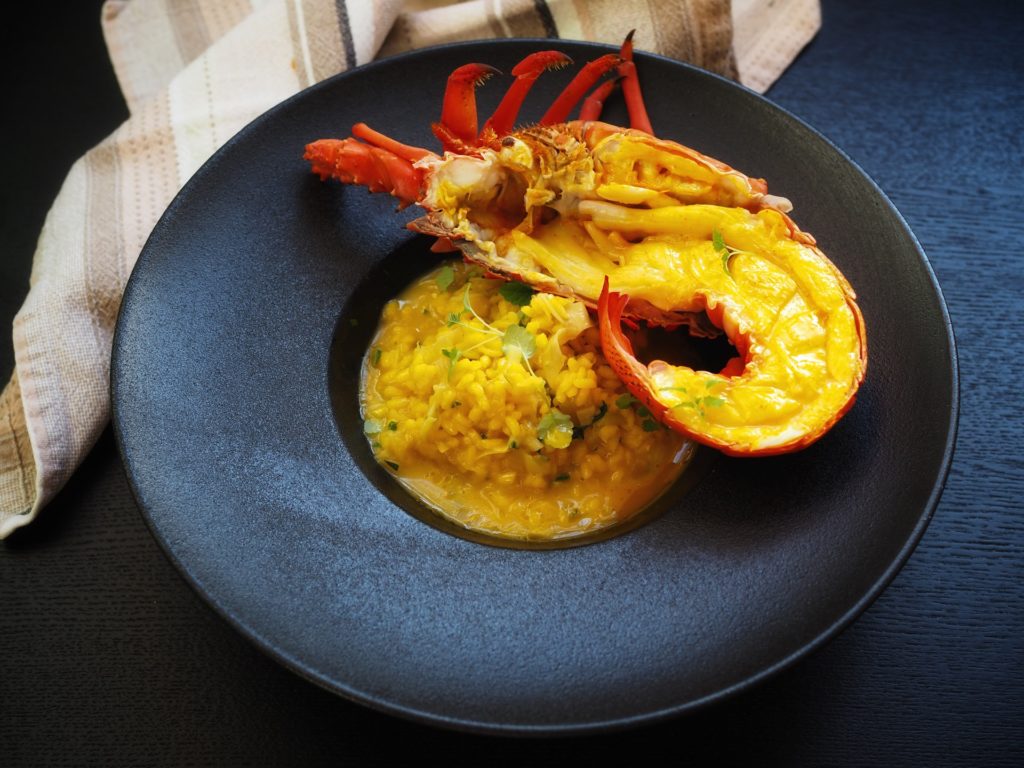
Lobsters are known as a luxury food item globally, and if you go to a restaurant and order a live lobster from the tank, you should be ready to pay a hefty price by the end of dinner. However, if you have access to a very good fish market, you may be able to save on the hefty price tag and cook lobster at home for a special occasion. The next question is, how do you then cook a lobster after purchase? Should they be alive when purchased or dead?

Look, as a general rule in restaurants, lobsters are always purchased live. This is because once a lobster dies, they spoil quite easily, and can cause severe food poisoning. So if you have the fridge space at home I would buy the lobster alive then put it in a container with ice in the fridge. The low temperature in the fridge or freezer disorients the lobster, and makes them easier to handle. Bring a pot of salty water to the boil then dunk the lobster in, a kilo of lobster takes about 12 minutes to cook, and each 500g adds 5 minutes.

If it’s illegal to boil lobster where you live, your other option after putting the lobster in the fridge is stabbing the lobster in the space between the head and body then splitting it straight in half lengthwise. I hate this method because I have to physically stab a live animal, so I prefer the boiling method.

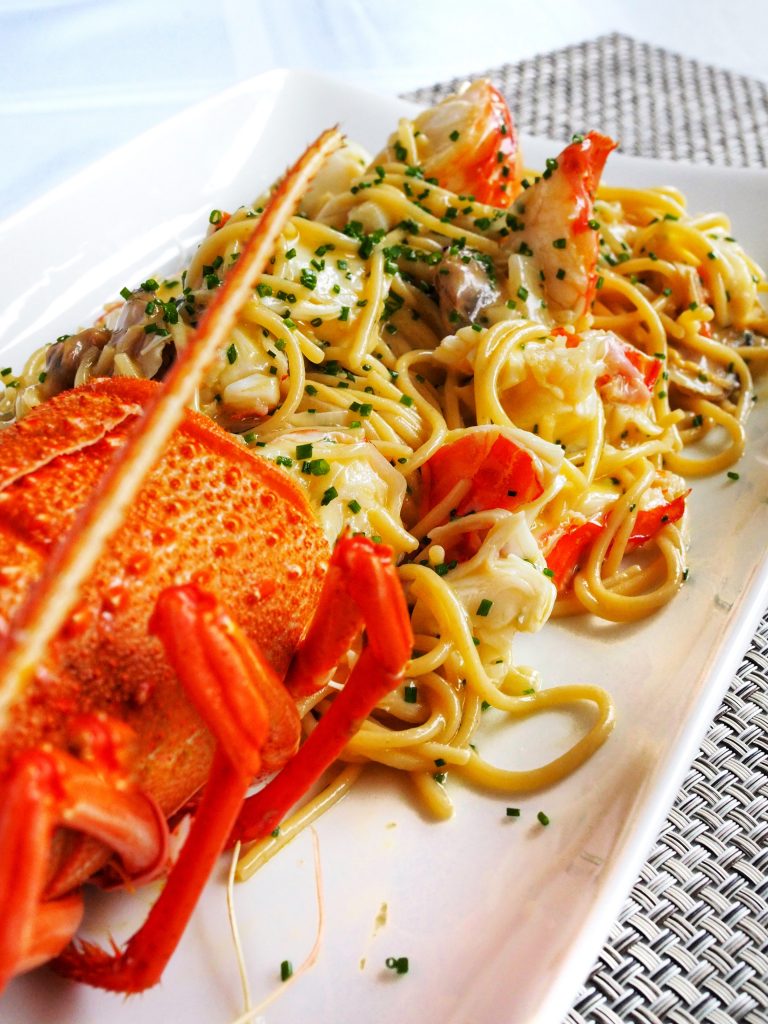
I love this dish because let’s face it, it’s absolutely impressive. I like adding caviar and pairing with champagne. It’s absolutely perfect for a romantic dinner at home or to cook on a special occasion. I add this dish to my catering menu when I know it’s a sit down and a special occasion, and people just love it and never forget it, and my clients don’t even mind the hefty price tag and most of them even add-on the optional caviar.

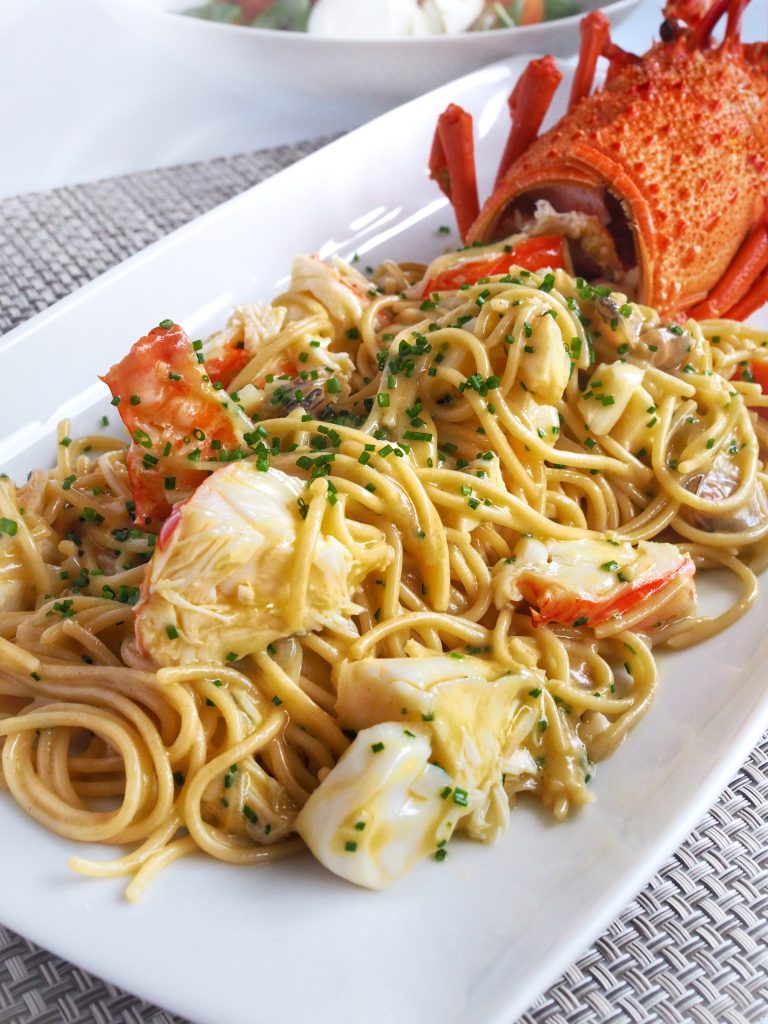
The sauce is a beurre blanc. Beurre blanc is a classic French white sauce made by reducing white wine, bouquet garni and French eschallots then adding butter while whisking constantly to make a rich and creamy sauce. The key is to not bring the liquid to the boil to avoid splitting. When done correctly, you get a shiny sauce that hugs each spaghetti noodle without running all over the plate.

To be honest, I don’t think I’ve done any justice to this dish with the photos that I took, because this is me plating it and shooting it right before dinner. Next time I plate this up for a catering function, I will make a note to take a nice photo, but for now, this is the homely version of this beautiful and delicious lobster spaghetti. Don’t forget to pop the champagne! Happy eating!

 
Difficulty: Medium

Lobster Spaghetti

Serves 2

Ingredients

Instructions

0/5 Instructions
  • Cook pasta according to packet and set aside. In a small sauce pot, place tarragon, eschallot and white wine together. Reduce until the liquid is halved. Drain and discard the tarragon and reserve the eschallot. Place the liquid back in the sauce pot.
  • Heat the liquid back up and start adding in the cold butter cubes gradually while whisking continuously. Keep whisking until the liquid starts to thicken. Do not bring the liquid to the boil or it might split. When the sauce has emulsified, take off the heat and set aside until ready to use.
  • Take the flesh of the lobster from the shell and reserve the head. Cut the lobster to bite size pieces.
  • Heat the sauce up in a medium pot that could fit the pasta, lobster and sauce. Toss the pasta, the eschallots and lobster in the warm sauce until everything is coated. Season with salt & pepper, sprinkle with chives.
  • Twirl the pasta using a carving fork and place on a long platter. Use the head as a garnish, making it look like the pasta is the lobster's body. Sprinkle with chopped chives. If using caviar, place the caviar on top. Serve immediately.

Oh hello! How was your week??? Here in Sydney, everything is starting to feel more relaxed, and as we approach Christmas, restaurants and hospitality venues have increasingly become busy. Hence, the scarcity of my posts. As a professional chef, I find I get exhausted at the end of the week to the point that I can’t think of what to say on my posts. My job can be physically demanding and time-consuming, but I suppose most jobs are, and I just need to make time by being more efficient with handling my free-time. How do you organise your free-time? Do you have a passion project just like me and are finding it a challenge to stay on top of it because of work and life in general? Or have you gotten it down pat and have some tips for me? I would appreciate any thoughts.

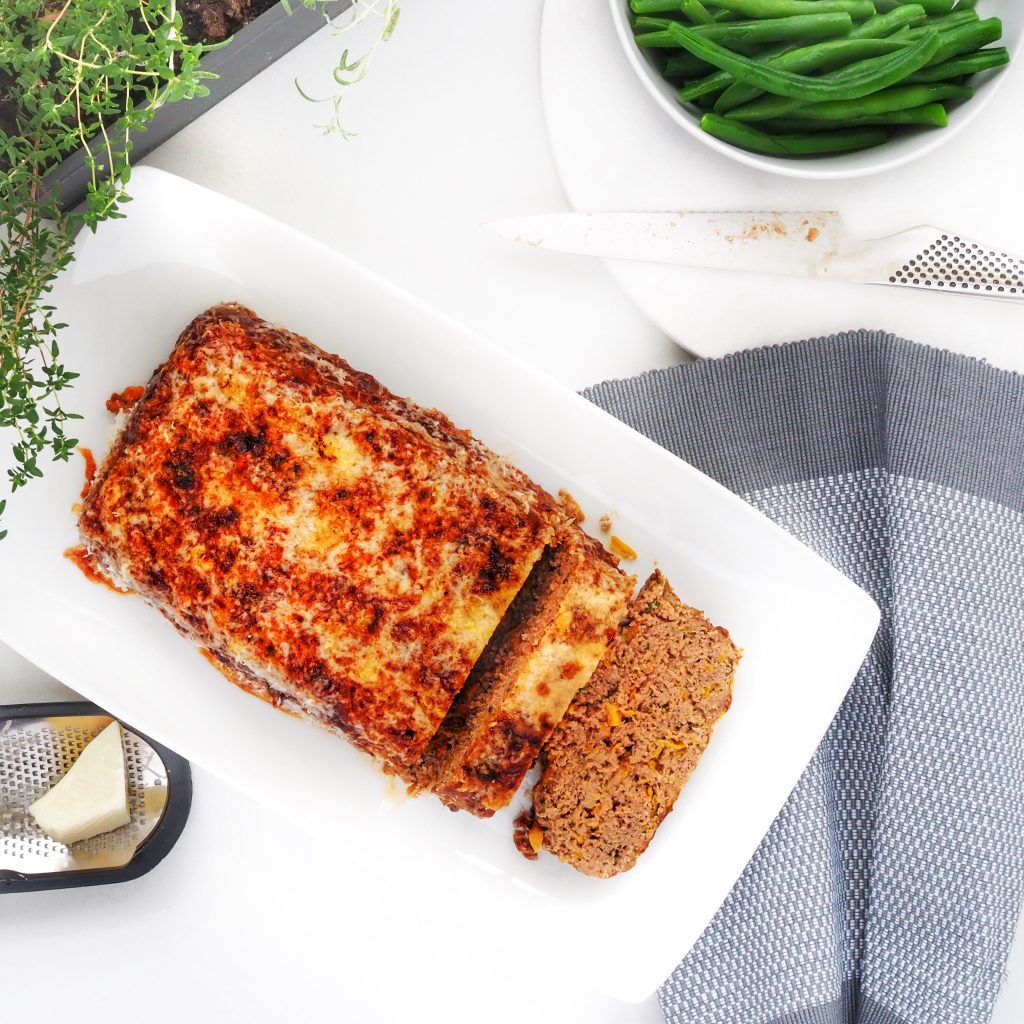
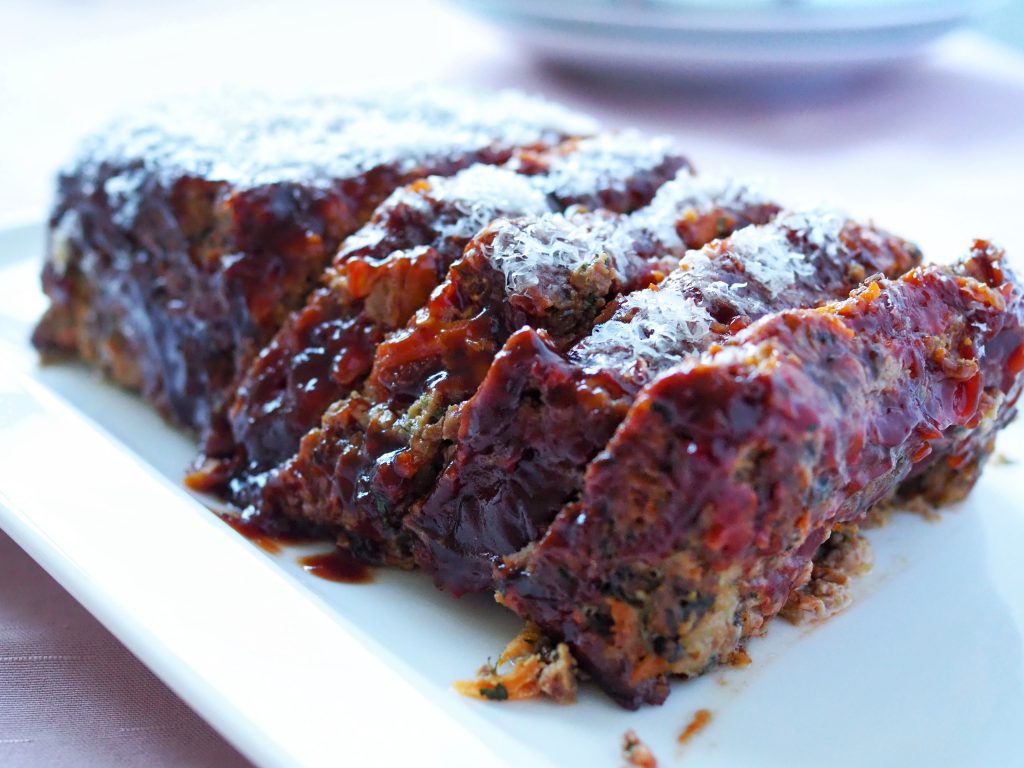
Anyway, today’s recipe is my glazed meatloaf. I’ve been meaning to share this for months but couldn’t get the right photo. I just think photos are so important for a food blog like mine, you see, we eat with our eyes, and if the photo doesn’t look good enough, then you guys wouldn’t want to make it right?

Why should you try this recipe? Meatloaf is such a simple dish, but when done right, it’s such a comfort food. This recipe is moist and flavourful and that’s why I think you’ll love it.

I love it because I get to use up my old bread. But if you don’t have old bread, then feel free to use crushed crackers, or breadcrumbs. Old bread soaks a lot of the juices and leaves the meatloaf moist, if you prefer using breadcrumbs, use panko crumbs because they soak up more liquid.

I also love it because I can cook it and freeze half. People find it ironic, but I don’t always have time to cook fresh dinners at home despite cooking being my main job. So having some frozen meals keep me and my husband fed when we don’t feel like eating out or takeaway. I prefer making meals ahead so I’m sure I know exactly what I’m feeding my family. So you see, if you’re meal prepping, or have children, this recipe is great for you too!

Oh and the thing I love most about this aside from the taste, is that I don’t have to chop the onion and carrot. I just use coarse side of my grater and I’m all set! I grate directly into the bowl so the juices don’t get wasted, remember more juice=more flavour!

I always say that when you make something simple you have to make sure the quality of the ingredients are very good. So I like using Cape Grim beef mince from Tasmania, but any good quality mince from the butcher should give you good results. I like using regular mince not lean mince because fat gives this dish good flavour and moisture. So what do you think? Would you give this recipe a shot? And if you do, don’t forget to comment below and tag me in the photos!

https://youtu.be/HPW3_ZUmTrI


Glazed Meatloaf

serves 5

Ingredients

    For the meatloaf
  • For the glaze

Instructions

0/4 Instructions
  • Preheat oven to 180C. Grease a loaf pan well. In a bowl, mix all the meatloaf ingredients except for grated parmesan. Mix well and pack into the prepared loaf pan.
  • Cook at 180C for 45mins. Take out of the oven and let rest for 10 minutes. Meanwhile make the glaze by combining all the glaze ingredients except the parmesan.
  • Strain off excess liquid from the loaf pan then run a knife along the sides of the pan to loosen the meatloaf. Transfer meatloaf onto a baking sheet lined with baking paper. Brush the meatloaf with prepared glaze and cover with grated parmesan. Put back in the oven for another 30 minutes when the cheese is melted and glaze is darker in colour.
  • Serve with my velvety mash potatoes and a salad.


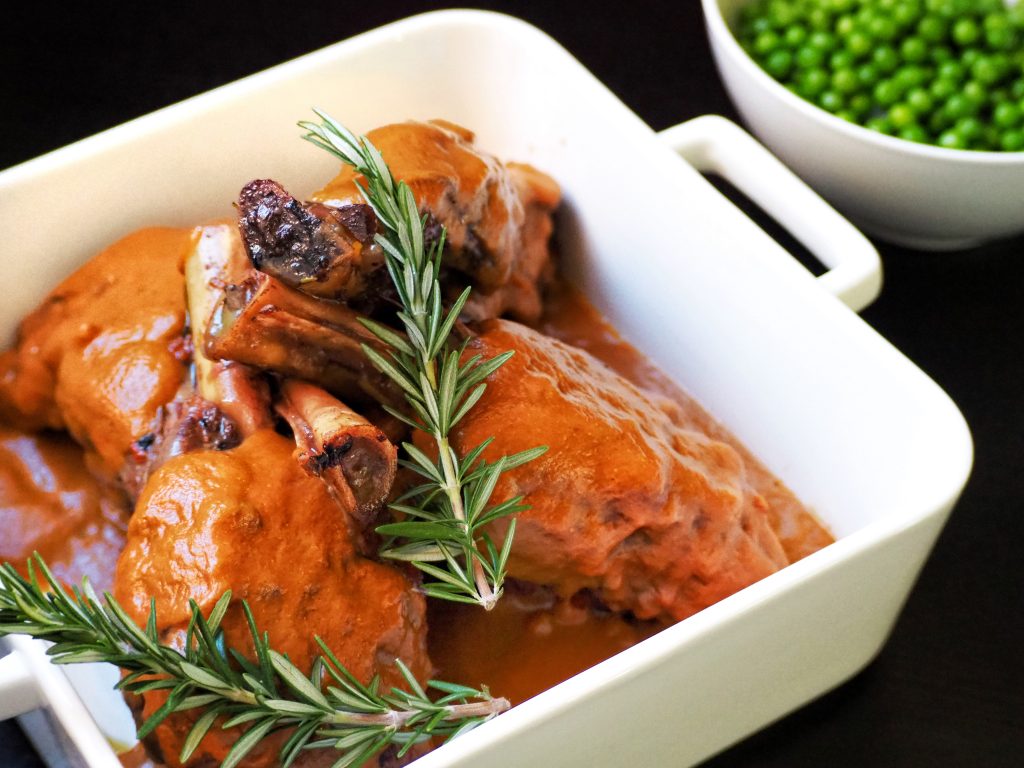
This fall off the bone, super tender lamb shanks is a perfect dinner option on a rainy weekend. I love this with my velvety mash potato recipe or if I’m serving it straight away, my creamy polenta. Watch the video below to learn how to make restaurant-style mash potatoes at home!

https://www.youtube.com/watch?v=U-b9s62fD6k

We went down the coast as part of my husband’s birthday gift to yours truly, and it was our first time there together. It was enjoyable, relaxing and the beaches are so beautiful. I only had one problem, every time I travel anywhere, I try to find inspiration for my next posts, and truth be told, I did not have a eureka moment this trip. However, because it’s been rainy in Sydney, I thought I’d share the recipe for one of my favorite cold weather dishes. It’s relatively easy to make, and just so comforting. You can use your slow cooker if you have one and that makes this recipe a convenient midweek dinner too! So nothing lost in the end, because I still found inspiration on what to post today!

Click on the photos to shop for the products. Most products ship internationally.

Mrs.Fancypants earns a small commission from affiliate links, when you buy the products above. If you’re in Australia, feel free to check the availability on advertised sites.

Give this recipe a try and let me know what you think in the comments below! Don’t forget to snap and tag @mrs.fancypants.recipes so I can see your photos on social media. Enjoy your weekend!


Difficulty: Easy Prep Time: 15 Mins Cook Time: 3 Hr Total Time: 3 Hr 15 Mins

Braised Lamb Shanks

Serves 4

Ingredients

Instructions

0/7 Instructions
  • Preheat oven to 170C. Trim lamb shanks of excess fat, pat dry then season with salt and pepper.
  • Heat oil in a pan. Brown shanks on all sides then place in a baking dish big enough to fit all 4 shanks and deep enough to hold 2 litres of liquid.
  • In the same pan, sauté vegetables until soft. Add red wine, bring to the boil then reduce red wine to half. Add stock, bring to the boil then pour liquid into the baking dish.
  • Cover tightly with foil and braise for 2 1/2 - 3 hours or until the meat is very tender that it falls off the bone.
  • When the meat is ready, take the meat out of the dish and cover with foil. To make the sauce, take the herbs out of the liquid (if there are big bits) then blend the liquid until smooth, be careful when blending hot liquids.
  • If you don't want to blend the liquid, simple strain off the vegetables and reduce the liquid in a sauce pot until your desired consistency. Please note this will result to less sauce.
  • Serve lamb shanks with mash potato or polenta and pour sauce on top.

Notes

  1. Feel free to cook the shanks in your slow cooker following manufacturer's instructions.
  2. Click here for my velvety mash potato recipe.

I think every Filipino family has their own version of every Filipino dish. This is then passed down to offsprings and so on. I say this a lot because it’s true, food has a very big role in Filipino culture. We love to eat and we show our love through food, and the best way for us to bond is by sharing a meal.

Growing up, my mom was never very experimental with her cooking, but she had a handful of specialties. If she reads this, she’d probably say that she taught me how to cook, and to be fair, she taught me her staple dishes. Like her spaghetti, macaroni salad, potato salad and caldereta. I think this is also so that I can take over the cooking, but I moved to Macau, then to Sydney, so she’s still the one that cooks at home until now.

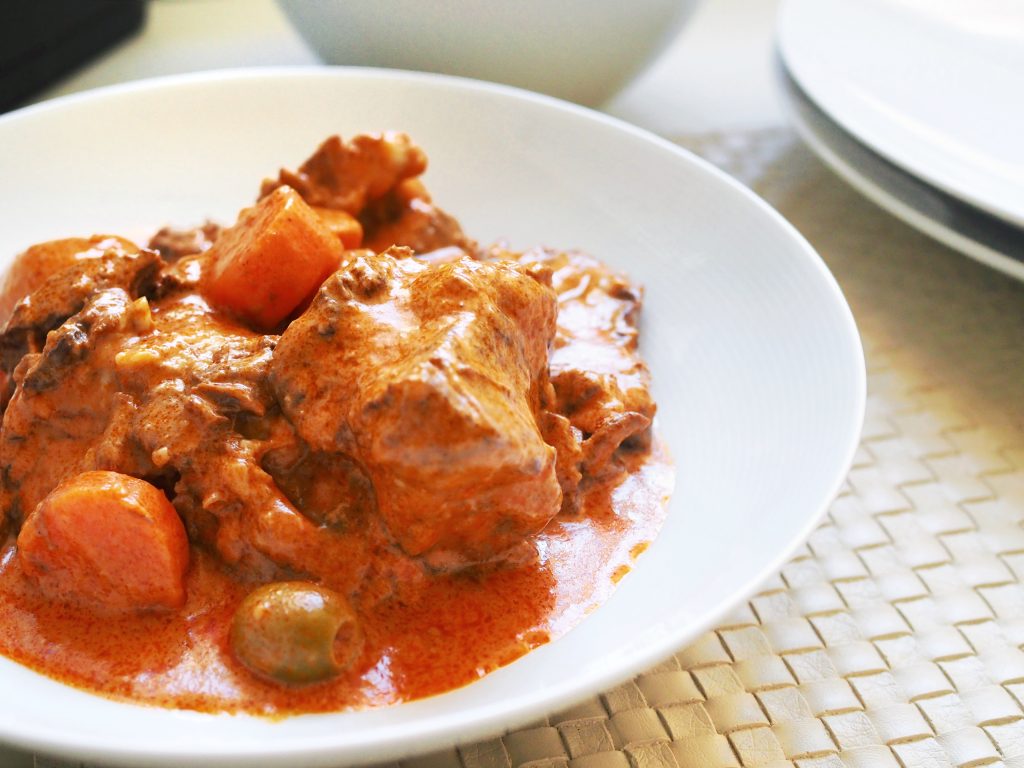
So the recipe below is my mom’s caldereta with coconut milk. Caldereta is a spicy beef stew, normally made with liver spread (liver pate), but this version doesn’t use that. My mom initially taught me to make caldereta and finish it with grated tasty cheese and that was the version that I grew up eating more, then she started cooking this version more, which uses coconut milk to finish the dish. My husband loves the coconut milk version, so that’s what I cook here.

https://www.instagram.com/p/CF1jRNMBEgI/?utm_source=ig_web_copy_link

Also, the protein used varies between goat and beef in the provinces, but I never really tried goat, and I always make this with beef. I should try using lamb one day, then I’ll let you know how it fares. That could be my Aussie version of a caldereta!

Anyway, I’ve tweaked my mom’s version by sealing the beef first before braising it so the beef doesn’t lose it’s flavour. I also put mirepoix in the braise and use beef stock, all to give the dish ample flavour. I strain the mirepoix off before adding the rest of the vegetables, so there won’t be the odd mushy carrot in there. This dish takes some time to cook, but very well worth it. I like cooking this in a dutch oven like the ones below, these are perfect for slow cooking. If you don’t have one, don’t worry, if you watch the video, I used a normal deep and wide sauce pan which I’m sure everyone has. I then serve it with plain rice, but if you really like coconut, my recipe for fluffy coconut rice can be found here.

Click on the photos to shop for the products. Most products ship internationally.

Mrs.Fancypants earns a small commission from affiliate links, when you buy the products above. If you’re in Australia, feel free to check the availability on advertised sites.

Now, if you’re busy and you don’t have time to wait hours at home, you can make this dish using a slow-cooker. They are very convenient, and have great features like setting the cooking time and keeping the food warm, so it’s ready when you get home. Here are some options, the one on the left is pretty basic, while the one on the right has all the bells & whistles.

Click on the photos to shop for the products. Most products ship internationally.

Mrs.Fancypants earns a small commission from affiliate links, when you buy the products above. If you’re in Australia, feel free to check the availability on advertised sites.

So I hope you try this hearty recipe. If you’re not Filipino, and not used to the flavours this is a good introductory dish to accustom your palate to what Filipino food is like. The cuisine is very diverse, ranging from light salads and raw fish cooked in vinegar, to hearty stews like this one. We also use a lot of strong flavours and some dishes have fairly strong aromas, so this dish is a good entry point because it has a tomato and beef stock base.

 
Difficulty: Easy Prep Time: 20 Mins Cook Time: 1 Hr 30 Mins Total Time: 1 Hr 50 Mins

My Mom’s Caldereta

(Filipino Beef Stew)

Serves 6

Ingredients

Instructions

0/3 Instructions
  • Season beef. Heat oil in a large, deep, wide pan. Brown beef on all sides, take out of the pan. Set aside.
  • In the same pan, sauté onion, 1 carrot & celery until caramelised. If there is too much oil in the pain, drain this off to prevent your sauce becoming too oily. Pour the stock into the pan and using a wooden spoon, scrape the bottom of the pan. Put the beef back into the pan, bring to the boil then slow down to a simmer. Partially cover with a lid so the liquid doesn't evaporate too quickly, and cook until beef is tender (at least 1 hour, if you use good quality beef). Skim all the impurities and fat that come up to the surface frequently.
  • When beef is ready, strain the liquid into a container big enough to hold it then discard the vegetables. Put the beef and the liquid back into the pan and then stir in tomato paste. Add the rest of the carrots and potatoes, then simmer until the vegetables are cooked. Add the olives and chili then stir in the coconut milk. Season to taste. Serve with steamed rice.

Notes

  1. This recipe is freezer-friendly. To freeze: portion the stew into airtight containers, cool down completely with no lid, place the lid on then freeze. Keeps up to 3 months. Thaw in the fridge overnight before heating up, heat up gently, or the coconut milk might split.


My husband loves this meal. It’s one of his favourite meals, and I love it because it’s simple, easy and quick to make but super delicious. It looks like a lot, but once you actually start cooking it, it’s so easy.

The teriyaki sauce can be used for other things as well, like chicken or tofu. My original teriyaki sauce had more cornflour in it but I like it with less because it doesn’t look gunky. Also, make sure you add the cornflour to the cold mix and keep whisking until the sauce thickens. Then you won’t have a gunky, lumpy sauce.

The coconut rice is yummy and I normally don’t use stock powder, but a little bit in this just gives it the additional flavour it needs. At first I was worried that the milk would split, but it turned out so well. I might try this with coconut water next time and see what happens. Oh and I found pandan leaf at Harris Farm the other day and the fragrance brought me home! But if it’s too hard to find, you can skip the leaf altogether.

This meal can be ready in 30 minutes, which is terrific for weeknight dinners. But you can also serve it to guests and use a whole side of salmon. If you’re looking for something tasty and no-fuss, give this a try and let me know how you rate it.

 
Difficulty: Easy Prep Time: 5 Mins Cook Time: 5 Mins Total Time: 10 Mins

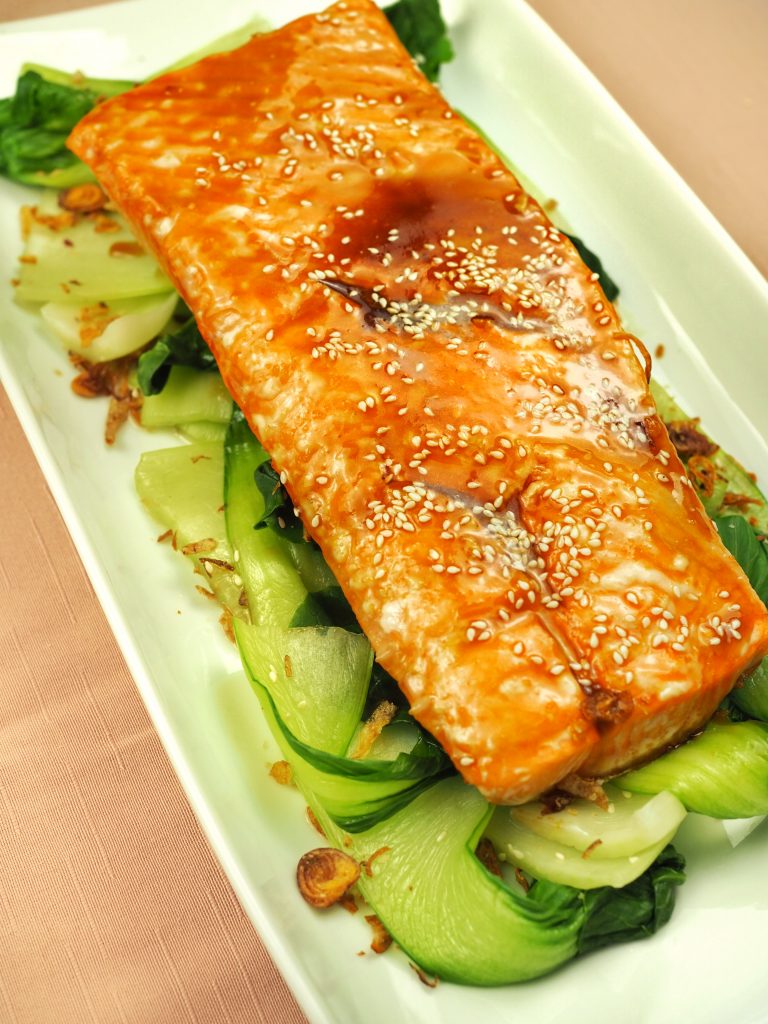
Teriyaki Salmon

with Asian greens & Coconut rice

Serves 4

Ingredients

    For the Teriyaki sauce
  • For the Salmon
  • For the greens
  • For the Coconut rice:
  • To serve: (optional)

Instructions

0/13 Instructions
    For the coconut rice:
  • Rinse the rice until the water runs clear. Do not skip this step. Drain.
  • Mix all the ingredients in a sauce pot except the panda leaf (if using), crush then knot the pandas leaf to release the flavour and add to the rice. Bring to the boil uncovered. Stir and lower the flame to low. Cover with lid and cook for 15 more minutes on low. Check the rice, and if it needs more cooking, add 5 more minutes. Keep warm.
  • For sauce:
  • In a small sauce pot whisk together all ingredients except the honey and lime juice.
  • Bring to the boil while constantly whisking to prevent the cornflour from making your sauce lumpy. Add the lime juice and pepper to taste.
  • If you need a little bit more sweetness, add the tablespoon of honey or brown sugar if you don’t have honey. Keep warm.
  • Cooking salmon on the barbecue:
  • Bring a large pot of water to the boil, enough to fit all the asian greens. Add the salt. Meanwhile preheat your bbq to 200C with the flat plate on. If you don't have a barbecue, use the oven method.
  • Pat the skin of the salmon dry and drizzle with oil and season with a pinch of salt. Place salmon skin side touching the flat plate. Close the bbq hood and wait until the temp goes back to 200C, then turn down to 150C. Cook for 20 minutes, check that the salmon is just done. Carefully transfer to a tray and cover with foil to keep warm.
  • Cooking salmon in the oven:
  • Bring a large pot of water to the boil, enough to fit all the asian greens. Add the salt. Meanwhile preheat your oven to 150C.
  • Heat oil in a pan big enough to fit the salmon. Pat the skin of the salmon dry and season with a pinch of salt. When the oil is smoking hot, place the salmon skin side down and cook until the skin is crispy, about 5 minutes on med-high flame.
  • Transfer to the oven and cook for 15 minutes or until the salmon is cooked to your liking. Take out and cover with foil to keep warm.
  • Blanch Asian greens:
  • While the salmon is cooking, trim the Asian greens and rinse. When the water boils, blanch the greens for 1 minute then drain.
  • To serve:
  • Toss Asian greens in 3 tbsp of sauce. Place on serving platter covering the surface area. Place salmon on top of greens then glaze with sauce. Sprinkle sesame seeds on top of salmon and fried shallots on the greens.
  • Serve with rice topped with picked coriander and extra sauce.


As we are now moving on to warmer months in Australia, I am slowly transitioning my cooking from roasted and braised to grilled and tossed. However, there is the few weeks in between when I can still enjoy winter produce and use it in a fresh and crunchy dish like this prawn and fennel salad.


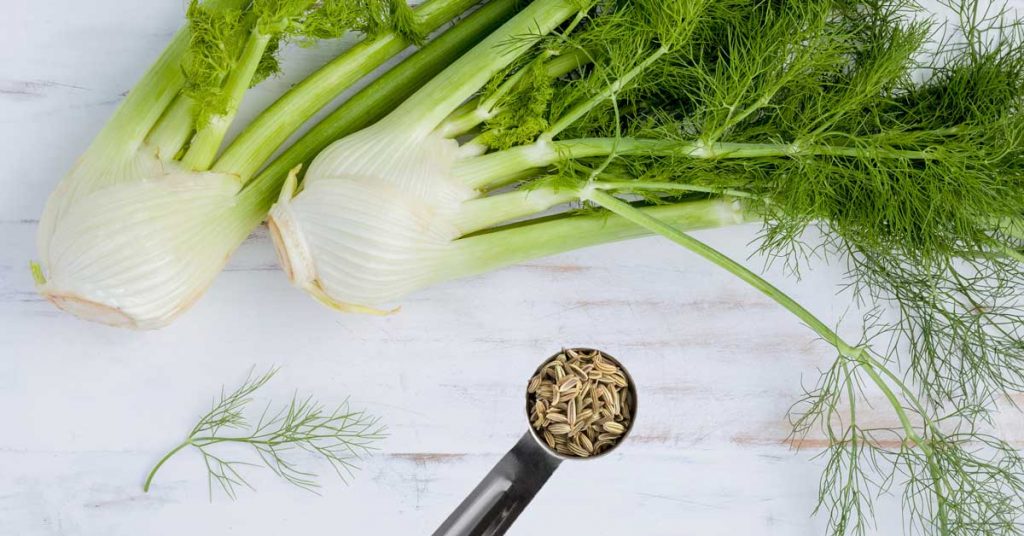
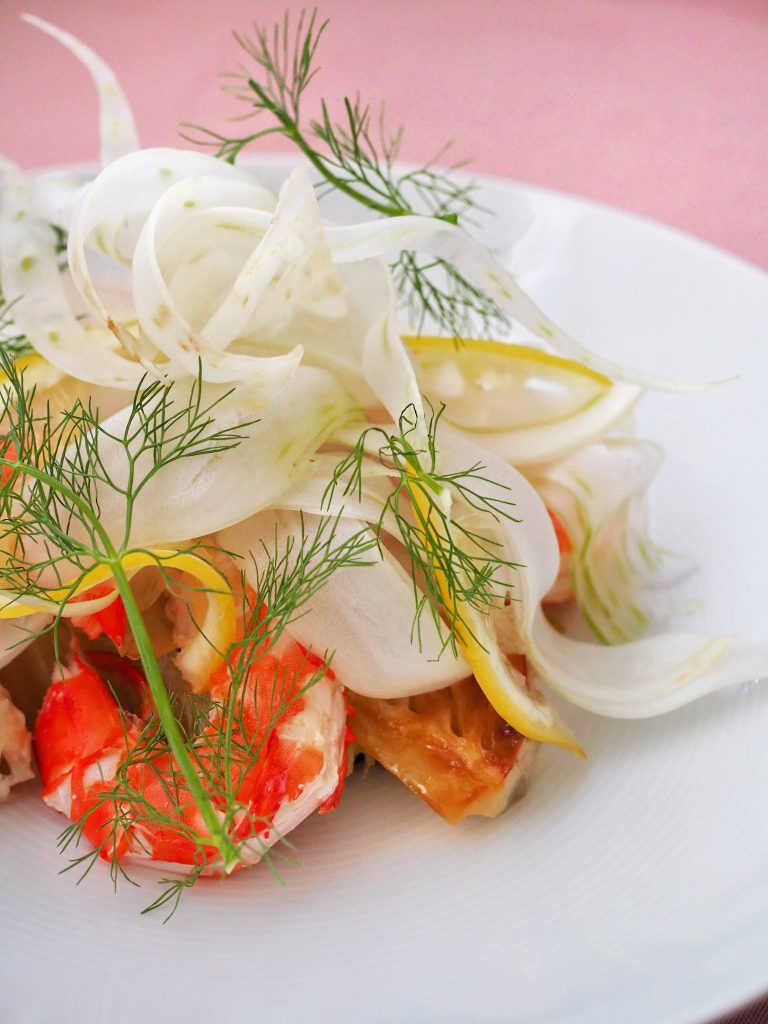
Fennel has a beautiful aniseed flavour and is delicious both roasted and shaved. I use lemon confit slices to give this a citrus punch and chopped smoked almonds for that added crunch. You can serve this with grilled fish like salmon or barramundi and it would still be beautiful, but my favourite is to serve it as an entree with some prawns. I haven’t put the smoked almonds on this because my husband is allergic, hence, I always have it on the side.

A great way to shave the fennel is by using a mandoline slicer. These come very sharp, so I suggest being careful and using the guard. Even professionals occasionally cut themselves while using these. They’re great because they give you sharp, even, paper thin slices then you can put the slices in ice water and they curl up like the ones in my photos. Most of them come with multiple blade options for julienne slicing, shaving vegetable for slaw and salad, slicing fries, etc. The one on the left below is the one I use, but the one on the right is a good household brand and would do the job at home. This can change the way you present food when you have guests, so give it a try!

Click on the photos to shop for the products. Most products ship internationally.

Mrs.Fancypants earns a small commission from affiliate links, when you buy the products above. If you’re in Australia, feel free to check the availability on advertised sites.

Make this lovely salad at home, and when you do, don’t forget to let me know what you liked (or didn’t like) about it! I’d be excited to see your photos too, so don’t be shy and connect with me on Instagram or Facebook!

 
Difficulty: Easy Prep Time: 20 Mins Cook Time: 45 Mins Total Time: 1 Hr 5 Mins

Prawn & Fennel Salad

Serves 4

Ingredients

Instructions

0/5 Instructions
  • Pre-heat oven to 180C. Wash fennel and take off the first layer. Trim the fronds and reserve.
  • Cut each fennel into quarters from the top. Reserve 1 quarter for shaving, then cut the rest into halves with the core of the fennel keeping the piece together. Arrange on a baking tray, brush with olive oil and roast until soft and caramelised, about 20-30 minutes. Cool down.
  • In the meantime, slice lemon into very thin rounds(you can use a slicer if you have one) and bring sugar, water and vinegar to the boil. Add lemon, cover and let sit until completely cold and lemon soft. Drain and reserve liquid.
  • Peel and rinse prawns. Set aside. Then with a slicer or a knife, slice the fennel very thinly like paper and put into ice water to crisp up.
  • To serve, drain shaved fennel and place in a large bowl. Add the rest of ingredients and use reserved liquid from the lemon as dressing, to taste. Season with salt then sprinkle chopped almonds if using.

Let’s face it, if you buy an expensive cut of steak, you wouldn’t use it for a stir-fry. So what is the secret to that melt-in-your-mouth beef that won’t cost you a fortune? Well, there are a number of ways to tenderise meat, you can soak in a brine, use a salt and spice rub and air it out in the fridge, or simply massage it with bi-carb soda. For a stir-fry I prefer using bi-carb soda. For a roast, I normally choose soaking in brine.

Using bi-carb soda or baking soda to tenderise meat works differently than using a salt brine. Baking soda neutralizes acid and raises the pH level on the surface of the meat, causing the outside of the meat to become more basic. This chemical reaction makes it more difficult for the proteins inside the meat to tense up, and when proteins can’t bond together, the meat stays tender when cooked instead of toughening up.

Also, this method is the fastest method to tenderise meat, so it’s perfect for a stir-fry.

I will talk about brining and how the process makes meat more tender on a different post, with a recipe for a brine and a roast. But basically, the salt breaks down the protein bonds and transforms into a string of amino acid that then links with water. Therefore keeping the meat from drying out.

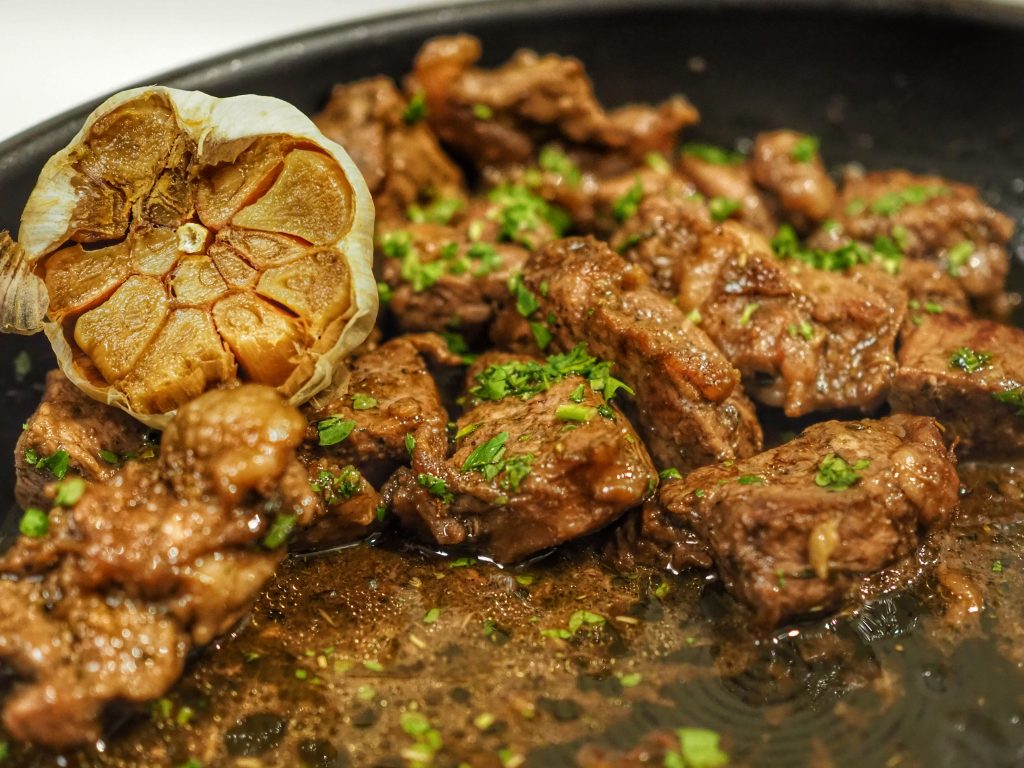
Today’s recipe is my version of a Filipino dish I loved ordering from a once popular Japanese joint in Makati, Philippines. This was probably more than a decade ago, and I’m not even sure if they still exist. It’s rich in flavour because of the roasted garlic, vincotto and Worcestershire sauce. Now, don’t fret it you don’t have vincotto, you may use a mix of honey and balsamic vinegar. It is not exactly the same, but you get a similar outcome for this recipe.

If you want to try and make this with vincotto, you can find it in specialty food shop and gourmet shops. In Australia, you can shop at Simon Johnson or Maggie Beer.

I can’t wait for you to try and make this, it’s quick, easy and so delicious! Tag me on Instagram and Facebook or use #mrsfancypantsrecipes to connect!

 
Yields: 1 Serving Difficulty: Easy

Garlicky Beef Stir-Fry

Serves 3

This is my version of a Filipino dish called Beef Salpicao

Ingredients

0/9 Ingredients

Instructions

0/6 Instructions
  • Tenderise the meat by sprinkling bi-carb soda and massaging it evenly. Leave in the fridge for 15-20 minutes then wash off completely with cold water. Drain.
  • Mix the roasted garlic and beef with your hands until the garlic is mashed.
  • Mix the olive oil, vincotto, worcestershire and chopped thyme in a medium bowl. Then add the beef to the liquid and mix through.
  • Melt the butter in a wide saute pan over med-high heat. Pan should fit the beef cubes in one layer.
  • When butter starts bubbling, place the beef in, trying not to get too much of the liquid. Reserve liquid. Cover with a lid and cook for 2 minutes.
  • After 2 minutes, open the lid and add the rest of the liquid. Bring to the boil to thicken sauce to desired consistency then turn heat off and serve immediately with steamed rice.

Notes

  1. If you don't have vincotto or vino cotto, you can substitute 1 tbsp honey and 1 tbsp balsamic vinegar.
  2. If you don't have fresh thyme, use 1/2 the amount of dried herbs.